
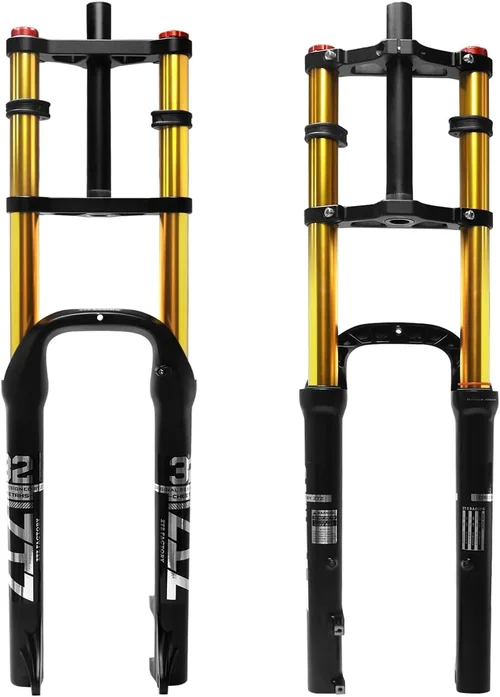
When it comes to upgrading your mountain bike’s performance without breaking the bank, few components offer as much bang for your buck as a quality suspension fork. Whether you’re a weekend warrior tackling local trails, a commuter navigating pothole-riddled city streets, or a new rider looking to add comfort and control to your first real MTB, a budget suspension fork can dramatically improve your ride experience. But with so many options flooding the market—each boasting different travel lengths, damping systems, and build materials—it’s easy to feel overwhelmed. That’s where this guide comes in.
In this comprehensive buying guide, we’ll walk you through everything you need to know to choose the best budget suspension fork for your needs in 2026. We’ll break down the key technical specs that actually matter, compare different types of forks, highlight common pitfalls to avoid, and share expert tips to help you get maximum value. Whether you’re working with a tight $100 budget or have a bit more flexibility up to $300, we’ve got you covered. Our goal isn’t just to list products—it’s to empower you with the knowledge to make a smart, informed decision that matches your riding style, terrain, and long-term goals.
The budget suspension fork market has evolved significantly over the past few years. What used to be a category dominated by heavy, unreliable coil shocks with minimal adjustability now includes lightweight air-sprung models with tunable compression and rebound damping—all at prices that were unthinkable a decade ago. Brands like RockShox, SR Suntour, Manitou, and X-Fusion have pushed innovation downward, bringing premium features into entry-level price brackets. At the same time, direct-to-consumer brands and Chinese manufacturers have introduced surprisingly competent forks that challenge traditional players on value. This means more choice than ever—but also more noise. With this guide, you’ll cut through the marketing hype and focus on what truly delivers performance, durability, and value.

What to Look for When Buying a Budget Suspension Fork
1. Travel Length
Travel refers to how far the fork compresses when absorbing impacts—measured in millimeters (mm). For budget forks, common travel ranges are 100mm to 140mm. A 100mm fork is ideal for cross-country (XC) riding, light trail use, or urban commuting, offering efficiency and minimal weight. If you plan to ride rougher terrain, jump lines, or technical descents, aim for 120mm–140mm. More travel generally means better absorption of big hits but can increase weight and reduce pedaling efficiency. Always match your fork’s travel to your bike’s intended use: installing a 140mm fork on an XC hardtail designed for 100mm may alter geometry negatively, causing handling issues. Check your bike’s manufacturer specs before upgrading.
2. Spring Type: Air vs. Coil
Budget forks typically use either air springs or coil springs. Air-sprung forks (like RockShox Recon or SR Suntour XCM) are lighter, tunable via air pressure, and better suited for riders who want to fine-tune sag and support. They’re ideal if you’re weight-conscious or vary your riding load (e.g., carrying a backpack). Coil-sprung forks (common in older or ultra-budget models) use a metal spring and are often heavier but provide a more linear, plush feel with less sensitivity to small bumps. However, they offer limited adjustability and can bottom out harshly under heavy loads. For most modern riders, air springs are the better choice in the budget segment due to their versatility and lighter weight.
3. Damping System
Damping controls how the fork rebounds after compressing—critical for maintaining traction and preventing pogo-stick behavior. Look for forks with adjustable rebound damping, even if it’s just a simple knob. Basic budget forks may only have open bath damping (oil flows freely), which is functional but less refined. Mid-tier budget models often include basic compression damping (e.g., SR Suntour’s RL or RL-R models), allowing you to slow down how quickly the fork compresses—useful for climbing or firm terrain. Avoid forks with no damping adjustment at all; they tend to feel harsh or uncontrolled. Hydraulic lockouts are a bonus for climbing efficiency but aren’t essential at this price point.
4. Stanchion Diameter
Stanchions are the upper tubes that slide into the lower legs. Wider stanchions (32mm–34mm) are stiffer, improving steering precision and reducing flex during hard cornering or big drops. Most budget forks use 32mm stanchions, which is adequate for light to moderate trail use. Higher-end budget models may feature 34mm stanchions (e.g., RockShox Judy Silver), offering noticeable stiffness gains. Avoid anything below 30mm—these are typically found on department store bikes and lack the rigidity needed for serious riding. Stiffer forks also tend to last longer under stress, making stanchion diameter a quiet but important durability factor.
5. Axle Standard & Wheel Compatibility
Modern forks use either 9mm quick-release (QR) or 15mm thru-axle systems. Thru-axles (15x100mm or 15x110mm Boost) provide superior stiffness and wheel retention, especially important for aggressive riding. If your bike has a thru-axle rear hub, ensure your new fork matches the same standard—mismatched axles won’t fit. QR forks are cheaper and compatible with older wheels but can flex under load. Also confirm wheel size compatibility: most budget forks support 27.5″ and 29″ wheels, but some older models are 26″ only. Always double-check your current wheel and axle setup before purchasing.
6. Weight
While budget forks won’t match the featherlight builds of high-end models, weight still matters—especially if you’re climbing frequently. Expect weights between 2.0 kg (4.4 lbs) for basic coil forks and 1.7 kg (3.7 lbs) for lightweight air models. Every gram saved improves acceleration and reduces fatigue on long rides. However, don’t sacrifice durability for marginal weight savings. A slightly heavier fork with better seals and stanchions will outlast a lighter one that leaks oil or develops play within months. Prioritize a balanced design over ultra-light claims unless you’re racing.
7. Seals & Maintenance Requirements
Good seals keep dirt and moisture out while retaining lubrication—critical for longevity. Budget forks often use basic rubber wiper seals, which work but require more frequent servicing. Look for models with upgraded seals (e.g., RockShox’s Fast Black coating or SR Suntour’s D-Seal) that resist contamination better. Also consider how easy the fork is to maintain. Forks with accessible lower leg bolts and user-serviceable air springs (like many Suntour models) save money long-term. Avoid forks sealed with permanent glue or proprietary tools—you’ll need a shop for basic upkeep. Regular cleaning and annual oil changes can double a fork’s lifespan.
8. Brand Reputation & After-Sales Support
Not all budget forks are created equal. Established brands like RockShox, SR Suntour, and Manitou offer better quality control, wider dealer networks, and reliable warranty support. A fork from a no-name brand might save $20 upfront but could leave you stranded if it fails mid-ride with no local service. Check if the brand has service centers in your region and whether they stock common replacement parts (seals, oils, air shafts). User forums and Reddit communities often reveal which brands honor warranties promptly. A reputable brand also means better documentation and compatibility info—saving you headaches during installation.
Different Types of Budget Suspension Forks

Common Buying Mistakes to Avoid
❌ Mistake: Ignoring Your Bike’s Geometry Limits
Why it’s bad: Swapping in a fork with significantly more travel than your frame is designed for can slacken the head angle, raise the bottom bracket, and make the bike unstable or hard to handle. This increases crash risk and voids warranties.
What to do instead: Check your bike’s manual or manufacturer website for recommended fork travel. Stick within ±10mm of the original spec unless you’re experienced with geometry adjustments.
❌ Mistake: Prioritizing Price Over Compatibility
Why it’s bad: A $99 fork might seem like a steal—until you realize it uses a 26″ axle standard while your wheels are 29″, or it lacks the correct steerer tube length. You’ll waste money on returns or adapters.
What to do instead: Measure your current fork’s steerer tube length, axle type, and wheel size before shopping. Use compatibility charts from retailers like Jenson USA or Chain Reaction Cycles.
❌ Mistake: Overlooking Serviceability
Why it’s bad: Some budget forks are sealed units that can’t be disassembled without special tools. If seals wear out or oil degrades, you’re forced to replace the entire fork—doubling your cost over time.
What to do instead: Choose forks with user-serviceable lowers and accessible air valves. Brands like SR Suntour publish service manuals online—a good sign of support.
❌ Mistake: Assuming All “Air Forks” Are Equal
Why it’s bad: Cheap air forks may use single-chamber designs with poor progressivity, leading to harsh bottom-outs. They might also lack reliable air valves that leak over time.
What to do instead: Look for forks with positive/negative air chambers (even basic ones) and reputable air valves (e.g., Schrader or Presta-compatible). Read user reviews about long-term air retention.
❌ Mistake: Skipping the Test Ride
Why it’s bad: Suspension feel is subjective. A fork that looks great on paper might feel too stiff, too soft, or overly damped for your weight and riding style.
What to do instead: If possible, test ride bikes with similar forks at local shops or demo events. Many retailers also offer 30-day return policies—use them to evaluate real-world performance.
❌ Mistake: Neglecting Installation Costs
Why it’s bad: Installing a fork isn’t just bolting it on—it requires cutting the steerer tube to length, setting up crown spacers, and possibly re-bleeding brakes. DIY errors can damage your frame.
What to do instead: Factor in $50–$100 for professional installation if you’re not confident. Some shops offer free install with purchase—ask before buying.
Budget Guidelines: How Much Should You Spend?
Entry-Level ($80–$130): This tier includes basic coil forks and older-generation air models. Expect minimal adjustability, heavier weight (2.0–2.3 kg), and limited damping. Best for casual riders, commuters, or kids’ bikes. Examples: SR Suntour XCT, generic coil forks from Decathlon. Don’t expect longevity beyond 1–2 years with regular trail use.
Mid-Range ($130–$220): The sweet spot for most riders. You’ll find reliable air-sprung forks with rebound adjustment, 32mm stanchions, and decent seals. These offer 80–90% of the performance of premium forks at half the price. Ideal for weekend trail riders, XC enthusiasts, and those upgrading from stock forks. Top picks: RockShox Judy Silver, SR Suntour XCR Air, X-Fusion RC3.
Premium Budget ($220–$300): For serious riders who want near-mid-tier performance without the $400+ price tag. These forks often feature 34mm stanchions, compression damping, lockout, and improved seal packages. Great for all-mountain beginners or riders tackling rougher terrain. Models like the RockShox Recon RL or Manitou Markhor fall here.
Luxury Budget ($300+): While technically beyond “budget,” some sub-$350 forks blur the line with pro-level features. Think RockShox Pike DJ or used Fox 32 SC. Only consider if you’re riding aggressively and plan to keep the bike long-term. Otherwise, mid-range offers better value.
Expert Tips for Getting the Best Deal
- Shop During Off-Season: Late fall and winter (October–February) are prime times for discounts as shops clear inventory for new models. You can save 20–30% on last year’s forks.
- Buy Direct from Brands or Authorized Retailers: Avoid Amazon third-party sellers for critical components. Stick to REI, Competitive Cyclist, or brand websites to ensure warranty coverage and authentic parts.
- Watch for “Open Box” or Demo Units: Many shops sell returned or demo forks at 15–25% off. These are often barely used and come with full warranties.
- Bundle with Other Upgrades: Some retailers offer discounts when you buy a fork with wheels, tires, or a dropper post. REI’s member rewards also stack well.
- Check Return Policies: Ensure the seller allows returns within 30 days. Suspension feel is personal—what works for your friend might not suit you.
- Negotiate at Local Shops: Independent bike shops may price-match online retailers or throw in free installation if you ask politely.
- Consider Used Marketplaces: Facebook Marketplace, Pinkbike Classifieds, and Craigslist often have lightly used forks from riders upgrading. Inspect for stanchion scratches and air leaks before buying.
- Join Loyalty Programs: Brands like RockShox offer member-exclusive sales and early access to clearance items. Sign up for newsletters.

Frequently Asked Questions
Q: Can I install a suspension fork myself?
A: Yes, but it requires specific tools: a headset press, steerer tube cutter, torque wrench, and possibly a crown race setter. If you’ve never done it, watch detailed YouTube tutorials (Park Tool has excellent guides) or pay a shop $60–$100 for professional installation. Mistakes can crack your frame.
Q: How often should I service my budget fork?
A: At minimum, clean the stanchions after every muddy ride and perform a lower leg service (oil change) every 50–100 hours of riding or annually. Air springs may need pressure checks monthly. More frequent use demands more maintenance.
Q: Will a better fork make my bike faster?
A: Not directly—but it improves control, traction, and confidence, allowing you to ride smoother and faster through technical sections. On smooth XC trails, a lighter rigid fork might be faster, but for rough terrain, suspension is a performance booster.
Q: Are Chinese-brand forks (like Zoom or TranzX) worth considering?
A: Some are surprisingly decent for the price (e.g., TranzX VL-8), but quality varies wildly. Avoid no-name brands with no service support. If you do buy one, choose models with standard parts (Schrader valves, common seals) for easier repairs.
Q: Do I need a lockout?
A: Only if you ride lots of climbs or paved sections. Lockouts prevent bobbing under pedaling, improving efficiency. For pure trail riding, they’re unnecessary—and many budget forks omit them to save cost.
Q: How do I set sag correctly?
A: Sag is how much the fork compresses under your static weight—typically 25–30% for trail forks. Sit on the bike in riding position (with gear), measure travel used, and adjust air pressure until you hit the target. Use a zip-tie on the stanchion as a marker.
Q: Can I convert a coil fork to air?
A: Generally no—coil and air forks use different lower leg designs and air shafts aren’t compatible. It’s cheaper and safer to buy a dedicated air fork.
Q: What’s the difference between Boost and standard axles?
A: Boost (15x110mm) uses a wider hub spacing for stiffer wheels and better tire clearance. Your fork must match your wheel’s axle standard. Mixing them won’t work.
Q: Will a new fork affect my bike’s warranty?
A: Usually not, unless you exceed recommended travel or damage the frame during install. Most manufacturers allow component upgrades as long as they’re within spec.
Q: How long do budget forks last?
A: With proper maintenance, 2–4 years of regular trail use. Coil forks may last longer mechanically but become outdated. Air forks can develop seal leaks or valve issues over time.
Our Final Recommendations
Best for Budget-Conscious Buyers: SR Suntour XCM Air – At under $150, it offers air spring tunability, 32mm stanchions, and decent rebound damping. Perfect for XC and light trail use. Lacks compression adjust, but unbeatable value.
Best Overall Value: RockShox Judy Silver TK – Around $200, this fork delivers 34mm stanchions, TurnKey damping, and a reliable air spring. It’s stiffer, lighter, and more refined than most in its class—ideal for trail riders wanting near-mid-tier performance.
Best Premium Option: Manitou Markhor – Priced near $280, it features hydraulic compression damping, adjustable rebound, and excellent small-bump sensitivity. A favorite among budget-minded all-mountain riders.
Best for Beginners: SR Suntour XCT Coil – Simple, tough, and under $100. Great for learning suspension basics without complexity. Upgrade later as skills grow.
Best for Advanced Users on a Budget: X-Fusion RC3 – With 34mm stanchions, three-position compression, and a plush air spring, it punches above its $250 price. Ideal for riders who want tunability without premium costs.
Conclusion: Making the Right Choice
Choosing the right budget suspension fork isn’t about finding the cheapest option—it’s about matching the right features to your riding style, bike compatibility, and long-term goals. A well-chosen fork can transform a harsh, jarring ride into a smooth, controlled adventure, opening up new trails and boosting your confidence on technical terrain. By focusing on travel length, spring type, damping, and serviceability—and avoiding common pitfalls like compatibility oversights—you’ll get far more value than the price tag suggests.
Remember, the best fork is the one that fits your bike, your body, and your budget while leaving room for growth. Don’t rush the decision. Read reviews, measure twice, and when in doubt, consult a local mechanic. And once you’ve made your choice, commit to regular maintenance—it’s the secret to squeezing years of performance from even the most affordable forks.
Whether you’re dropping into your first black diamond or just smoothing out city commutes, a quality budget suspension fork is one of the smartest upgrades you can make. So gear up, get out there, and let your new fork handle the bumps while you focus on the fun.