
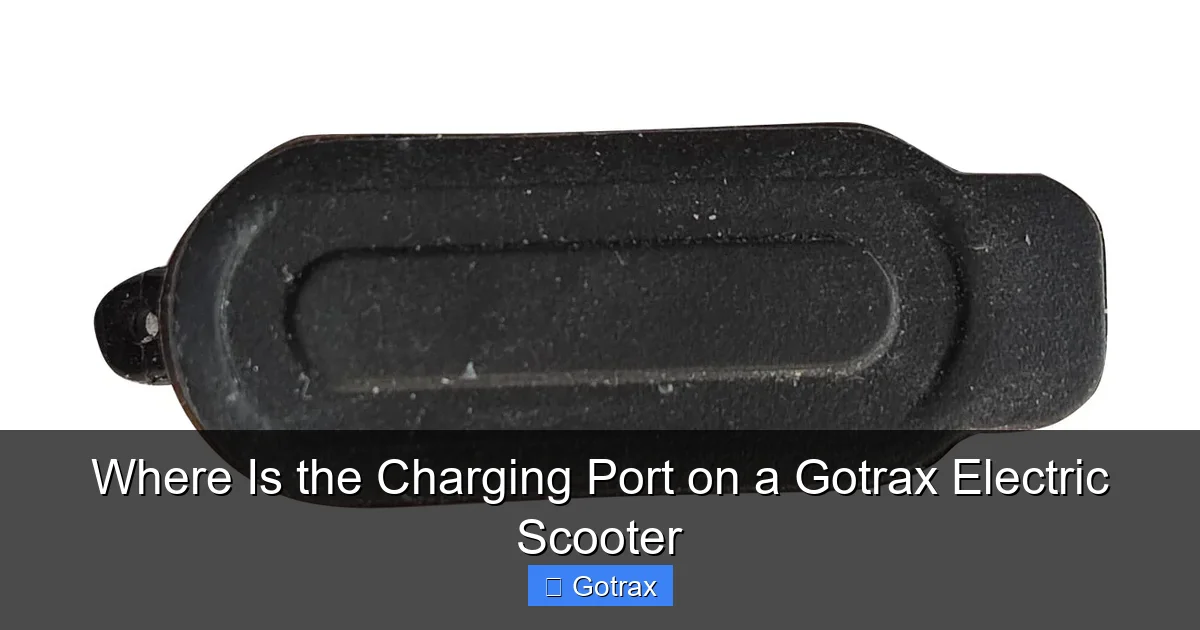
Knowing where the charging port is on your Gotrax electric scooter is essential for safe and efficient charging. This guide breaks down the location by model, offers step-by-step access instructions, and shares pro tips to keep your scooter powered and protected.
If you’ve just unboxed your brand-new Gotrax electric scooter or you’re a seasoned rider who’s never had to dig too deep into the technical side of things, one question is bound to come up sooner or later: *Where is the charging port on a Gotrax electric scooter?* It might seem like a simple query, but if you’ve ever fumbled around the deck, stem, or rear fender looking for that elusive port, you know it’s not always obvious—especially if you’re in a hurry or caught in the rain.
Gotrax offers a wide range of electric scooters, from compact commuter models like the GXL V2 to powerful off-road options like the G4 and G6. While they share many design elements, the placement of the charging port isn’t always consistent across the lineup. Some models tuck it neatly under a protective flap near the rear wheel, while others position it closer to the handlebars or even integrate it into the stem. This variation can confuse new users, especially if they’re used to other brands or older Gotrax models.
But don’t worry—you’re not alone. Thousands of riders have asked the same question, and the good news is that once you know what to look for, finding and using the charging port becomes second nature. In this comprehensive guide, we’ll walk you through the exact location of the charging port on every major Gotrax model, explain how to safely access and use it, and share essential tips to keep your scooter charged, safe, and ready to ride. Whether you’re charging at home, at work, or on the go, understanding your scooter’s charging system is key to maximizing performance and battery life.
Key Takeaways
- Charging port locations vary by model: Most Gotrax scooters have the charging port on the deck near the rear wheel, but some newer models place it under a protective flap or near the stem.
- Always power off before charging: For safety and battery longevity, turn off your scooter completely before plugging in the charger.
- Use only the official Gotrax charger: Third-party chargers may damage the battery or void your warranty due to incorrect voltage or amperage.
- Look for a rubber or plastic cover: Many models include a dust and water-resistant flap that must be opened to access the port—handle it gently to avoid cracking.
- Charge in a dry, room-temperature environment: Avoid extreme heat, cold, or moisture when charging to prevent battery degradation or safety hazards.
- Full charge takes 4–6 hours: Most Gotrax scooters require about 4 to 6 hours for a complete charge—don’t leave them plugged in overnight unnecessarily.
- Regular inspection prevents issues: Check the port and cable monthly for dirt, corrosion, or wear to ensure reliable charging.
📑 Table of Contents
Why the Charging Port Location Matters
You might be thinking, “It’s just a port—how hard can it be?” But the location of the charging port on your Gotrax electric scooter actually plays a big role in usability, safety, and long-term maintenance. A poorly placed or hard-to-reach port can lead to frustration, accidental damage, or even charging failures. On the flip side, a well-designed port makes topping up your battery quick, convenient, and stress-free.
One of the main reasons Gotrax varies the port location across models is to balance protection with accessibility. Electric scooters are exposed to the elements—rain, dust, dirt, and road grime—all of which can damage electrical components if they get inside. That’s why many Gotrax scooters feature a rubber or plastic cover over the charging port. This flap acts as a barrier against moisture and debris, helping to extend the life of both the port and the battery.
Another factor is ergonomics. Gotrax designs its scooters with real-world use in mind. For example, placing the port near the rear wheel allows riders to charge the scooter while it’s upright and stable, reducing the risk of tipping. It also keeps the charging cable out of the way of the handlebars and wheels, minimizing tripping hazards or cable snags. In contrast, models with ports near the stem—like some of the newer G-series scooters—may prioritize a cleaner look or easier access when the scooter is folded.
Understanding where your charging port is located also helps prevent common mistakes. For instance, forcing a charger into the wrong socket (like the display port or brake sensor connector) can damage delicate electronics. Knowing the exact spot eliminates guesswork and ensures you’re plugging in correctly every time.
Finally, the charging port’s location can affect how you store and charge your scooter. If the port is on the side or bottom of the deck, you’ll need to position the scooter so the cable can reach comfortably. If it’s near the stem, you might need to unfold the handlebars slightly for better access. These small details matter, especially if you’re charging in a tight space like a hallway, office, or apartment balcony.
Charging Port Locations by Gotrax Model

Visual guide about Where Is the Charging Port on a Gotrax Electric Scooter
Image source: gotrax.com
One of the most common sources of confusion among Gotrax riders is the variation in charging port placement across different models. While Gotrax maintains a consistent design language, they’ve made subtle changes over the years to improve functionality and durability. Below, we break down the charging port location for each major Gotrax model, so you can quickly identify yours and charge with confidence.
Gotrax GXL V2
The Gotrax GXL V2 is one of the brand’s most popular commuter scooters, known for its balance of speed, range, and affordability. On this model, the charging port is located on the **right side of the deck**, just above the rear wheel. It’s protected by a small rubber flap that snaps shut to keep out dust and water. To access it, simply lift the flap with your fingernail or a small tool, insert the charger, and secure the connection. The port is clearly labeled with a lightning bolt icon, making it easy to spot even in low light.
Gotrax G2 and G3
The G2 and G3 are entry-level models designed for casual riders and short commutes. Both feature the charging port on the **rear fender**, near the base of the deck and just behind the rear wheel. Like the GXL V2, it’s covered by a rubber flap. The G3 includes a slightly more robust cover due to its improved water resistance rating. When charging, make sure the scooter is on a flat surface and the flap opens fully to avoid bending the cable.
Gotrax G4 and G6 (Off-Road Models)
The G4 and G6 are built for adventure, with larger tires, stronger frames, and enhanced suspension. On these models, Gotrax moved the charging port to the **left side of the deck**, closer to the center. This change helps protect the port from mud and debris kicked up by the rear wheel during off-road use. The port is still covered by a rubber flap, but it’s slightly larger to accommodate the higher-capacity charger. Be extra careful when opening the flap—off-road conditions can cause dirt buildup, so wipe the area clean before charging.
Gotrax XR and XR Elite
The XR series is designed for longer commutes and higher performance. On these models, the charging port is located on the **right side of the stem**, just below the handlebars. This placement makes it easy to access when the scooter is folded or standing upright. The port is recessed and covered by a hinged plastic flap that clicks into place. One advantage of this design is that the charging cable doesn’t interfere with the wheels or deck, reducing wear and tear.
Gotrax Apex and Apex Pro
The Apex series features a more modern, streamlined design. Here, the charging port is integrated into the **rear fender**, but it’s positioned slightly higher than on older models. It’s protected by a flexible rubber cover that’s easy to lift but stays securely closed during rides. The Apex Pro includes a small LED indicator near the port that glows red while charging and turns green when fully charged—a handy visual cue.
Gotrax G Max and G Max Pro
These high-performance scooters are built for speed and range. The charging port is located on the **left side of the deck**, near the rear wheel, similar to the G4 and G6. However, the G Max Pro includes a reinforced port housing to handle the higher charging current. Always ensure the flap is fully closed after charging to maintain the scooter’s IP rating.
How to Safely Access and Use the Charging Port

Visual guide about Where Is the Charging Port on a Gotrax Electric Scooter
Image source: gotrax.com
Now that you know where to find the charging port on your Gotrax scooter, it’s time to learn how to use it safely and effectively. Charging may seem straightforward, but a few simple steps can make a big difference in performance, safety, and battery life.
Step 1: Power Off the Scooter
Before you even think about plugging in, make sure your scooter is completely turned off. This isn’t just a suggestion—it’s a safety requirement. Charging while the scooter is on can cause electrical surges, overheating, or damage to the battery management system (BMS). To power off, press and hold the power button until the display shuts down. Wait a few seconds to ensure all systems are idle.
Step 2: Locate and Open the Port Cover
Find the charging port using the model-specific guide above. Gently lift the rubber or plastic flap. Avoid using sharp objects like keys or screwdrivers, as they can tear the cover or scratch the port. If the flap is stiff, warm it slightly with your hands—cold weather can make rubber brittle. Once open, inspect the port for dirt, corrosion, or moisture. If you see any debris, wipe it away with a dry cloth.
Step 3: Plug In the Charger Correctly
Take your official Gotrax charger and align the connector with the port. The plug is usually keyed, meaning it only fits one way—don’t force it. Push it in gently until it clicks or sits flush. Never twist or bend the cable near the connector, as this can damage the wires inside. If the charger feels loose, double-check that it’s fully inserted.
Step 4: Monitor the Charging Process
Once connected, the charger’s LED should light up (usually red or orange). Most Gotrax scooters also have a small indicator on the deck or display that shows charging status. A red light typically means charging in progress; green means fully charged. Avoid unplugging the scooter prematurely—most models need 4 to 6 hours for a full charge. Interrupting the cycle can reduce battery efficiency over time.
Step 5: Disconnect and Secure the Port
When charging is complete, unplug the charger by pulling straight out—don’t yank the cable. Close the port cover firmly to keep out dust and water. If the flap doesn’t snap shut easily, check for trapped debris or a misaligned cover. Never ride with the port exposed.
Common Charging Mistakes to Avoid
Even experienced riders can fall into bad habits when it comes to charging. Here are some of the most common mistakes—and how to avoid them.
Using Third-Party Chargers
It’s tempting to use a generic charger you have lying around, but this is a big no-no. Gotrax scooters require specific voltage and amperage to charge safely. Using an incompatible charger can overheat the battery, cause fires, or permanently damage the scooter. Always use the charger that came with your model or an official Gotrax replacement.
Charging in Extreme Temperatures
Batteries don’t like extreme heat or cold. Charging in direct sunlight, inside a hot car, or in freezing conditions can degrade the battery and reduce its lifespan. Ideally, charge your scooter in a cool, dry place between 50°F and 86°F (10°C to 30°C). If you’ve been riding in the cold, let the scooter warm up to room temperature before plugging in.
Leaving the Scooter Plugged In Overnight
While modern Gotrax scooters have built-in protection against overcharging, it’s still best not to leave them plugged in for extended periods. Once the battery reaches 100%, the charger should stop supplying power—but leaving it connected increases the risk of power surges or charger failure. Unplug once charged, especially if you’re not using the scooter the next day.
Ignoring the Port Cover
The rubber flap isn’t just for looks—it’s essential for protecting the port from water and dirt. Riding with the cover open or damaged can lead to corrosion, short circuits, or charging failures. If your flap is cracked or missing, replace it immediately. Gotrax sells replacement covers online, or you can use a small piece of electrical tape as a temporary fix.
Charging on Uneven or Unstable Surfaces
Always charge your scooter on a flat, stable surface. If the scooter tips over while charging, the cable could snap, the port could break, or the battery could be damaged. Avoid charging on carpets, stairs, or near doorways where someone might trip.
Tips for Maintaining Your Charging Port and Battery
A little maintenance goes a long way in keeping your Gotrax scooter running smoothly. Here’s how to care for your charging port and battery for long-term reliability.
Clean the Port Monthly
Use a dry toothbrush or compressed air to remove dust and debris from the charging port. If you notice corrosion (a green or white powder), gently wipe it away with a cotton swab dipped in isopropyl alcohol. Let it dry completely before charging.
Inspect the Charger Cable
Check the charger cable for fraying, kinks, or exposed wires. Damaged cables can be dangerous and should be replaced immediately. Store the charger in a dry place, coiled loosely to prevent stress on the wires.
Store the Scooter Properly
If you’re not using your scooter for a week or more, charge the battery to about 50% before storing. This prevents deep discharge, which can harm lithium-ion batteries. Store in a cool, dry place away from direct sunlight.
Update Firmware (If Applicable)
Some newer Gotrax models support firmware updates that can improve charging efficiency and battery management. Check the Gotrax website or app for updates and follow the instructions carefully.
Conclusion
Finding the charging port on a Gotrax electric scooter might seem like a small detail, but it’s a crucial part of owning and maintaining your ride. Whether you’re cruising through the city on a GXL V2 or tackling trails on a G6, knowing exactly where to plug in—and how to do it safely—ensures your scooter stays powered, protected, and ready for adventure.
From the rear fender of the G2 to the stem of the XR Elite, Gotrax has designed each model with thoughtful attention to charging accessibility and durability. By following the tips in this guide—using the right charger, keeping the port clean, and avoiding common mistakes—you’ll extend the life of your battery and enjoy smoother, more reliable rides.
Remember, your scooter is an investment. Treat it well, and it will take you farther, faster, and with fewer headaches. So the next time someone asks, “Where is the charging port on a Gotrax electric scooter?” you’ll not only know the answer—you’ll be able to help them charge safely and confidently.
Frequently Asked Questions
Where is the charging port on a Gotrax GXL V2?
The charging port on the Gotrax GXL V2 is located on the right side of the deck, just above the rear wheel. It’s protected by a small rubber flap that lifts up for access.
Can I use a third-party charger with my Gotrax scooter?
No, it’s not recommended. Only use the official Gotrax charger or a certified replacement to avoid damaging the battery or voiding your warranty.
How long does it take to fully charge a Gotrax scooter?
Most Gotrax scooters take between 4 and 6 hours to charge from empty to full, depending on the model and battery capacity.
Is it safe to charge my Gotrax scooter in the rain?
No, never charge your scooter in wet conditions. Water can damage the port, charger, or battery, creating a serious safety hazard.
What should I do if my charging port cover is broken?
Replace the cover as soon as possible to protect the port from dust and moisture. You can order a replacement from Gotrax or use temporary tape until you get one.
Why won’t my Gotrax scooter charge even though the port looks fine?
This could be due to a faulty charger, a drained battery, or a loose connection. Try a different outlet, check the charger LED, and ensure the plug is fully inserted.