

Knowing where the battery is on a Gotrax scooter is essential for maintenance, charging, and troubleshooting. This guide walks you through the battery location across different models, how to safely access it, and best practices to extend its lifespan.
If you’ve ever owned or ridden a Gotrax electric scooter, you know how convenient and fun these compact rides can be. Whether you’re zipping through city streets, commuting to work, or just enjoying a weekend cruise, your Gotrax scooter relies on one critical component: the battery. But here’s the thing—many new riders (and even some experienced ones) aren’t entirely sure where the battery is actually located. Is it under the seat? Behind the front wheel? Tucked away near the motor?
The truth is, the battery placement varies slightly depending on your Gotrax model, but there’s a general pattern you can follow. Understanding where the battery is—and how to access it—isn’t just about curiosity. It’s essential for routine maintenance, troubleshooting performance issues, replacing a worn-out pack, or even upgrading to a higher-capacity battery if your model supports it.
In this comprehensive guide, we’ll walk you through everything you need to know about the battery location on a Gotrax scooter. We’ll cover the most popular models, explain how to safely access the battery compartment, share tips for maintaining battery health, and answer common questions riders have. Whether you’re a first-time owner or a seasoned scooter enthusiast, this article will help you get the most out of your Gotrax ride.
So, grab your toolkit, charge up your curiosity, and let’s dive into the world of Gotrax batteries—starting with the most important question: Where is the battery on a Gotrax scooter?
Key Takeaways
- Battery Location Varies by Model: Most Gotrax scooters house the battery under the deck plate, but some newer models may have it integrated into the stem or front fork.
- Access Requires Basic Tools: You’ll typically need a Phillips screwdriver or Allen wrench to remove the deck plate and reach the battery compartment.
- Look for a Rectangular or Cylindrical Pack: Gotrax batteries are usually lithium-ion and resemble a flat rectangular box or a series of connected cylindrical cells.
- Check the User Manual First: Always refer to your specific model’s manual for exact instructions and safety warnings before attempting to access the battery.
- Regular Inspection Extends Life: Periodically check the battery for swelling, loose wires, or corrosion to prevent performance issues or safety hazards.
- Only Use Compatible Replacements: If replacing the battery, ensure it matches the voltage, capacity, and connector type of the original to avoid damage.
- Charging Port ≠ Battery Location: Just because you plug in the charger near the rear wheel doesn’t mean the battery is there—most are centrally located under the deck.
📑 Table of Contents
Why Battery Location Matters on Your Gotrax Scooter
You might be thinking, “As long as it works, who cares where the battery is?” But knowing the battery location is more important than you might realize. First and foremost, it affects how you maintain and care for your scooter. If your battery starts to degrade or fails to hold a charge, you’ll need to access it for inspection or replacement. Without knowing where it is, you could waste time—or worse, damage your scooter trying to find it.
Second, battery placement impacts the scooter’s balance and performance. Gotrax designs its scooters with weight distribution in mind, and the battery is often positioned low and centered to improve stability. If you ever need to remove the battery (for transport, repair, or upgrade), understanding its location helps you handle the scooter safely and avoid tipping or imbalance.
Third, safety is a major concern. Lithium-ion batteries, while efficient and powerful, require careful handling. If you notice swelling, overheating, or a burning smell, you’ll need to locate and inspect the battery immediately. Knowing exactly where it is can help you respond quickly in an emergency.
Finally, if you’re considering upgrading your battery for longer range or better performance, you’ll need to know the physical dimensions and connector type of the existing pack. This information is only accessible if you can locate and examine the battery firsthand.
In short, the battery is the heart of your Gotrax scooter—and knowing where it beats is the first step to keeping your ride running smoothly.
General Battery Location Across Gotrax Models

Visual guide about Where Is the Battery on a Gotrax Scooter
Image source: gotrax.com
While Gotrax offers a range of electric scooters—from the lightweight GXL V2 to the rugged G4 and the high-performance GMAX—the battery is typically housed in one of two primary locations: under the deck plate or integrated into the stem or front fork assembly. Let’s break this down by category.
Battery Under the Deck Plate (Most Common)
The majority of Gotrax scooters, including the popular GXL, G2, G3, and G4 models, store the battery beneath the deck—the flat platform where you stand. This location keeps the center of gravity low, which improves handling and stability, especially at higher speeds.
To access the battery, you’ll usually need to remove the deck plate. This involves unscrewing several Phillips-head or Allen screws (typically 6–10) along the edges of the deck. Once removed, you’ll see the battery pack secured with Velcro straps, zip ties, or mounting brackets. The battery is often wrapped in protective foam or plastic to prevent vibration damage.
For example, on the Gotrax GXL V2, the battery is a flat, rectangular lithium-ion pack about the size of a small laptop. It’s positioned just behind the front wheel and connected to the motor and control board via a thick wiring harness. The charging port, located near the rear fender, connects directly to this battery.
Battery in the Stem or Front Fork (Newer Models)
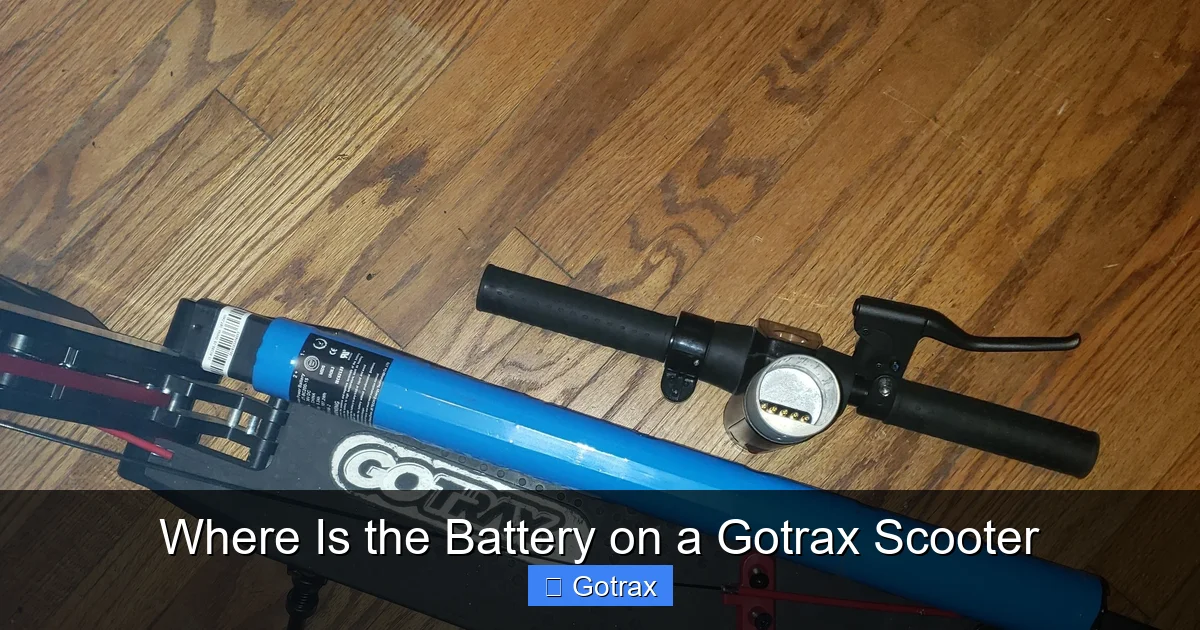
Some newer Gotrax models, like the GMAX and certain versions of the G4, have experimented with alternative battery placements. In these designs, the battery may be partially or fully integrated into the stem (the vertical tube that holds the handlebars) or the front fork.
This design choice helps reduce clutter under the deck and can make the scooter more aerodynamic. However, it also makes accessing the battery more complex. You may need to disassemble parts of the stem or remove the front wheel to reach it.
For instance, on the Gotrax GMAX, the battery is split between the deck and the stem. The main pack sits under the deck, but a secondary cell or control module may be housed in the stem near the handlebars. This hybrid approach allows for higher capacity without making the deck excessively thick.
How to Identify Your Scooter’s Battery Location
If you’re unsure where the battery is on your specific Gotrax model, start by checking the user manual. Gotrax provides detailed diagrams and instructions for each scooter. You can usually download the manual from the official Gotrax website using your model number (e.g., GXL-V2, G4-ULTRA).
If you don’t have the manual, look for visual clues. The charging port is often near the battery, but not always directly connected. On most models, the port is on the rear fender or near the rear wheel. Follow the thick wires from the port—they usually lead to the battery under the deck.
Another tip: listen for a faint hum or feel for warmth after charging. The battery generates a small amount of heat, so if you notice a warm spot under the deck after plugging in, that’s likely where the battery is located.
Step-by-Step Guide to Accessing the Battery
Visual guide about Where Is the Battery on a Gotrax Scooter
Image source: d3nevzfk7ii3be.cloudfront.net
Now that you know where to look, let’s walk through the process of safely accessing the battery on your Gotrax scooter. Always prioritize safety—disconnect the scooter from power, wear gloves, and work in a well-lit area.
Tools You’ll Need
Before you begin, gather the following tools:
– Phillips-head screwdriver (size #2 is common)
– Allen wrench set (typically 4mm or 5mm)
– Small flathead screwdriver (for prying if needed)
– Work gloves (to protect your hands)
– Flashlight (to see under the deck)
Optional but helpful:
– Multimeter (to test voltage)
– Zip ties or Velcro straps (for re-securing the battery)
– Anti-static wrist strap (to prevent electrical damage)
Step 1: Power Off and Unplug
First, make sure your scooter is completely powered off. Turn the key (if your model has one) to the “off” position, and unplug the charger if it’s connected. This prevents accidental short circuits or electrical shocks.
Step 2: Flip the Scooter Over
Carefully flip your scooter upside down so the deck rests on a soft surface (like a towel or carpet). This gives you clear access to the underside. Be gentle—don’t drop it or rest it on sharp objects that could scratch the frame.
Step 3: Locate and Remove the Deck Screws
Look for screws along the edges of the deck. Most Gotrax scooters have 6–10 screws securing the deck plate. Use your Phillips screwdriver or Allen wrench to remove them. Keep the screws in a small container so you don’t lose them.
Tip: Some models have hidden screws under rubber foot pads. Gently peel back the pads with a flathead screwdriver to reveal them.
Step 4: Lift the Deck Plate
Once all screws are removed, carefully lift the deck plate. It may be held in place by adhesive or tight fit, so wiggle it gently if needed. Be cautious not to pull too hard—wires may still be connected underneath.
Step 5: Locate the Battery Pack
Under the deck, you’ll see the battery pack—usually a flat, rectangular unit with a black or gray casing. It’s often secured with Velcro straps or plastic brackets. You’ll also see a thick red and black wire harness connecting it to the motor and control board.
Take a moment to inspect the battery. Look for signs of damage: swelling, leaks, burnt smell, or frayed wires. If you notice any of these, do not attempt to charge or use the scooter. Contact Gotrax support immediately.
Step 6: Disconnect the Battery (If Needed)
If you’re replacing or testing the battery, you’ll need to disconnect it. Most Gotrax batteries use a standard XT60 or similar connector. Gently unplug it by pulling the connector—do not yank the wires.
Warning: Never disconnect the battery while the scooter is powered on. Always power off first.
Step 7: Reassemble the Scooter
After inspecting or replacing the battery, reconnect the wires securely. Reattach the battery using the original straps or new Velcro. Replace the deck plate and screw it back in place. Make sure all screws are tight but not over-torqued.
Flip the scooter back over, power it on, and test the throttle and brakes to ensure everything works correctly.
Battery Maintenance and Care Tips
Now that you know how to access the battery, let’s talk about how to keep it in top condition. A well-maintained battery lasts longer, performs better, and reduces the risk of failure.
Charge Regularly, But Don’t Overcharge
Gotrax batteries are lithium-ion, which means they perform best when kept between 20% and 80% charge. Avoid letting the battery drop to 0% regularly, as this can degrade its capacity over time. Similarly, don’t leave it plugged in for days after it’s fully charged.
Use only the charger that came with your scooter. Third-party chargers may not regulate voltage properly and can damage the battery.
Store in a Cool, Dry Place
Extreme temperatures are the enemy of lithium-ion batteries. Avoid leaving your scooter in a hot car or outside in freezing weather. Ideal storage temperature is between 50°F and 77°F (10°C to 25°C).
If you won’t be riding for a while, store the scooter with a 50% charge. This helps preserve battery health during long periods of inactivity.
Inspect Monthly
Make it a habit to inspect the battery every month. Check for:
– Swelling or bulging (a sign of internal failure)
– Corrosion on terminals
– Loose or frayed wires
– Unusual odors
If you notice any issues, stop using the scooter and consult a professional.
Clean the Contacts
Dust and dirt can accumulate on the battery connectors, leading to poor contact and reduced performance. Use a dry cloth or compressed air to gently clean the terminals. Never use water or cleaning solvents.
Avoid Physical Damage
Dropping your scooter or riding over rough terrain can damage the battery internally, even if there’s no visible damage. If you experience a hard impact, inspect the battery as soon as possible.
Signs Your Gotrax Battery Needs Replacement
Even with proper care, batteries eventually wear out. Here are common signs that it’s time for a replacement:
– **Reduced Range:** If your scooter used to go 15 miles but now only goes 8, the battery may be degraded.
– **Slow Charging:** A healthy battery should charge fully in 4–6 hours. If it takes much longer, the cells may be failing.
– **Frequent Shutdowns:** The scooter turns off unexpectedly, even with charge remaining.
– **Swelling:** A puffed-up battery is a serious safety hazard and must be replaced immediately.
– **Overheating:** If the battery gets hot during normal use, it could indicate internal damage.
If you experience any of these issues, don’t ignore them. Continuing to use a failing battery can lead to fire or permanent scooter damage.
Upgrading or Replacing Your Gotrax Battery
Some Gotrax models allow battery upgrades, but this depends on the scooter’s design and compatibility. For example, the G4 and GMAX may support higher-capacity batteries, but the GXL V2 has limited space and may not accommodate larger packs.
Before upgrading:
– Check your scooter’s specifications (voltage, connector type, physical dimensions)
– Ensure the new battery is compatible with the motor and controller
– Consider professional installation if you’re unsure
Always purchase batteries from reputable sources. Cheap, counterfeit batteries can be dangerous and may void your warranty.
Conclusion
Knowing where the battery is on a Gotrax scooter isn’t just a technical detail—it’s a key part of owning and maintaining your ride. Whether you’re troubleshooting a charging issue, inspecting for damage, or planning an upgrade, understanding the battery’s location and how to access it safely empowers you to take control of your scooter’s performance and longevity.
From the deck-mounted packs of the GXL and G4 to the innovative stem-integrated designs of newer models, Gotrax continues to refine how it powers its scooters. But no matter the model, the principles remain the same: treat the battery with care, inspect it regularly, and never ignore warning signs.
So the next time someone asks, “Where is the battery on a Gotrax scooter?” you’ll have the answer—and the confidence to show them exactly where it is.
Frequently Asked Questions
Where is the battery located on a Gotrax GXL scooter?
The battery on the Gotrax GXL (and GXL V2) is located under the deck plate, just behind the front wheel. You’ll need to remove the deck screws to access it.
Can I ride my Gotrax scooter if the battery is swollen?
No, you should not ride it. A swollen battery is a serious safety risk and could lead to fire or explosion. Stop using the scooter immediately and contact Gotrax support.
How long does a Gotrax battery last?
With proper care, a Gotrax battery typically lasts 2–3 years or 300–500 charge cycles. Actual lifespan depends on usage, charging habits, and environmental conditions.
Can I replace the battery myself?
Yes, most Gotrax batteries can be replaced at home with basic tools. However, ensure the replacement is compatible and follow safety precautions. If unsure, consult a professional.
Why won’t my Gotrax scooter charge?
Common causes include a faulty charger, damaged charging port, or a degraded battery. Check the charger first, then inspect the battery and wiring under the deck.
Is the charging port the same as the battery location?
No. The charging port is usually near the rear wheel, but the battery is typically under the deck. The port connects to the battery via internal wiring.