
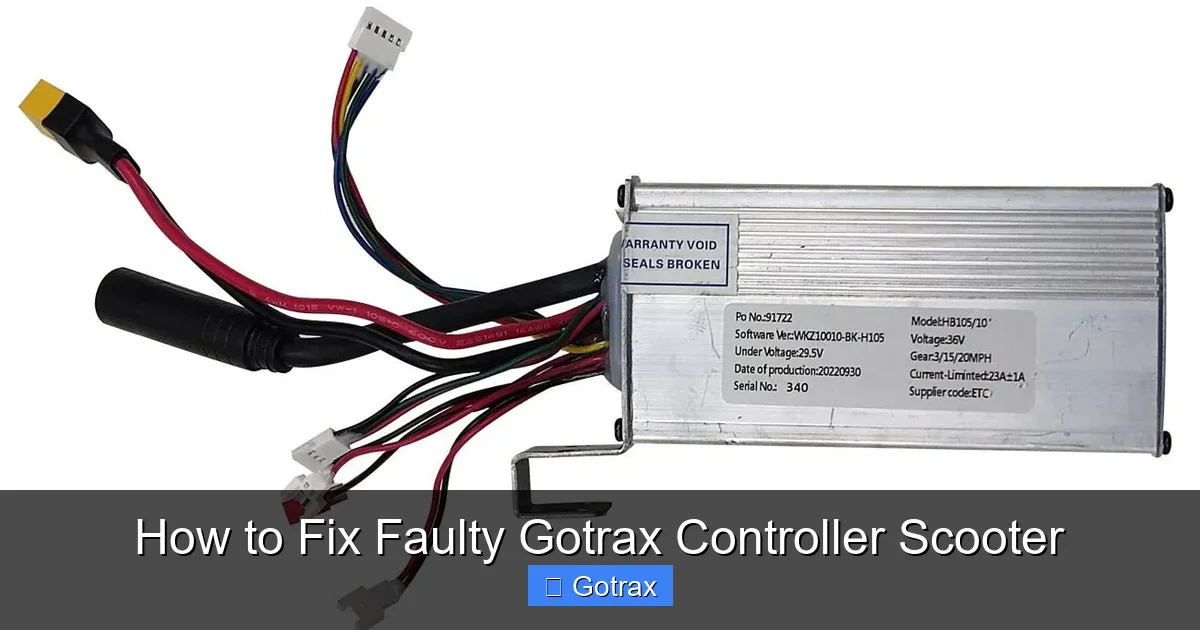
Discover how to diagnose and fix common Gotrax controller scooter issues like unresponsive throttle, power loss, or error codes. This guide walks you through safe troubleshooting, controller replacement, and maintenance tips to keep your scooter running smoothly.
Key Takeaways
- Diagnose the problem first: Identify symptoms like no power, erratic speed, or error lights before attempting repairs.
- Check connections and wiring: Loose or corroded wires are a common cause of controller failure—inspect and secure all connections.
- Test the battery and charger: A weak or faulty battery can mimic controller issues—verify voltage and charging function.
- Reset the controller safely: Many Gotrax models allow a soft reset by power cycling or holding specific buttons.
- Replace the controller if needed: If troubleshooting fails, installing a compatible replacement controller can restore full function.
- Prevent future issues: Regular cleaning, avoiding water exposure, and proper storage extend controller life.
- Seek professional help when unsure: If you’re uncomfortable with electrical work, consult a certified technician.
How to Fix Faulty Gotrax Controller Scooter
Gotrax electric scooters are popular for their affordability, portability, and ease of use. But like any electronic device, they can develop problems—especially with the controller, the brain of the scooter that manages power, speed, and throttle response. If your Gotrax scooter won’t start, jerks unexpectedly, or shows error codes, the controller might be faulty.
This comprehensive guide will walk you through how to fix a faulty Gotrax controller scooter step by step. You’ll learn how to diagnose the issue, perform basic repairs, reset the system, and even replace the controller if necessary. Whether you’re a beginner or have some DIY experience, this guide is designed to help you get your scooter back on the road safely and efficiently.
Understanding the Gotrax Controller
Before diving into repairs, it’s important to understand what the controller does. The controller is an electronic circuit board located inside the scooter’s deck or stem. It receives input from the throttle, brake, and battery, then regulates power delivery to the motor. It also communicates with the display panel to show speed, battery level, and error codes.
Common symptoms of a faulty controller include:
- Scooter won’t turn on or power up
- Throttle is unresponsive or jerky
- Motor cuts out during riding
- Error codes flashing on the display (e.g., E1, E2, E3)
- Sudden loss of power or speed
If you’re experiencing any of these issues, the controller could be the culprit—but don’t jump to conclusions. Other components like the battery, throttle, or motor can mimic controller problems. That’s why proper diagnosis is key.
Step 1: Safety First
Working on an electric scooter involves handling electrical components and potentially high-voltage batteries. Always prioritize safety:
- Turn off the scooter and remove the key if applicable.
- Disconnect the battery before opening any panels or touching internal wiring.
- Work in a dry, well-lit area to avoid slips or electrical shorts.
- Use insulated tools to reduce the risk of shock.
- Wear safety glasses when handling screws or prying open panels.
Never attempt repairs while the scooter is plugged in or the battery is connected. Even when off, lithium-ion batteries can deliver a dangerous shock if mishandled.
Step 2: Diagnose the Problem
Before replacing or repairing the controller, confirm it’s actually the source of the issue. Use this troubleshooting checklist:
Check the Battery
A weak or dead battery can cause the scooter to appear unresponsive. Use a multimeter to test the battery voltage. Most Gotrax scooters use 36V or 48V batteries. If the voltage is significantly lower than rated (e.g., below 30V for a 36V battery), the battery may need charging or replacement.
Inspect the Charger
Plug in the charger and check if the LED turns red (charging) or green (fully charged). If the charger light doesn’t turn on, the charger might be faulty. Try a known-working charger if available.
Test the Throttle
The throttle sends signals to the controller. If it’s damaged or disconnected, the controller won’t respond. Remove the handlebar cover and check the throttle wiring. Look for loose connections, frayed wires, or corrosion. You can also test the throttle with a multimeter to see if it outputs the correct voltage range (usually 0.8V to 4.2V).
Look for Error Codes
Gotrax scooters display error codes on the LCD screen. Common ones include:
- E1: Throttle malfunction
- E2: Motor fault
- E3: Controller communication error
- E4: Battery over-discharge
Refer to your scooter’s manual for a full list. If you see E3, it strongly suggests a controller issue.
Check the Power Switch
Sometimes the power button itself is faulty. Try pressing it multiple times or wiggling it gently. If the scooter turns on intermittently, the switch may need cleaning or replacement.
Step 3: Reset the Controller
Many Gotrax models allow you to reset the controller, which can resolve temporary glitches or communication errors.
Soft Reset Method
- Turn off the scooter completely.
- Hold down the power button for 10–15 seconds.
- Release and wait 30 seconds.
- Turn the scooter back on.
Hard Reset (Power Cycle)
- Disconnect the battery from the main wiring harness.
- Wait 2–3 minutes to allow capacitors to discharge.
- Reconnect the battery securely.
- Turn on the scooter and test functionality.
This process clears temporary faults and reinitializes the controller. It’s a simple but effective first step.
Step 4: Inspect Wiring and Connections
Loose, corroded, or damaged wires are a leading cause of controller failure. Follow these steps to inspect the wiring:
Access the Controller
Most Gotrax scooters have the controller under the deck plate. Use a Phillips screwdriver to remove the screws and carefully lift the plate. Be gentle—some wires may still be connected.
Check All Connectors
Look at the connectors between the controller and:
- Battery
- Motor
- Throttle
- Brake lever
- Display panel
Ensure each plug is fully seated and not loose. Wiggle them gently—if the scooter flickers or beeps, a connection is intermittent.
Look for Damage
Inspect wires for:
- Fraying or cuts
- Burn marks or melted insulation
- Corrosion (green or white residue)
- Loose solder joints
If you find damaged wires, they may need repair or replacement. Use electrical tape for minor insulation issues, but replace severely damaged wires.
Clean Corrosion
If you see corrosion, clean it with a cotton swab dipped in isopropyl alcohol. Let it dry completely before reconnecting.
Step 5: Test the Controller
If all connections are secure and the battery is good, test the controller directly. This requires a multimeter and some basic electrical knowledge.
Check Input Voltage
Set your multimeter to DC voltage. Touch the red probe to the positive terminal and black to negative on the controller’s battery input. You should see the battery voltage (e.g., 36V). If it’s zero or very low, the issue may be upstream.
Check Output to Motor
With the scooter on and throttle engaged, measure voltage at the motor output terminals. You should see a rising voltage as you twist the throttle. If there’s no output, the controller may be faulty.
Test Signal from Throttle
Measure the voltage at the throttle connector while twisting it. It should increase smoothly from ~0.8V to ~4.2V. If it jumps or stays flat, the throttle is bad—not the controller.
Note: Testing live circuits can be risky. If you’re unsure, skip this step and proceed to replacement.
Step 6: Replace the Controller
If troubleshooting confirms the controller is faulty, replacement is the best solution. Here’s how to do it safely.
Find the Right Replacement
Gotrax controllers are model-specific. Check your scooter’s model number (usually on the deck or under the seat) and search for a compatible controller. Common models include:
- Gotrax GXL V2
- Gotrax XR Elite
- Gotrax G4
- Gotrax Apex
Purchase from reputable sellers like Amazon, Gotrax official store, or authorized repair shops. Avoid cheap knockoffs—they may damage your scooter.
Remove the Old Controller
- Disconnect the battery.
- Unplug all wires from the controller (take a photo first for reference).
- Unscrew the controller from its mounting bracket.
- Gently remove it from the scooter.
Install the New Controller
- Position the new controller in the same location.
- Secure it with screws.
- Reconnect all wires exactly as they were (use your photo).
- Double-check each connection.
Test the Installation
- Reconnect the battery.
- Turn on the scooter.
- Test the throttle, brakes, and display.
- Take a short test ride in a safe area.
If everything works, you’ve successfully fixed your Gotrax scooter!
Step 7: Prevent Future Controller Issues
Once your scooter is working, take steps to avoid future problems:
Avoid Water Exposure
Gotrax scooters are water-resistant but not waterproof. Avoid riding in heavy rain or through puddles. Water can seep into the controller and cause corrosion.
Keep It Clean
Wipe down the scooter after rides, especially the deck and stem. Use a dry or slightly damp cloth—never spray water directly on electronics.
Store Properly
Store your scooter in a dry, temperature-controlled environment. Extreme cold or heat can damage the controller and battery.
Charge Regularly
Don’t let the battery drain completely. Charge it after each use to maintain battery health and reduce strain on the controller.
Inspect Monthly
Every month, check wires, connectors, and the controller area for signs of wear or damage. Early detection prevents major failures.
Troubleshooting Common Issues
Even after repairs, you might encounter lingering problems. Here’s how to handle them:
Scooter Turns On But Won’t Move
Check the throttle signal and motor connections. Also, ensure the brake lever isn’t stuck in the “on” position—some scooters won’t move if the brake is engaged.
Intermittent Power Loss
This often points to a loose battery connection or a failing battery. Re-seat the battery connector and test voltage under load.
Error Code Persists After Reset
If an error code returns after a reset, the component it references (e.g., motor for E2) may be damaged. Consider professional diagnosis.
Controller Gets Hot
A hot controller can indicate overload or internal failure. Turn off the scooter immediately and inspect for short circuits or blocked airflow.
When to Seek Professional Help
While many controller issues can be fixed at home, some situations require expert assistance:
- You’re uncomfortable working with electronics
- The scooter was submerged in water
- Multiple components are suspected (e.g., motor and controller)
- You’ve tried all steps and the problem persists
Contact Gotrax customer support or visit an authorized repair center. They can run advanced diagnostics and provide warranty service if applicable.
Conclusion
Fixing a faulty Gotrax controller scooter is achievable with the right approach. Start by diagnosing the issue, checking connections, and performing a reset. If those steps don’t work, inspect the wiring and consider replacing the controller. Always prioritize safety and follow the steps in this guide carefully.
With proper maintenance and care, your Gotrax scooter can provide years of reliable service. Remember: prevention is just as important as repair. Keep your scooter clean, dry, and well-charged to avoid future controller problems.
Now that you know how to fix a faulty Gotrax controller scooter, you can tackle issues confidently and get back to riding with peace of mind.