
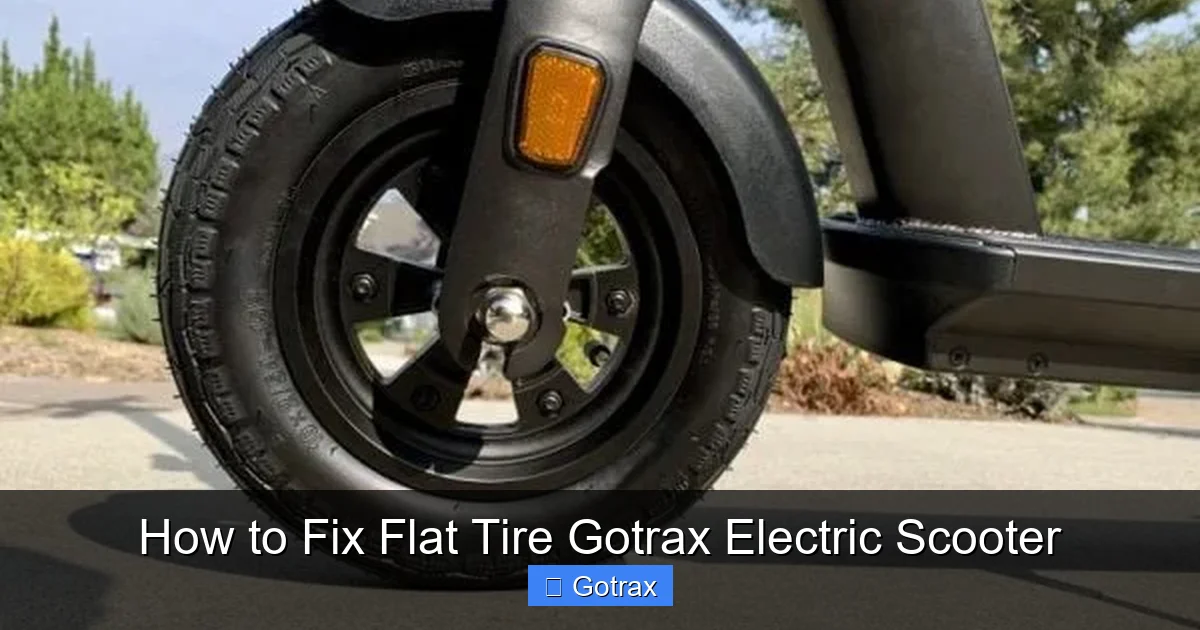
Got a flat tire on your Gotrax electric scooter? Don’t panic—this guide walks you through the entire repair process, from diagnosing the issue to reassembling your scooter safely. With the right tools and a little patience, you’ll be back on the road in no time.
Key Takeaways
- Identify the type of flat: Determine if it’s a slow leak, puncture, or complete blowout to choose the right fix.
- Gather essential tools: You’ll need tire levers, a pump, patch kit, wrench, and possibly a replacement inner tube.
- Remove the wheel safely: Always disconnect the scooter from power and support it securely before removing the tire.
- Patch or replace the inner tube: Small punctures can often be patched, but damaged tubes may need full replacement.
- Reinstall and test carefully: Ensure the tire is seated properly and inflate to the correct PSI before riding.
- Prevent future flats: Regular maintenance and avoiding rough terrain can extend tire life.
- Know when to seek help: If you’re unsure or the tire is severely damaged, consult a professional.
How to Fix a Flat Tire on a Gotrax Electric Scooter
So, you’re cruising along on your Gotrax electric scooter when suddenly—*thump, thump, thump*—you feel that all-too-familiar wobble. You look down and realize: flat tire. Don’t worry. It happens to the best of us. The good news? Fixing a flat tire on a Gotrax electric scooter is totally doable at home with a few basic tools and a little know-how.
In this complete guide, we’ll walk you through every step of diagnosing, repairing, and preventing flat tires on your Gotrax scooter. Whether you’re dealing with a slow leak from a tiny nail or a full-on blowout from a pothole, we’ve got you covered. By the end, you’ll not only know how to fix the problem but also how to avoid it in the future.
Let’s get rolling.
Understanding Gotrax Scooter Tires
Visual guide about How to Fix Flat Tire Gotrax Electric Scooter
Image source: alphaproscooters.com
Before we dive into the repair, it’s important to understand what kind of tires your Gotrax scooter has. Most Gotrax models—like the GXL, G2, G3, and G4—come with pneumatic (air-filled) tires. These are great for comfort and shock absorption, especially on uneven city streets. However, they’re also more prone to flats than solid rubber tires.
Gotrax tires typically range from 8 to 10 inches in diameter and are inflated to around 40–50 PSI (pounds per square inch), depending on the model. Always check your scooter’s user manual or the sidewall of the tire for the exact recommended pressure.
The tire consists of three main parts:
– The **outer tire** (also called the casing or tread)—this is the durable rubber layer that contacts the ground.
– The **inner tube**—a rubber bladder that holds the air.
– The **rim**—the metal wheel that the tire wraps around.
Most flats occur in the inner tube due to punctures, pinch flats (also called “snake bites”), or valve stem damage. In rare cases, the outer tire itself may be torn or worn through, which requires more extensive repair or replacement.
Signs You Have a Flat Tire
How do you know if your Gotrax scooter has a flat? Here are the most common signs:
– **Loss of air pressure:** The scooter feels sluggish, bouncy, or hard to control.
– **Visible sagging:** The tire looks visibly deflated when you look at it.
– **Unusual noise:** A thumping or flapping sound while riding.
– **Difficulty steering:** The scooter pulls to one side or feels unbalanced.
– **Rim damage:** In severe cases, the rim may scrape the ground.
If you notice any of these, it’s time to inspect the tire. Don’t keep riding on a flat—this can damage the rim, inner tube, and even the motor or hub.
Tools and Materials You’ll Need
Before you start, gather these essential tools and supplies. Having everything ready will make the process faster and less frustrating.
Basic Repair Kit
- Tire levers (2–3): Plastic or metal tools to pry the tire off the rim.
- Pump or air compressor: To reinflate the tire after repair. A portable mini pump works great.
- Patch kit: Includes rubber patches, glue, and sandpaper. Look for a quality kit designed for bike or scooter tires.
- Wrench or Allen key: Most Gotrax scooters use a 13mm or 15mm wrench to remove the axle nut. Some models use hex bolts.
- Bucket of soapy water: Helps locate leaks by bubbling where air escapes.
- Clean rag or paper towels: For wiping grease and drying surfaces.
Optional (But Helpful)
- Replacement inner tube: If the tube is too damaged to patch, you’ll need a new one. Make sure it matches your tire size (e.g., 8×2.0).
- Valve core tool: For removing and tightening the valve stem (Schrader or Presta type).
- Jack or stand: To lift the scooter off the ground safely.
- Gloves: Keep your hands clean and protected.
Step-by-Step Guide to Fixing a Flat Tire
Now that you’re prepared, let’s get into the actual repair process. Follow these steps carefully to safely fix your Gotrax scooter’s flat tire.
Step 1: Safety First
Before touching anything, make sure your scooter is safe to work on.
– Turn off the scooter and remove the key (if applicable).
– Place it on a flat, stable surface.
– If possible, use a stand or jack to lift the wheel off the ground. If not, flip the scooter upside down so it rests on the handlebars and deck. Be careful not to damage the display or controls.
– Wear gloves to protect your hands from dirt and sharp edges.
Step 2: Remove the Wheel
Most Gotrax scooters have either a front or rear wheel that can be removed. The process is similar for both, but the rear wheel may have a motor cable to disconnect.
For the Front Wheel:
- Locate the axle nut on the side of the fork.
- Use a wrench to loosen and remove the nut.
- Gently pull the wheel out of the fork dropouts.
For the Rear Wheel (Motorized):
- Loosen the axle nut with a wrench.
- You may need to slightly loosen the brake caliper or chain tensioner (on models with chains) to create enough slack.
- Carefully disconnect the motor wires. Most Gotrax models have a quick-disconnect plug—just unplug it. Take a photo first so you remember how to reconnect it.
- Slide the wheel out of the dropouts.
Step 3: Deflate the Tire Completely
If there’s any air left in the tire, let it out now.
– Press the valve stem (Schrader type, like a car tire) to release all air.
– If it has a Presta valve (thin, with a lock nut), unscrew the tip first, then press to deflate.
Step 4: Remove the Tire from the Rim
This is where tire levers come in handy.
– Insert one tire lever under the bead (edge) of the tire and hook it to a spoke.
– Insert a second lever about 2–3 inches away and lift the bead over the rim.
– Slide the lever around the rim to loosen one side of the tire.
– Once one side is off, you can usually pull the rest by hand.
– Carefully remove the inner tube from inside the tire.
Step 5: Locate the Leak
Now it’s time to find where the air is escaping.
– Inflate the inner tube slightly so it holds its shape.
– Submerge it in a bucket of soapy water or spray soapy water over it.
– Look for bubbles—these indicate the leak.
– Common spots: near the valve stem, along the tread, or on the sides.
If you can’t find the leak, listen for a hissing sound or feel for air with your hand.
Step 6: Patch the Inner Tube
If the hole is small (under 1/4 inch), you can patch it.
– Dry the area around the leak.
– Use sandpaper from the patch kit to roughen the surface (about the size of the patch).
– Apply a thin layer of rubber cement and let it get tacky (30–60 seconds).
– Peel the backing off the patch and press it firmly onto the tube. Hold for 30 seconds.
– Avoid touching the sticky side of the patch with your fingers.
Step 7: Inspect the Tire and Rim
Before reinstalling, check for what caused the flat.
– Run your fingers along the inside of the tire to feel for nails, glass, or sharp debris.
– Remove any foreign objects.
– Check the rim tape (the strip covering the spoke holes) to ensure it’s intact and not exposing sharp edges.
If the tire is torn or the rim is damaged, you may need professional help.
Step 8: Reinstall the Inner Tube and Tire
Now it’s time to put everything back together.
– Inflate the tube slightly (just enough to give it shape).
– Insert the valve stem into the rim hole.
– Gently tuck the tube back inside the tire.
– Starting at the valve, push the tire bead back onto the rim. Use your hands—avoid tire levers if possible to prevent pinching the tube.
– If it’s tight, use tire levers carefully to finish seating the bead.
Step 9: Inflate the Tire
– Use your pump to inflate the tire to the recommended PSI (usually 40–50 PSI).
– Check the sidewall of the tire or your user manual for the exact number.
– Overinflating can cause blowouts; underinflating leads to pinch flats.
Step 10: Reinstall the Wheel
– Slide the wheel back into the dropouts.
– For the rear wheel, reconnect the motor wires (match the colors or refer to your photo).
– Tighten the axle nut securely with a wrench.
– Make sure the wheel spins freely and doesn’t wobble.
Step 11: Test the Repair
– Lower the scooter and turn it on.
– Give it a gentle test ride in a safe area.
– Listen for unusual noises and check that the tire holds air.
If everything feels good, you’re all set!
Troubleshooting Common Issues
Even with careful repair, problems can arise. Here’s how to handle them.
The Tire Won’t Hold Air
– Recheck for leaks using soapy water.
– Ensure the valve stem is tight. Use a valve core tool to tighten it.
– The patch may not have adhered properly—try a new patch or replace the tube.
The Tire Keeps Going Flat
– There may be a second puncture you missed.
– The rim tape could be damaged, exposing spoke holes.
– The tire itself might have a slow leak from a sidewall crack.
The Wheel Wobbles After Reinstallation
– The tire may not be seated evenly on the rim.
– Deflate the tire, adjust the bead, and reinflate.
– Check that the axle is tightened evenly on both sides.
Motor Doesn’t Work After Rear Wheel Repair
– Double-check the motor wire connection.
– Ensure the plug is fully seated and not damaged.
– Test the scooter in a safe area—sometimes the motor needs a moment to reset.
When to Replace Instead of Repair
Not all flats can be fixed with a patch. Consider replacing the inner tube or tire if:
– The tube has multiple punctures or a large tear.
– The valve stem is cracked or damaged.
– The outer tire is worn, cracked, or has a bulge.
– The rim is bent or the spokes are loose.
Replacing an inner tube is often faster and more reliable than patching, especially if you’re in a hurry. Replacement tubes cost around $10–$15 and are widely available online or at bike shops.
Preventing Future Flats
An ounce of prevention is worth a pound of cure. Here’s how to reduce the risk of flats:
– **Maintain proper tire pressure:** Check PSI weekly. Underinflated tires are more prone to pinch flats.
– **Avoid debris:** Steer clear of glass, nails, and sharp objects on the road.
– **Ride smoothly:** Slow down for potholes, curbs, and rough terrain.
– **Inspect tires regularly:** Look for cuts, wear, or embedded objects.
– **Use tire liners or sealant:** Products like Slime or tire liners can help prevent small punctures.
– **Store your scooter properly:** Keep it in a dry, cool place to prevent rubber degradation.
Final Thoughts
Fixing a flat tire on your Gotrax electric scooter might seem intimidating at first, but with the right tools and a calm approach, it’s a manageable DIY task. Not only will you save money on repair shops, but you’ll also gain confidence in maintaining your scooter.
Remember: safety first, take your time, and don’t rush the process. A properly repaired tire will keep you riding smoothly for miles to come.
And if you’re ever in doubt? Don’t hesitate to reach out to Gotrax customer support or visit a local bike shop. They’re usually happy to help with scooter repairs.
Now go enjoy that ride—your Gotrax is ready to roll!