
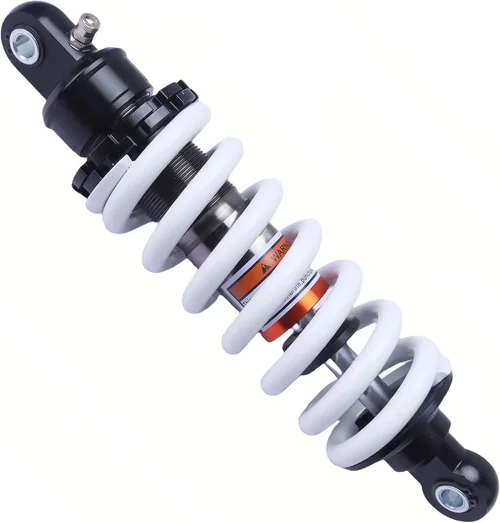
When it comes to upgrading your pit bike, few components have as dramatic an impact on ride quality, control, and overall performance as the rear shock absorber. Whether you’re a weekend warrior hitting local trails, a motocross enthusiast pushing limits on the track, or just someone who wants a smoother, more predictable ride around the backyard, choosing the right rear shock can make all the difference. Yet, with dozens of brands, models, and technical specs flooding the market in 2026, it’s easy to feel overwhelmed—especially when you’re not sure what actually matters most.
This comprehensive buying guide is designed to cut through the noise and give you everything you need to make a smart, informed decision. We’ll walk you through the critical factors that separate a mediocre shock from a game-changing upgrade, compare different types available today, highlight common pitfalls to avoid, and even share insider tips to help you get the best value for your money. By the end, you won’t just know which shocks are popular—you’ll understand exactly which one fits your riding style, budget, and bike setup.
The pit bike rear shock market has evolved significantly over the past few years. What used to be a niche aftermarket segment dominated by a handful of Japanese and European brands now features innovative offerings from global manufacturers, including Chinese OEMs stepping up their quality game and U.S.-based tuners delivering precision-engineered solutions. From basic coil-over units to fully adjustable air shocks with remote reservoirs, there’s never been more choice—or more confusion. Our goal is to demystify that landscape so you can confidently invest in a shock that enhances your ride instead of collecting dust in the garage.

What to Look for When Buying a Pit Bike Rear Shock
1. Budget & Price Range
Your budget is often the first and most practical constraint when shopping for a rear shock. However, it’s important not to view price as the sole deciding factor—instead, think of it as a boundary within which you’ll optimize value. Entry-level shocks typically start around $80–$120, while mid-range options fall between $150–$300. Premium shocks with advanced damping systems and full adjustability can cost $400–$700 or more. Luxury or race-spec units may even exceed $1,000.
While it’s tempting to go cheap, remember that a shock is a safety-critical component. A poorly performing or failing shock can lead to loss of traction, unpredictable handling, or even accidents—especially at higher speeds or on rough terrain. That said, you don’t need to break the bank to get a solid upgrade. Many riders find excellent performance in the $200–$350 range, where build quality, adjustability, and reliability converge without unnecessary frills.
2. Performance Specifications
Performance specs tell you how a shock behaves under real-world conditions. Key metrics include spring rate (measured in kg/mm or lbs/in), stroke length (how far the shock compresses), eye-to-eye length (critical for fitment), and damping characteristics (compression and rebound). These numbers aren’t just technical jargon—they directly affect how your bike handles jumps, corners, and whoops.
For example, a stiffer spring rate suits heavier riders or aggressive riding styles, while softer springs are better for lighter riders or smoother tracks. Stroke length determines how much suspension travel you get; too little and you’ll bottom out on big hits, too much and you risk damaging the linkage or frame. Most modern pit bikes have 7–9 inches of rear travel, so aim for a shock with a stroke that matches your bike’s design.
Damping is equally crucial. Compression damping controls how quickly the shock compresses under load (like hitting a bump), while rebound damping manages how fast it extends back out. Poorly tuned damping leads to a bouncy, unstable ride or a harsh, jarring feel. Look for shocks with adjustable compression and rebound—even basic knob-style adjustments can dramatically improve ride quality.
3. Build Quality & Durability
A shock’s construction determines how long it lasts and how well it performs under stress. High-quality materials like hard-anodized aluminum bodies, chrome-moly steel shafts, and premium seals prevent corrosion, wear, and fluid leaks. Cheaper shocks often use thin-walled tubing, low-grade seals, or painted finishes that chip and rust quickly—especially if you ride in wet or muddy conditions.
Pay attention to the shock body finish: matte black anodizing is common on mid-to-high-end units and offers excellent resistance to scratches and UV damage. The shaft should be polished and free of pitting—any roughness can damage seals over time. Also check the mounting hardware: forged aluminum or CNC-machined eyes are stronger and lighter than stamped steel.
Durability also ties into serviceability. Can you rebuild the shock yourself, or does it require specialized tools? Some brands offer rebuild kits, while others seal their units permanently. If you plan to ride frequently or in harsh environments, choose a shock that’s easy to maintain or has a proven track record of longevity.
4. Features & Functionality
Modern pit bike shocks come with a range of features designed to fine-tune performance. The most valuable among these are adjustability options: preload, compression, rebound, and sometimes even high/low-speed compression separation. Preload adjustment lets you set sag—the amount the suspension compresses under the rider’s weight—which is essential for proper setup.
Remote reservoirs are another premium feature. They house extra shock oil and a floating piston that separates oil from nitrogen gas, reducing heat buildup during long rides or hard sessions. This prevents “fade”—a loss of damping performance due to overheating—which is common on stock or budget shocks during extended track days.
Some shocks also include tools like built-in sag scales, clicker dials with clear markings, or even Bluetooth connectivity for real-time tuning (though this is rare in pit bikes). While not essential, these conveniences can save time and improve consistency, especially if you’re experimenting with different setups.
5. Brand Reputation
Not all shock manufacturers are created equal. Established brands like Öhlins, WP Suspension, Showa, and Kayaba have decades of racing heritage and rigorous testing behind their products. Their shocks are often used as OEM equipment on high-end dirt bikes and are trusted by professional riders worldwide.
However, several newer brands—such as Fastace, DNM, and Raptor—have gained strong followings in the pit bike community by offering near-OEM performance at a fraction of the cost. These companies often reverse-engineer proven designs and use similar materials, making them excellent value propositions.
Be cautious with no-name or ultra-cheap brands sold exclusively through online marketplaces. While some may work fine for casual use, they often lack consistent quality control, proper documentation, or customer support. Reading user forums, watching YouTube reviews, and checking retailer return rates can help you separate reputable brands from fly-by-night operations.
6. Warranty & Support
A solid warranty is a strong indicator of a manufacturer’s confidence in their product. Most reputable brands offer at least a 1-year limited warranty covering defects in materials and workmanship. Premium brands like Öhlins often provide 2–3 years, sometimes even transferable to new owners.
Customer support matters too. If your shock fails or you need help with setup, can you easily reach a technician? Do they offer rebuild services or replacement parts? Brands with U.S.-based service centers (like Fastace or Raptor) tend to respond faster than those relying on overseas distributors.
Always register your purchase and keep receipts. Some warranties require proof of professional installation or regular maintenance records. And if buying used, verify whether the warranty is still valid—many are voided after resale.
7. Compatibility & Fitment
Even the best shock in the world is useless if it doesn’t fit your bike. Pit bikes come in many sizes and configurations, and shock dimensions vary widely. The two most critical measurements are eye-to-eye length (from top mount to bottom mount) and stroke length. Measure your stock shock carefully—don’t rely solely on model numbers, as manufacturers sometimes change specs between years.
Also consider mounting style: most pit bikes use clevis mounts with bushings or bearings. Ensure the new shock uses compatible hardware. Some aftermarket shocks include adapter kits, but others require you to reuse or modify existing parts.
If you’re unsure, consult your bike’s service manual or contact the shock manufacturer directly. Many brands maintain fitment databases or offer compatibility guides online. When in doubt, buy from retailers with generous return policies.
8. User Reviews & Real-World Feedback
Spec sheets tell one story; real riders tell another. User reviews—especially detailed ones with photos, videos, or before/after comparisons—provide invaluable insights into how a shock performs outside the lab. Look for patterns: if multiple users report seal failures after 6 months, that’s a red flag. If several praise the ease of adjustment and improved cornering, that’s a good sign.
Platforms like YouTube, Reddit (r/pitbike), and specialized forums (like ThumperTalk) are goldmines for honest feedback. Pay attention to reviewers with similar bike models, riding styles, and weight to yours. A shock that works great for a 120-lb trail rider might feel too soft for a 180-lb motocross competitor.
Be skeptical of overly promotional reviews or those with no context. Genuine feedback usually includes both pros and cons—and often mentions how the shock compares to stock or other aftermarket options.
Different Types of Pit Bike Rear Shocks

Common Buying Mistakes to Avoid
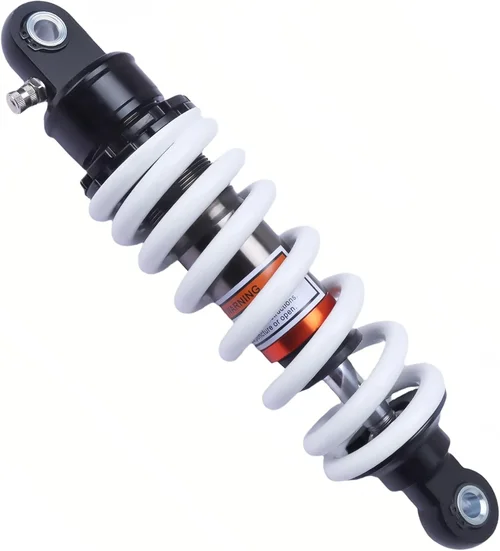
❌ Mistake: Ignoring Sag Setup
Why it’s bad: Sag—the amount your suspension compresses under your static weight—is the foundation of proper shock tuning. Without correct sag, even the best shock will perform poorly, leading to bottoming out, wallowing, or harsh rides.
What to do instead: Always set sag after installation. For most pit bikes, target 25–30% of total travel. Use a tape measure or sag tool, and adjust preload accordingly. Many quality shocks include sag markings or instructions.
❌ Mistake: Buying Based Solely on Price
Why it’s bad: The cheapest shock may save you $50 upfront but cost you in performance, durability, and safety. Conversely, overspending on features you’ll never use wastes money.
What to do instead: Define your priorities (e.g., “I need adjustability for jumping” or “I want something that lasts 2 seasons”) and shop within that framework. Value beats price every time.
❌ Mistake: Overlooking Compatibility
Why it’s bad: A shock that’s too long or short can damage your bike’s linkage, frame, or swingarm. Incorrect mounting hardware can cause premature wear or failure.
What to do instead: Double-check eye-to-eye length, stroke, and mount type against your stock unit. When in doubt, consult the manufacturer or a trusted mechanic.
❌ Mistake: Skipping Break-In Period
Why it’s bad: New shocks need a break-in period (usually 2–5 hours of moderate riding) to allow seals to seat and oil to circulate properly. Riding aggressively right away can cause leaks or poor damping.
What to do instead: Follow the manufacturer’s break-in instructions. Start with light trail rides and gradually increase intensity.
❌ Mistake: Neglecting Maintenance
Why it’s bad: Dirt, mud, and moisture degrade seals and internals over time. A neglected shock loses performance and may fail prematurely.
What to do instead: Clean your shock after every ride, inspect for leaks or damage, and service it annually (or per manufacturer recommendations). Rebuild kits are affordable and extend lifespan significantly.
❌ Mistake: Assuming All Adjustments Are Equal
Why it’s bad: Compression and rebound damping affect different aspects of ride quality. Turning both knobs randomly won’t improve performance—it might make things worse.
What to do instead: Learn what each adjustment does. Start with factory settings, then tweak one at a time while testing. Keep a log of changes and results.
❌ Mistake: Buying Used Without Inspection
Why it’s bad: Used shocks may have hidden damage, worn seals, or incorrect spring rates. You can’t always tell by looking.
What to do instead: If buying used, ask for service history, photos of internals (if opened), and compression/rebound feel. Better yet, buy from someone you trust or have it inspected by a shop.
Budget Guidelines: How Much Should You Spend?
Entry-Level ($80–$150): This tier includes basic coil-over shocks from brands like DNM or generic OEM replacements. They’re fine for casual riding, light trails, or as a temporary fix. Expect minimal adjustability, average build quality, and limited lifespan under heavy use. Ideal for kids’ bikes or infrequent riders.
Mid-Range ($150–$350): The sweet spot for most riders. Shocks here—like Fastace Stage 3, Raptor R3, or Showa rebuildables—offer full adjustability (preload, compression, rebound), better materials, and solid reliability. They’re suitable for motocross, enduro, and aggressive trail riding. Many include rebuild kits and strong warranties.
Premium ($350–$700): Designed for serious enthusiasts and racers. These shocks feature remote reservoirs, high/low-speed damping, and precision machining. Brands like Öhlins, WP, and Elka dominate this space. Expect exceptional performance, longevity, and support—but also higher maintenance demands.
Luxury ($700+): Top-tier units with cutting-edge tech: electronic damping, data logging, or custom valving. Mostly used by pro riders or collectors. Overkill for 99% of pit bike owners, but worth considering if you’re building a race-only machine or demand absolute perfection.
Expert Tips for Getting the Best Deal
- Shop during off-season: Prices drop in winter (November–February) when demand is low. Many retailers clear inventory before new models arrive.
- Bundle with other parts: Some shops offer discounts when you buy shocks with springs, linkage kits, or installation services.
- Check manufacturer rebates: Brands like Fastace and Raptor occasionally run mail-in rebates or referral programs.
- Buy from authorized dealers: Avoid counterfeit shocks by purchasing through verified retailers. You’ll also get full warranty coverage.
- Negotiate on used gear: Private sellers often accept reasonable offers, especially if the shock has been sitting unused.
- Join rider groups: Facebook groups, forums, and local clubs often have members selling quality used parts at fair prices.
- Consider rebuildable shocks: Instead of replacing, rebuild your current shock for 1/3 the cost of a new one—if it’s a reputable model.
- Read return policies carefully: Some retailers charge restocking fees or won’t accept returns on installed items. Choose stores with 30-day no-hassle returns.

Frequently Asked Questions
Q: Can I install a rear shock myself?
A: Yes, most pit bike shocks can be installed with basic tools (socket set, torque wrench, Allen keys). However, proper sag setup and alignment are critical. If you’re unsure, have a mechanic do it—especially if your bike has a linkage system.
Q: How often should I service my shock?
A: Clean it after every ride. Full service (seal replacement, oil change) every 20–30 hours of riding or annually, whichever comes first. Race bikes may need service after every event.
Q: Will a better shock improve my lap times?
A: Absolutely—if your current shock is limiting traction or control. A well-tuned shock helps maintain tire contact, reduces rider fatigue, and improves corner exit speed. But don’t expect miracles; rider skill matters more.
Q: Are air shocks better than coil shocks?
A: Air shocks offer infinite spring rate adjustment via air pressure, making them ideal for riders who share bikes or change terrain often. Coil shocks are simpler, more durable, and often cheaper. Choose based on your needs.
Q: What’s the difference between compression and rebound damping?
A: Compression damping slows how fast the shock compresses (e.g., hitting a bump). Rebound damping controls how fast it extends back out. Too little rebound causes bouncing; too much makes the bike feel harsh.
Q: Can I use a motorcycle shock on my pit bike?
A: Generally no—motorcycle shocks are too long, heavy, and have different mounting points. Pit bike shocks are engineered for shorter wheelbases and lighter weights.
Q: How do I know if my shock is failing?
A: Signs include oil leaks, excessive bouncing, bottoming out on small bumps, or a harsh ride. If the shock feels “dead” or unresponsive, it likely needs service or replacement.
Q: Do I need a new spring with my shock?
A: Only if your weight or riding style requires a different spring rate. Most aftermarket shocks come with springs rated for average riders (150–180 lbs). Heavier riders should upgrade to a stiffer spring.
Q: Are Chinese shocks reliable?
A: It depends. Brands like Fastace and DNM (both Chinese-made) have excellent reputations and are used by pros. Avoid no-name shocks with no reviews or documentation.
Q: What’s sag, and why does it matter?
A: Sag is the amount your suspension compresses under your static weight. Proper sag (25–30% of travel) ensures the shock works through its optimal range, improving traction and control.
Our Final Recommendations
Best for Budget-Conscious Buyers: DNM ADS Coil-Over Shock – At under $120, it offers surprising adjustability and decent build quality. Great for beginners or as a backup shock.
Best Overall Value: Fastace Stage 3 Rear Shock – Priced around $250, it includes full adjustability, a rebuildable design, and excellent user feedback. Perfect for 80% of riders.
Best Premium Option: Öhlins TTX22 Pit Bike Shock – With a remote reservoir and race-proven valving, this $650 shock delivers unmatched performance for serious competitors.
Best for Beginners: Raptor R3 Adjustable Shock – Easy to set up, includes clear instructions and sag tool. Around $220, it’s a confidence-boosting first upgrade.
Best for Advanced Users: WP Suspension XPLOR Pro Rear Shock – Features separate high/low-speed compression and tool-free adjustments. Ideal for tuners and racers who demand precision.
Conclusion: Making the Right Choice
Choosing the right pit bike rear shock isn’t just about picking the shiniest part or the cheapest option—it’s about matching a critical component to your riding style, weight, terrain, and long-term goals. We’ve covered everything from budget considerations and performance specs to common mistakes and expert buying strategies. Now it’s your turn to apply that knowledge.
Remember: the best shock is the one that helps you ride safer, faster, and more confidently. Don’t rush the decision. Measure twice, read reviews, and when possible, test before you buy. And once you’ve made your choice, take the time to set it up properly—your bike (and your body) will thank you.
Whether you’re upgrading for the first time or replacing a worn-out unit, investing in a quality rear shock is one of the smartest moves you can make. So gear up, hit the track, and enjoy the ride—because with the right shock, every jump feels smoother, every corner tighter, and every session more rewarding.