
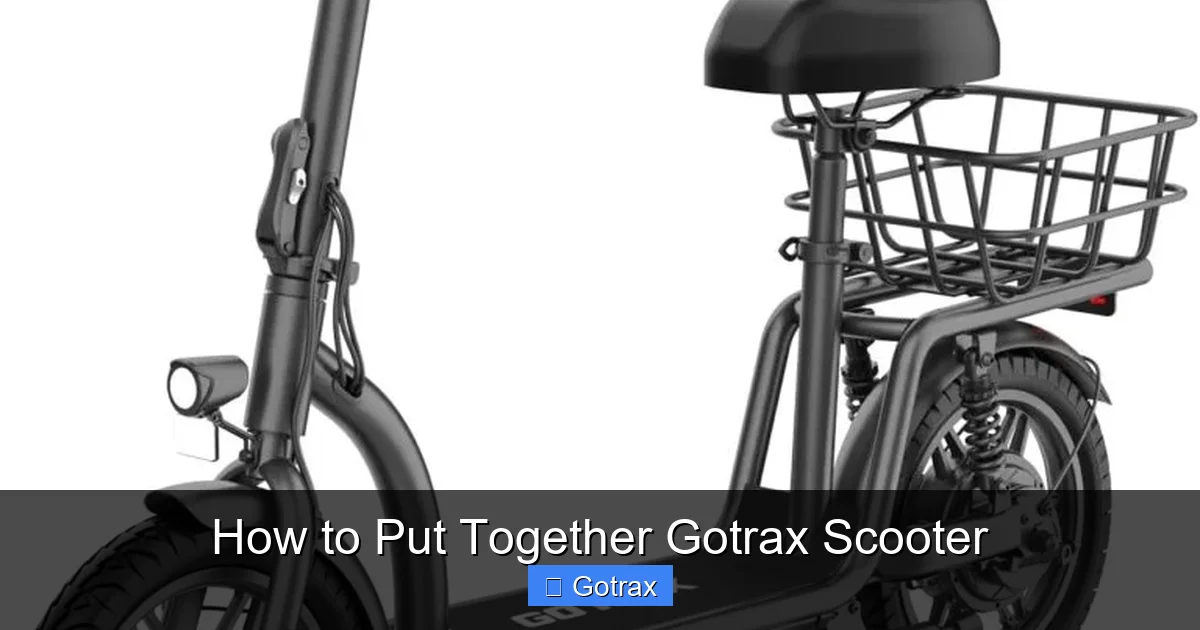
This guide walks you through how to put together a Gotrax scooter quickly and safely, even if you’re a first-time user. With clear steps, helpful tips, and troubleshooting advice, you’ll be riding in no time.
Key Takeaways
- Unbox carefully: Remove all parts gently and check for damage before starting assembly.
- Use the right tools: Most Gotrax scooters require only an Allen wrench and screwdriver—usually included.
- Attach the handlebar first: This is the most critical step and sets the foundation for the rest of the build.
- Secure all bolts tightly: Loose parts can cause safety issues—double-check tightness after assembly.
- Charge before first ride: Always fully charge the battery before your first use to maximize performance.
- Test ride in a safe area: Start slow on flat, open ground to ensure everything works properly.
- Keep the manual handy: Refer back to it for maintenance tips and warranty info.
How to Put Together Gotrax Scooter: A Complete Step-by-Step Guide
So, you’ve just unboxed your brand-new Gotrax scooter—congratulations! Whether it’s the Gotrax GXL, G4, G2, or another model, you’re about to enjoy a fun, eco-friendly way to get around. But before you hit the pavement, you’ll need to put it together. Don’t worry—this isn’t as hard as it looks. In fact, most Gotrax scooters are designed for quick and easy assembly, often taking less than 30 minutes.
This guide will walk you through how to put together a Gotrax scooter from start to finish. We’ll cover everything from unboxing to your first test ride, with practical tips and troubleshooting advice along the way. No mechanical experience? No problem. Just follow these simple steps, and you’ll be gliding down the sidewalk in no time.
What You’ll Need Before You Start
Before diving into assembly, make sure you have the right tools and a clean, well-lit workspace. Most Gotrax scooters come with the necessary tools, but it’s good to double-check.
Tools Included (Usually)
- Allen wrench (hex key) – typically 4mm or 5mm
- Phillips or flathead screwdriver (sometimes included)
- Spare fuses or connectors (model-dependent)
Optional but Helpful
- A second Allen wrench or socket set for faster tightening
- A soft cloth to protect the scooter’s finish
- A small container to hold screws and bolts (so you don’t lose them)
- A fully charged phone to watch a video tutorial if needed
Workspace Tips
Choose a flat, open area like a garage, driveway, or large room. Avoid assembling outdoors if it’s windy or rainy—small parts can easily get lost or damaged. Lay down a towel or mat to protect the scooter’s deck and components.
Step 1: Unbox Your Gotrax Scooter
The first step in how to put together a Gotrax scooter is carefully unboxing it. Gotrax scooters are typically packed securely to prevent damage during shipping, but it’s important to handle everything with care.
Open the Box Gently
Use scissors or a box cutter to open the top flaps. Avoid stabbing into the box—there might be parts just beneath the surface. Remove the top layer of packaging, which often includes foam inserts and plastic wrap.
Identify All Components
Most Gotrax scooters come with the following:
- Main scooter deck (with wheels and motor)
- Handlebar assembly (folded or detached)
- Battery (usually pre-installed, but sometimes separate)
- Charger
- User manual and warranty card
- Tool kit (Allen wrench, screws, etc.)
- Optional: phone mount, lights, or accessories
Check for Damage
Inspect each part for cracks, dents, or loose components. If you notice anything unusual—like a cracked deck or a bent handlebar—contact Gotrax customer support immediately. Don’t assemble a damaged scooter—it could be unsafe.
Keep Everything Organized
Place screws, bolts, and small parts in a bowl or tray. Label them if needed (e.g., “handlebar bolts” or “deck screws”). This prevents confusion later.
Step 2: Attach the Handlebar
The handlebar is the most important part of the assembly process. It controls steering, braking, and throttle, so it must be installed correctly.
Locate the Handlebar Stem
On most Gotrax models, the handlebar is folded down or detached. You’ll see a vertical tube (the stem) that inserts into the front fork of the scooter.
Insert the Handlebar into the Fork
Lift the handlebar and slide the stem into the front fork opening. Make sure it goes in straight—don’t force it. If it doesn’t slide in easily, check for obstructions or misalignment.
Secure with the Clamp or Bolts
Once the handlebar is in place, you’ll need to tighten it. There are two common methods:
- Clamp-style: A quick-release lever or bolt holds the handlebar in place. Tighten it using the Allen wrench until it’s snug but not over-tightened.
- Bolt-style: Some models use 2–4 bolts on the side of the stem. Insert the bolts and tighten them evenly in a crisscross pattern to avoid warping.
Check Alignment
Stand in front of the scooter and look down the handlebar. It should be perfectly straight with the front wheel. If it’s crooked, loosen the bolts slightly, adjust, and retighten.
Test the Steering
Turn the handlebar left and right. It should move smoothly without wobbling. If it feels loose, double-check the tightness of the bolts.
Step 3: Install the Seat (If Applicable)
Not all Gotrax scooters have seats—many are stand-up models. But if you have a Gotrax G4 or another seated model, this step is essential.
Locate the Seat Post
The seat post is a metal tube that inserts into a socket on the scooter’s deck. It usually comes pre-attached to the seat.
Insert the Seat Post
Slide the post into the socket. Most models have a height adjustment mechanism—pull up to extend, push down to lower.
Secure the Seat
Once at your desired height, tighten the clamp or bolt that holds the seat post in place. Use the Allen wrench to ensure it’s tight enough that the seat doesn’t slip when you sit.
Test for Stability
Sit on the seat gently. It shouldn’t wobble or sink. If it does, tighten the clamp further or check for damage to the post or socket.
Step 4: Attach the Rear Fender (If Detached)
Some Gotrax models ship with the rear fender (the plastic cover over the back wheel) detached to save space.
Locate the Fender and Mounting Points
The fender usually attaches to the deck near the rear wheel. You’ll see pre-drilled holes or clips.
Align and Secure
Place the fender over the wheel and align it with the mounting holes. Insert the provided screws and tighten with a screwdriver or Allen wrench. Don’t overtighten—plastic can crack.
Check Clearance
Spin the rear wheel to make sure the fender doesn’t rub against the tire. If it does, loosen the screws slightly and adjust the position.
Step 5: Install the Battery (If Not Pre-Installed)
Most Gotrax scooters come with the battery already installed, but some models (especially older ones) may require you to insert it.
Locate the Battery Compartment
This is usually under the deck, behind a removable panel. Use a screwdriver to remove the cover.
Insert the Battery
Slide the battery into the compartment, aligning the connectors. You’ll hear a click when it’s properly seated.
Secure the Cover
Replace the panel and tighten the screws. Make sure it’s flush and secure.
Charge the Battery
Before your first ride, plug in the charger and let the battery charge fully. This usually takes 4–6 hours. A full charge ensures optimal performance and battery life.
Step 6: Attach Accessories (Optional)
Gotrax offers several accessories that can enhance your ride. These are easy to install and often snap or screw into place.
Phone Mount
Most mounts attach to the handlebar. Slide it onto the bar and tighten the clamp. Make sure your phone fits securely before riding.
LED Lights
Some models have built-in lights, but you can add aftermarket ones. Stick them to the deck or handlebar using adhesive or zip ties.
Basket or Bag
If your scooter has a front basket, it usually clips onto the handlebar stem. Ensure it’s tight and doesn’t interfere with steering.
Step 7: Final Safety Check
Before you ride, do a thorough safety inspection. This is a crucial step in how to put together a Gotrax scooter safely.
Check All Bolts and Screws
Go over every bolt—especially on the handlebar, deck, and wheels. Use your Allen wrench to tighten any that feel loose.
Inspect the Tires
Make sure the tires are properly inflated (if pneumatic) or free of cracks (if solid). Spin each wheel to check for wobbling or rubbing.
Test the Brakes
Squeeze the brake lever. The rear wheel should stop quickly. If it feels spongy or doesn’t engage, check the brake cable or contact support.
Check the Throttle
Twist or press the throttle gently. The motor should respond smoothly. If it’s unresponsive, ensure the battery is charged and connections are secure.
Verify Lights and Display
Turn on the scooter and check that the display shows battery level and speed. Test the headlight and taillight if equipped.
Step 8: Take Your First Test Ride
Now that your Gotrax scooter is fully assembled, it’s time to ride—safely.
Choose a Safe Location
Start in a quiet, flat area like a parking lot or empty sidewalk. Avoid traffic, hills, or uneven terrain for your first ride.
Wear Safety Gear
Always wear a helmet, and consider knee and elbow pads, especially if you’re new to scooters.
Start Slow
Stand on the deck with one foot, push off with the other, and gently apply the throttle. Get a feel for the balance and braking.
Practice Turning and Stopping
Make wide turns at first. Practice braking gradually—don’t slam the brakes, as this can cause skidding.
Listen for Unusual Noises
If you hear grinding, clicking, or rattling, stop and inspect the scooter. It could indicate a loose part or misalignment.
Troubleshooting Common Assembly Issues
Even with careful assembly, problems can arise. Here’s how to fix the most common ones.
Handlebar Wobbles or Feels Loose
This is usually due to under-tightened bolts. Use the Allen wrench to tighten the stem bolts evenly. If the problem persists, check for cracks in the stem or fork.
Scooter Won’t Turn On
First, ensure the battery is charged. Check the power button and make sure the battery is properly seated. If it still doesn’t turn on, try resetting the scooter by turning it off, waiting 10 seconds, and turning it back on.
Throttle Doesn’t Respond
Check the throttle connection under the handlebar. It may have come loose during shipping. Reconnect it and test again.
Brake Feels Weak
Adjust the brake cable tension using the barrel adjuster near the lever. Turn it counterclockwise to tighten. If that doesn’t work, the brake pads may need replacement.
Scooter Makes a Rattling Noise
This is often caused by loose bolts or accessories. Go over every screw and tighten as needed. Check the fender, basket, and phone mount.
Battery Drains Quickly
Ensure the battery was fully charged before first use. Avoid riding in cold weather, as it reduces battery efficiency. If the problem continues, the battery may be defective—contact Gotrax support.
Maintenance Tips After Assembly
Once your scooter is assembled and riding smoothly, regular maintenance will keep it in top shape.
Clean Regularly
Wipe down the deck and handlebar with a damp cloth. Avoid spraying water directly on the motor or battery.
Lubricate Moving Parts
Apply a small amount of bike lubricant to the brake cables and folding mechanism every few months.
Check Tire Pressure (If Applicable)
Pneumatic tires should be inflated to the recommended PSI (usually 35–50 PSI). Use a bike pump with a pressure gauge.
Store Properly
Keep your scooter in a dry, cool place. Avoid leaving it in direct sunlight or extreme temperatures.
Update Firmware (If Supported)
Some Gotrax models allow firmware updates via a smartphone app. Check the Gotrax website for updates.
Conclusion
Putting together a Gotrax scooter is easier than you might think. With the right tools, a little patience, and this step-by-step guide, you can have your scooter ready to ride in under 30 minutes. From unboxing and attaching the handlebar to charging the battery and taking your first test ride, every step is designed to be simple and safe.
Remember, the key to a successful assembly is attention to detail. Tighten all bolts, charge the battery fully, and always do a safety check before riding. And if you run into any issues, don’t hesitate to reach out to Gotrax customer support—they’re known for being helpful and responsive.
Now that you know how to put together a Gotrax scooter, you’re ready to enjoy all the benefits of eco-friendly, convenient transportation. Whether you’re commuting to work, running errands, or just cruising around the neighborhood, your Gotrax scooter is a reliable and fun way to get there.
So grab your helmet, charge up, and hit the road—your adventure starts now!