
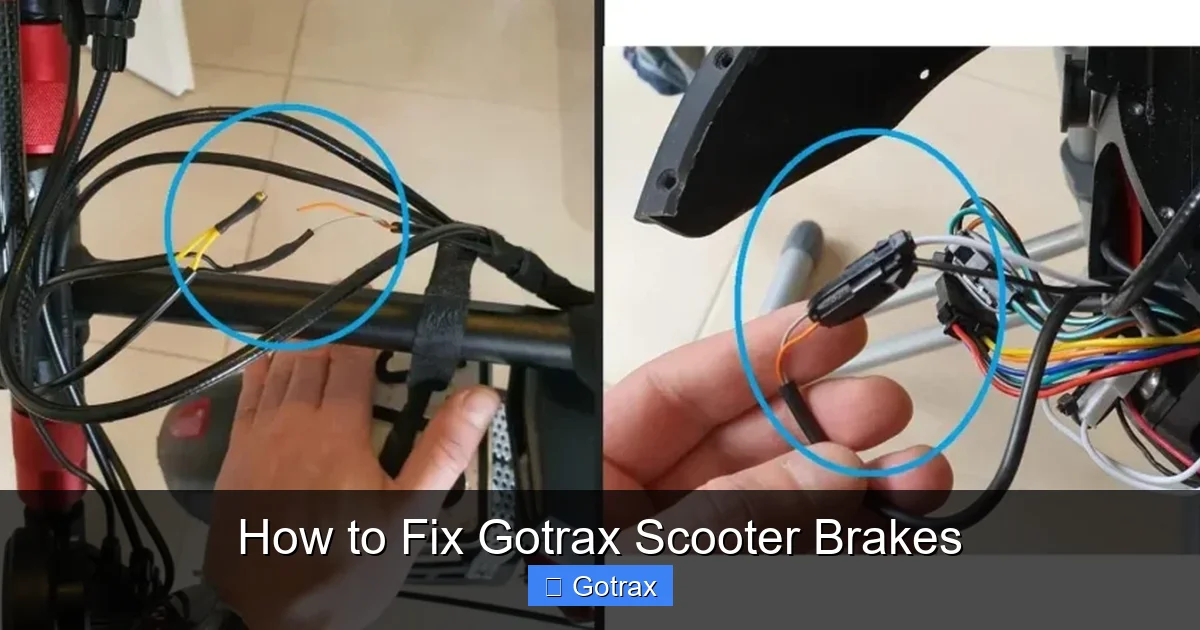
Gotrax scooter brakes not working properly? This guide walks you through diagnosing, fixing, and maintaining your scooter’s braking system. From loose cables to worn brake pads, we cover everything you need to restore safe, responsive stopping power.
Key Takeaways
- Regular inspection prevents brake failure: Check your Gotrax scooter brakes every few weeks for wear, alignment, and responsiveness.
- Adjust brake cable tension for better performance: Loose cables are a common cause of weak braking—tighten them using the barrel adjuster or by repositioning the cable.
- Replace worn brake pads promptly: Thin or glazed pads reduce stopping power; swap them out with compatible replacements.
- Clean brake components to avoid slippage: Dirt, grease, and moisture can reduce friction—clean rotors and pads with isopropyl alcohol.
- Lubricate moving parts, not braking surfaces: Apply lubricant only to pivot points and cables—never on brake pads or rotors.
- Test brakes after every repair: Always ride slowly in a safe area to confirm brakes engage smoothly and stop effectively.
- Know when to seek professional help: If issues persist after troubleshooting, consult a certified technician or Gotrax support.
How to Fix Gotrax Scooter Brakes: A Complete Step-by-Step Guide
Gotrax electric scooters are popular for their affordability, portability, and smooth rides—but like any vehicle, they require regular maintenance to stay safe and functional. One of the most critical components to monitor is the braking system. Whether you’re dealing with spongy levers, squeaky brakes, or complete loss of stopping power, knowing how to fix Gotrax scooter brakes can save you time, money, and potential accidents.
In this comprehensive guide, you’ll learn how to diagnose common brake issues, perform essential repairs, and maintain your Gotrax scooter’s braking system for long-term reliability. We’ll cover everything from simple cable adjustments to replacing brake pads and cleaning components. By the end, you’ll have the confidence and know-how to keep your scooter stopping safely every time you hit the road.
Understanding Your Gotrax Scooter’s Braking System
Before diving into repairs, it’s important to understand how your Gotrax scooter’s brakes work. Most Gotrax models—such as the GXL, G2, G3, and G4—use a combination of mechanical disc brakes and electronic regenerative braking. The rear wheel typically features a hand-operated disc brake controlled by a lever on the left handlebar, while the front may use regenerative braking (which slows the motor when you release the throttle) or a secondary mechanical brake depending on the model.
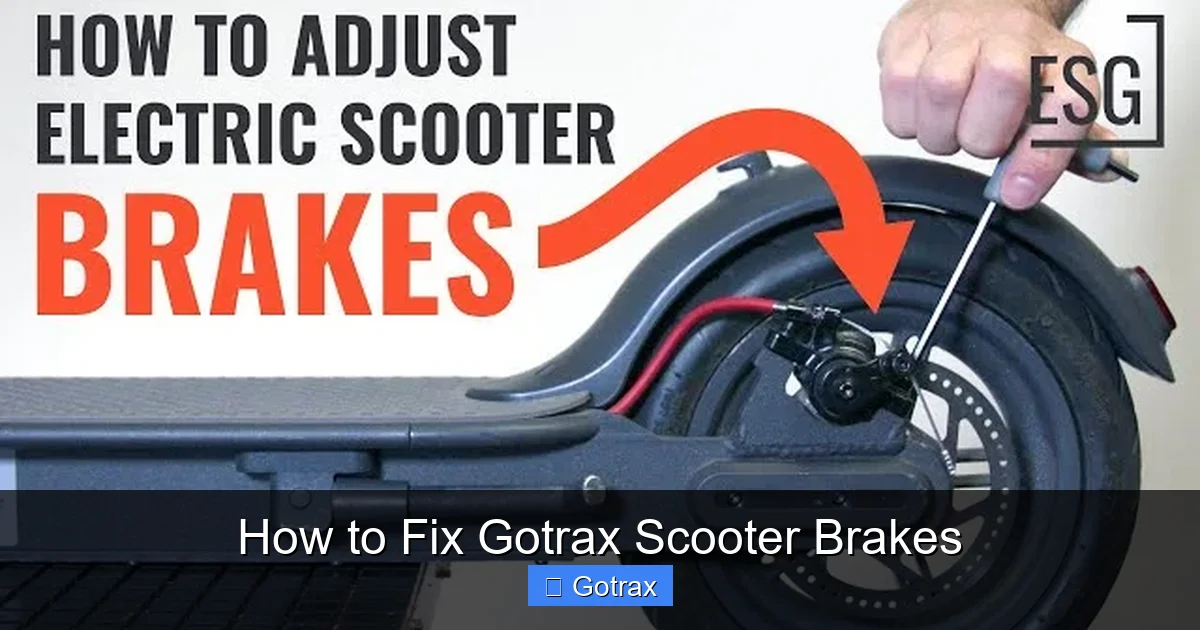
Visual guide about How to Fix Gotrax Scooter Brakes
Image source: i.ytimg.com
The disc brake system consists of three main parts:
- Brake lever: Located on the handlebar, it activates the brake when squeezed.
- Brake cable: Transfers force from the lever to the caliper.
- Brake caliper and pads: Clamp onto the rotor (disc) to create friction and slow the wheel.
Understanding these components will help you pinpoint where the problem lies. For example, if the lever feels loose or doesn’t return properly, the issue might be with the cable or spring. If the scooter doesn’t stop well even when the lever is fully squeezed, the pads or rotor may be worn or dirty.
Tools and Supplies You’ll Need
Before starting any repair, gather the right tools and materials. Most Gotrax brake fixes require only basic items you might already have at home. Here’s a checklist:
- Phillips and flathead screwdrivers
- Allen wrench set (typically 2mm to 5mm)
- Needle-nose pliers
- Adjustable wrench or socket set
- Isopropyl alcohol and clean rags
- Replacement brake pads (if needed)
- Brake cable lubricant (optional)
- Brake cleaner spray (optional but helpful)
- Torque wrench (for precise tightening, optional)
Always work in a well-lit, clean area with enough space to lay out your tools. If you’re new to scooter maintenance, consider watching a short video tutorial alongside this guide to visualize the steps.
Step 1: Diagnose the Brake Problem
The first step in fixing your Gotrax scooter brakes is identifying what’s wrong. Brake issues can range from minor adjustments to full component replacements. Here’s how to troubleshoot common problems:
Check Brake Lever Feel
Squeeze the brake lever. It should feel firm and return smoothly when released. If it feels spongy, loose, or sticks in place, there may be air in the system (unlikely on mechanical brakes) or a problem with the cable or spring.
Test Braking Performance
Ride your scooter at a slow speed (under 5 mph) and gently apply the brake. The scooter should slow down and stop within a few feet. If it takes longer or the wheel locks up unevenly, the pads may be worn or misaligned.
Inspect Brake Pads
Look at the brake pads through the caliper. They should have at least 1–2mm of material remaining. If they appear thin, cracked, or glazed (shiny and smooth), they need replacement.
Examine the Rotor
The rotor (disc) should be clean, flat, and free of deep scratches or warping. A warped rotor can cause pulsing or vibration when braking. Spin the wheel by hand and watch the rotor—if it wobbles noticeably, it may need straightening or replacement.
Check Cable Tension
Pull the brake lever slightly. There should be a small amount of free play (about 1–2mm) before resistance kicks in. If the lever pulls too close to the handlebar or feels too tight, the cable tension needs adjustment.
Step 2: Adjust Brake Cable Tension
One of the most common fixes for Gotrax scooter brakes is adjusting the cable tension. Over time, cables can stretch or loosen, reducing braking effectiveness. Fortunately, this is a quick and easy fix.
Locate the Barrel Adjuster
Look for a small cylindrical knob where the brake cable enters the lever or caliper. This is the barrel adjuster. Turning it counterclockwise loosens the cable (increasing tension), while turning it clockwise tightens it (reducing tension).
Make Small Adjustments
Turn the barrel adjuster a quarter-turn at a time. After each adjustment, squeeze the brake lever to test the feel. You want the lever to engage the brake firmly about halfway through its travel—not too close to the handlebar, not too loose.
Fine-Tune the Cable Anchor
If the barrel adjuster is maxed out and the brake still feels loose, you may need to adjust the cable at the caliper. Use pliers to loosen the cable anchor bolt on the caliper, pull the cable tighter, and retighten the bolt. Be careful not to overtighten, as this can damage the cable or strip the bolt.
Test and Repeat
After adjusting, spin the wheel and apply the brake. The pads should contact the rotor evenly without dragging. If one pad touches before the other, you may need to realign the caliper (see Step 4).
Step 3: Clean Brake Components
Dirty or contaminated brakes can significantly reduce performance. Oil, grease, dirt, and moisture can coat the pads and rotor, leading to slippage, noise, and poor stopping power.
Remove Dirt and Debris
Use a clean rag to wipe down the rotor and caliper. Remove any visible dirt, mud, or debris. Avoid using water unless necessary—excess moisture can cause rust or reduce friction.
Clean with Isopropyl Alcohol
Spray isopropyl alcohol (at least 70%) onto a clean rag and wipe the rotor thoroughly. This removes oils and residues that reduce friction. For the brake pads, gently scrub the surface with the alcohol-soaked rag. Do not soak the pads—excess liquid can seep into the backing plate and weaken adhesion.
Avoid Brake Cleaners with Additives
While brake cleaner sprays are effective, some contain additives that can leave residues. If you use one, choose a non-chlorinated, residue-free formula and follow the manufacturer’s instructions.
Let Everything Dry
Allow the rotor and pads to air dry completely before reassembling or riding. Never ride with wet brakes—this can cause temporary loss of stopping power.
Step 4: Align the Brake Caliper
Misaligned calipers cause uneven pad contact, leading to noise, reduced braking, and premature wear. Proper alignment ensures both pads grip the rotor evenly.
Loosen the Caliper Bolts
Use an Allen wrench to slightly loosen the two bolts that secure the caliper to the frame or fork. Don’t remove them completely—just enough to allow the caliper to move.
Squeeze the Brake Lever
While holding the brake lever firmly, gently wiggle the wheel back and forth. This centers the caliper over the rotor. The pads should now be equidistant from the rotor on both sides.
Tighten the Bolts
While still holding the lever, tighten the caliper bolts evenly in a crisscross pattern. Use a torque wrench if possible (typically 6–8 Nm) to avoid over-tightening.
Release and Test
Release the brake lever and spin the wheel. The rotor should spin freely without rubbing against the pads. If you hear a slight squeal or see light contact, make minor adjustments by tapping the caliper left or right with a rubber mallet.
Step 5: Replace Worn Brake Pads
When brake pads wear down, they must be replaced to maintain safety. Continuing to ride with thin pads can damage the rotor and reduce braking efficiency.
Identify Pad Wear
Inspect the pads through the caliper window. If the friction material is less than 1mm thick, or if you can see the metal backing plate, it’s time for new pads.
Remove the Old Pads
Use an Allen wrench to remove the retaining pin or bolt that holds the pads in place. Slide the old pads out of the caliper. Note their orientation—most pads are directional and must be installed correctly.
Install New Pads
Insert the new pads into the caliper, ensuring they match the original position. Secure them with the retaining pin or bolt. Some pads come with washers or springs—make sure these are reinstalled properly.
Bed in the New Pads
New pads need to be “bedded in” to ensure optimal performance. Ride your scooter at a moderate speed and apply the brake gently several times, gradually increasing pressure. Avoid hard stops during the first few rides to prevent glazing.
Step 6: Lubricate Moving Parts (Carefully!)
Lubrication is essential for smooth brake operation, but it must be applied correctly. Never lubricate the brake pads, rotor, or any surface that creates friction. Doing so can cause brake failure.
Lubricate the Brake Cable
If the cable feels stiff or sticky, apply a few drops of cable lubricant to the cable where it enters the housing. Work the lever back and forth to distribute the lubricant.
Lubricate Pivot Points
Apply a small amount of grease or light oil to the pivot points on the brake lever and caliper. This ensures smooth movement and prevents rust.
Avoid Over-Lubrication
Use lubricants sparingly. Excess grease can attract dirt and debris, leading to buildup and reduced performance.
Troubleshooting Common Brake Issues
Even after following the steps above, you may encounter persistent problems. Here’s how to address them:
Brake Lever Feels Spongy
This is usually due to loose cable tension or a worn cable. Adjust the barrel adjuster or replace the cable if it’s frayed or stretched.
Brake Squeaks or Squeals
Common causes include dirty pads, glazed surfaces, or misalignment. Clean the pads and rotor, realign the caliper, and bed in new pads if necessary.
Brake Drags or Won’t Release
This can happen if the cable is too tight, the caliper is misaligned, or the return spring is weak. Adjust cable tension, realign the caliper, or replace the spring.
Brake Loses Power Over Time
If brakes work initially but fade during a ride, the pads may be overheating or contaminated. Let the scooter cool down and clean the components. Consider upgrading to higher-performance pads if you ride frequently or in hilly areas.
Regenerative Brake Not Working
On models with electronic braking, check the battery level and throttle connection. A low battery or faulty sensor can disable regenerative braking. Consult your user manual or contact Gotrax support.
Preventive Maintenance Tips
Regular maintenance is the best way to avoid brake problems. Follow these tips to keep your Gotrax scooter in top condition:
- Inspect brakes weekly: Check pad thickness, cable tension, and rotor condition.
- Clean after wet or dirty rides: Moisture and grime accelerate wear.
- Avoid harsh braking: Gradual stops reduce pad and rotor wear.
- Store in a dry place: Prevent rust and corrosion.
- Replace parts proactively: Don’t wait for complete failure—replace pads and cables before they wear out.
When to Seek Professional Help
While most brake issues can be fixed at home, some problems require expert attention. Contact a certified technician or Gotrax support if:
- The rotor is severely warped or cracked.
- The caliper is leaking fluid (on hydraulic models).
- You’re unsure about disassembling components.
- Brake problems persist after multiple repairs.
Gotrax offers customer support and replacement parts through their official website. Always use genuine or compatible parts to ensure safety and warranty compliance.
Conclusion
Fixing Gotrax scooter brakes doesn’t have to be intimidating. With the right tools, a little patience, and this step-by-step guide, you can restore your scooter’s braking performance and ride with confidence. Remember, brakes are your first line of defense in an emergency—never ignore warning signs like squeaking, sponginess, or reduced stopping power.
By performing regular inspections, making timely adjustments, and replacing worn parts, you’ll extend the life of your scooter and ensure every ride is safe and enjoyable. Whether you’re commuting to work, cruising around the neighborhood, or exploring new trails, well-maintained brakes make all the difference. So grab your tools, give your Gotrax some TLC, and get back on the road—safely.