
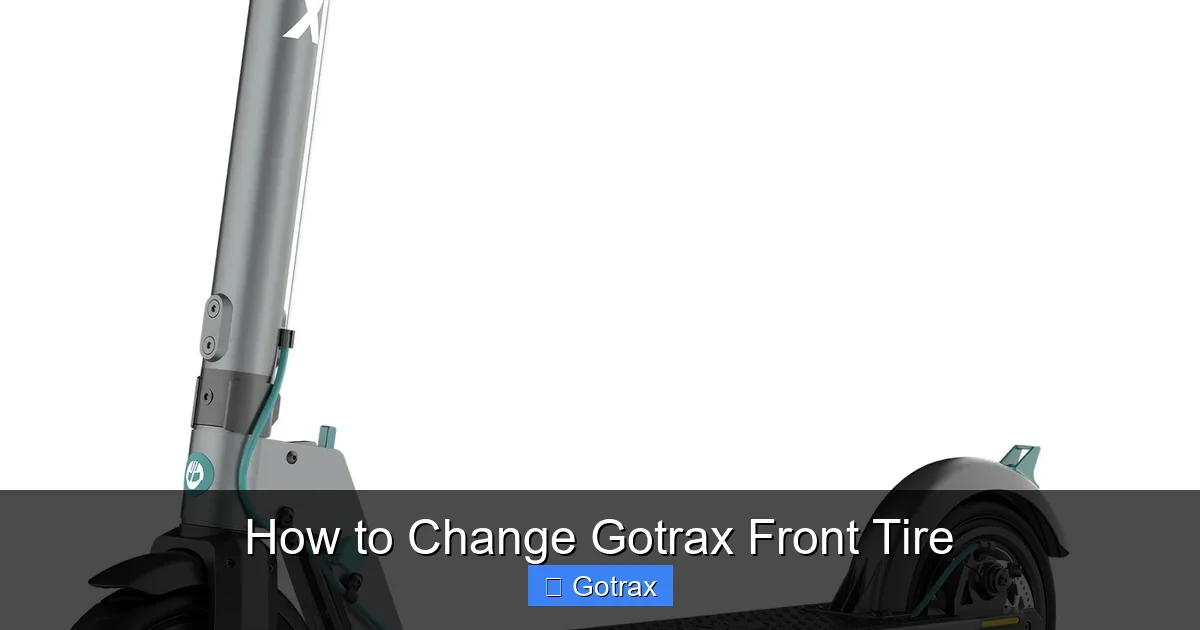
Changing a Gotrax front tire might seem tricky, but with the right tools and guidance, it’s totally doable. This guide walks you through every step—from removing the wheel to inflating the new tire—so you can get back on the road quickly and safely.
Key Takeaways
- Always wear safety gear: Protect your hands and eyes when working with tires and tools.
- Use the right tools: A tire lever, wrench, pump, and valve core tool make the job much easier.
- Check tire compatibility: Make sure your replacement tire matches your Gotrax model’s size and type.
- Inspect the inner tube and rim: Look for damage or debris that could cause future flats.
- Inflate gradually: Add air slowly and check the tire bead seating to avoid overinflation.
- Test before riding: Spin the wheel and take a short test ride to ensure everything is secure.
- Keep spare parts handy: Store a spare tube, patch kit, and basic tools for emergencies.
How to Change Gotrax Front Tire: A Complete Step-by-Step Guide
Gotrax electric scooters are built for fun, convenience, and daily commuting. But like any vehicle with wheels, they’re not immune to flats, wear, or punctures. If you’ve noticed your Gotrax front tire is losing air, wobbling, or completely flat, it’s time for a change. Don’t worry—you don’t need to be a mechanic to do this. With a little patience and the right approach, you can replace your Gotrax front tire at home in under an hour.
This guide will walk you through the entire process, from diagnosing the problem to installing a new tire and testing your scooter. Whether you’re dealing with a punctured inner tube or a worn-out tire, we’ve got you covered. We’ll also share practical tips, troubleshooting advice, and safety reminders to make sure your repair goes smoothly.
By the end of this guide, you’ll not only know how to change a Gotrax front tire, but you’ll also feel confident handling future maintenance. Let’s get started!
Why You Might Need to Change Your Gotrax Front Tire
Visual guide about How to Change Gotrax Front Tire
Image source: cdn.shopify.com
Before diving into the how-to, it’s helpful to understand why front tire changes are necessary. The front tire on your Gotrax scooter takes a lot of stress—especially during braking, turning, and riding over bumps. Over time, this can lead to wear and tear.
Common reasons to change your front tire include:
- Punctures: Nails, glass, or sharp debris can pierce the tire and cause slow or fast leaks.
- Worn tread: If the tire surface is smooth or cracked, it loses grip and becomes unsafe.
- Bulges or sidewall damage: These indicate internal damage and can lead to blowouts.
- Chronic flats: If you’re getting frequent flats, the tire or tube may be compromised.
- Age: Even unused tires degrade over time due to UV exposure and temperature changes.
Ignoring these signs can lead to poor handling, reduced braking performance, or even accidents. Replacing the tire promptly keeps your ride safe and smooth.
Tools and Materials You’ll Need
Having the right tools on hand makes the job faster and safer. Here’s what you’ll need to change your Gotrax front tire:
- Tire levers (2–3): Plastic or metal tools to pry the tire off the rim.
- Wrench or socket set: Typically a 13mm or 15mm wrench to remove the axle nut.
- Air pump: A floor pump with a pressure gauge is ideal.
- Valve core tool: Helps remove and reinstall the valve core for easier inflation.
- Replacement tire or inner tube: Make sure it matches your Gotrax model (e.g., 8.5”, 9”, or 10”).
- Soapy water or tire lubricant: Helps seat the tire bead during inflation.
- Clean cloth or rag: For wiping down parts.
- Safety gloves and glasses: Protect your hands and eyes.
Optional but helpful:
- Work stand or upside-down scooter position: Makes access easier.
- Tire pressure gauge: Ensures accurate inflation.
- Patch kit: If you’re repairing a tube instead of replacing it.
Pro tip: Keep a small toolkit with these items in your scooter bag or at home for quick fixes.
Step 1: Prepare Your Workspace and Scooter
Safety and preparation are key. Start by choosing a clean, flat, and well-lit area to work. A garage, driveway, or even a quiet sidewalk will work—just make sure you have enough space to move around.
Turn Off the Scooter and Remove the Battery (If Applicable)
Before touching any parts, power down your Gotrax scooter completely. If your model has a removable battery (like the GXL or G4), take it out to prevent accidental activation. This is especially important if you’re working near the motor or wiring.
Position the Scooter for Easy Access
Flip your scooter upside down so it rests on the handlebars and deck. This gives you clear access to the front wheel. Use a soft surface or place a towel under the handlebars to avoid scratches.
Alternatively, if you have a scooter stand or can prop it securely, keep it upright. Just make sure it won’t tip over.
Gather Your Tools and Parts
Lay out all your tools and the new tire or tube within reach. Double-check that your replacement part is the correct size. Most Gotrax models use 8.5-inch or 9-inch pneumatic tires, but confirm your model’s specs in the user manual or on the tire sidewall.
Step 2: Remove the Front Wheel
Now it’s time to take off the front wheel. This step varies slightly depending on your Gotrax model, but the general process is the same.
Loosen the Axle Nut
Locate the axle nut on the left side of the front wheel (opposite the motor). Use your wrench to turn it counterclockwise. You may need to hold the other side with a second wrench or use a hex key if it’s a bolt-on design.
Don’t remove the nut completely yet—just loosen it enough so the wheel can move.
Release the Brake (If Necessary)
Some Gotrax models have a front disc brake. If yours does, you’ll need to disconnect the brake caliper or loosen the brake cable to free the wheel.
For cable brakes:
- Locate the brake cable near the handlebar.
- Loosen the pinch bolt and slide the cable out.
- Gently pull the brake lever to release tension.
For disc brakes:
- Remove the two bolts holding the caliper to the fork.
- Lift the caliper off the rotor—don’t disconnect the hydraulic line unless you’re experienced.
Pro tip: Take a photo before disconnecting anything. This helps you remember how to reassemble it later.
Slide the Wheel Out
Once the axle nut is loose and the brake is disengaged, gently pull the wheel forward and down to remove it from the fork dropouts. The wheel should come out easily—if it’s stuck, wiggle it slightly or check for obstructions.
Set the wheel aside on a clean surface.
Step 3: Deflate and Remove the Old Tire
With the wheel off, it’s time to remove the tire and tube.
Deflate the Tire Completely
Press the valve stem to release all air. For Schrader valves (like on most Gotrax scooters), you can use a small tool or the valve core tool to press the pin inside. For Presta valves, unscrew the tip first.
Make sure there’s no air left—this makes it easier to remove the tire.
Break the Tire Bead
The tire bead is the edge that seals against the rim. To remove the tire, you need to break this seal.
Place the wheel on a flat surface. Use your hands or a tire lever to press down on the tire near the rim. Work your way around the wheel until the bead pops loose on both sides.
Insert Tire Levers and Pry the Tire Off
Slide a tire lever under the bead and hook it to a spoke. Insert a second lever about 4–6 inches away. Gently pry the tire over the rim.
Work your way around the wheel, using the levers to lift the tire off. Once one side is off, you can usually pull the rest by hand.
Remove the Inner Tube
Once the tire is loose, pull out the inner tube. Start at the valve stem and gently pull the tube out from under the tire.
Inspect the tube for punctures, tears, or wear. If you’re replacing it, discard the old one. If you’re patching it, mark the hole and set it aside.
Inspect the Rim and Tire
Before installing the new tire, check both the rim and the old tire for damage.
Look for:
- Sharp edges or burrs on the rim.
- Debris like glass or nails stuck in the tire.
- Cracks or dry rot in the tire sidewall.
- Worn or damaged rim tape (the strip covering the spoke holes).
If you find debris, remove it carefully. If the rim tape is damaged, replace it to prevent future flats.
Step 4: Install the New Tire and Tube
Now comes the fun part—putting everything back together.
Partially Inflate the New Tube
Before installing, add a little air to the new tube (just enough to give it shape). This prevents it from pinching during installation.
Insert the Tube into the Tire
Place the tube inside the new tire, making sure the valve stem lines up with the hole in the rim. Start by inserting the valve stem through the rim, then tuck the rest of the tube inside.
Seat One Side of the Tire on the Rim
Start at the valve stem and work your way around, pushing one side of the tire bead into the rim. Use your hands—don’t force it. Most tires will go on easily with hand pressure.
Seat the Second Side of the Tire
This is the tricky part. Start opposite the valve and work toward it, pushing the bead over the rim.
If it gets stuck, use tire levers—but be gentle. Insert one lever under the bead and hook it to a spoke. Use a second lever to pry the rest over.
Avoid using metal levers near the tube to prevent punctures.
Check the Tube for Pinching
Before inflating, spin the wheel and check that the tube isn’t pinched between the tire and rim. Look for bulges or uneven seating.
Also, make sure the valve stem is straight and not bent.
Step 5: Inflate the Tire
Now it’s time to add air—but do it carefully.
Inflate Gradually
Attach your pump to the valve stem. Start inflating slowly. Listen for the “pop” as the tire bead seats properly on the rim.
If the tire isn’t seating evenly, deflate it slightly, adjust the bead, and try again.
Use Soapy Water to Help Seat the Bead
If the tire won’t seat, apply a small amount of soapy water around the bead. This reduces friction and helps it slide into place.
Check Tire Pressure
Most Gotrax tires require 35–50 PSI. Check your user manual for the exact recommendation.
Use a pressure gauge to ensure accuracy. Overinflation can cause blowouts; underinflation leads to poor handling and increased wear.
Reinstall the Valve Core (If Removed)
If you used a valve core tool to remove the core for easier inflation, screw it back in tightly.
Step 6: Reinstall the Front Wheel
With the tire inflated and seated, it’s time to put the wheel back on.
Align the Wheel in the Fork
Slide the wheel into the fork dropouts. Make sure it’s centered and the axle sits properly in the slots.
Reconnect the Brake
If you disconnected the brake, reattach it now.
For cable brakes:
- Slide the cable back into the pinch bolt.
- Tighten the bolt and test the brake lever for proper tension.
For disc brakes:
- Place the caliper back over the rotor.
- Reinstall and tighten the bolts evenly.
- Spin the wheel to ensure it doesn’t rub against the brake pads.
Tighten the Axle Nut
Thread the axle nut back on and tighten it securely with your wrench. Don’t overtighten—this can damage the axle or fork.
For most Gotrax models, hand-tight plus a quarter turn is sufficient.
Test the Wheel Spin
Spin the front wheel by hand. It should rotate smoothly without wobbling or rubbing.
If it wobbles, the wheel may not be seated properly or the tire may be damaged.
Step 7: Final Checks and Test Ride
Before hitting the road, do a few final checks.
Check Tire Pressure Again
After reinstalling, the pressure may have changed slightly. Recheck and adjust if needed.
Inspect All Connections
Make sure the axle nut, brake, and any cables are secure.
Take a Short Test Ride
Start with a slow ride in a safe area. Test the brakes, steering, and stability.
Listen for unusual noises or vibrations. If everything feels good, you’re ready to go!
Troubleshooting Common Issues
Even with careful work, problems can happen. Here’s how to fix common issues:
Tire Won’t Inflate or Keeps Going Flat
- Check for punctures in the new tube or tire.
- Ensure the valve core is tight.
- Look for rim damage or poor seating.
Wheel Wobbles After Installation
- Make sure the axle is fully seated in the fork.
- Check for bent rims or damaged spokes.
- Verify the tire is evenly seated on both sides.
Brake Rubs or Doesn’t Engage
- Realign the brake caliper or cable.
- Adjust brake pad spacing.
- Ensure the rotor isn’t bent.
Valve Stem Leaks Air
- Tighten the valve core with a valve tool.
- Replace the valve core if damaged.
- Ensure the tube isn’t pinched at the stem.
Tips for Preventing Future Flats
Now that your tire is changed, keep it in great shape with these tips:
- Check tire pressure weekly: Proper inflation reduces wear and prevents pinch flats.
- Avoid debris: Ride around glass, nails, and sharp objects when possible.
- Use tire sealant: Some riders add sealant to the tube for extra protection.
- Rotate tires (if applicable): On models with dual rear tires, rotating can extend life.
- Store indoors: Keep your scooter out of extreme heat or cold to preserve tire rubber.
Conclusion
Changing a Gotrax front tire might seem intimidating at first, but it’s a skill every scooter owner should have. With the right tools, a little patience, and this step-by-step guide, you can handle flats and wear like a pro.
Remember: safety first, take your time, and don’t skip the final checks. A well-maintained tire means a smoother, safer ride—and more fun on your Gotrax.
Keep this guide handy for future reference, and consider keeping a spare tube and patch kit in your scooter bag. You never know when you’ll need it!
Now go enjoy the ride—your Gotrax is ready for the road.