
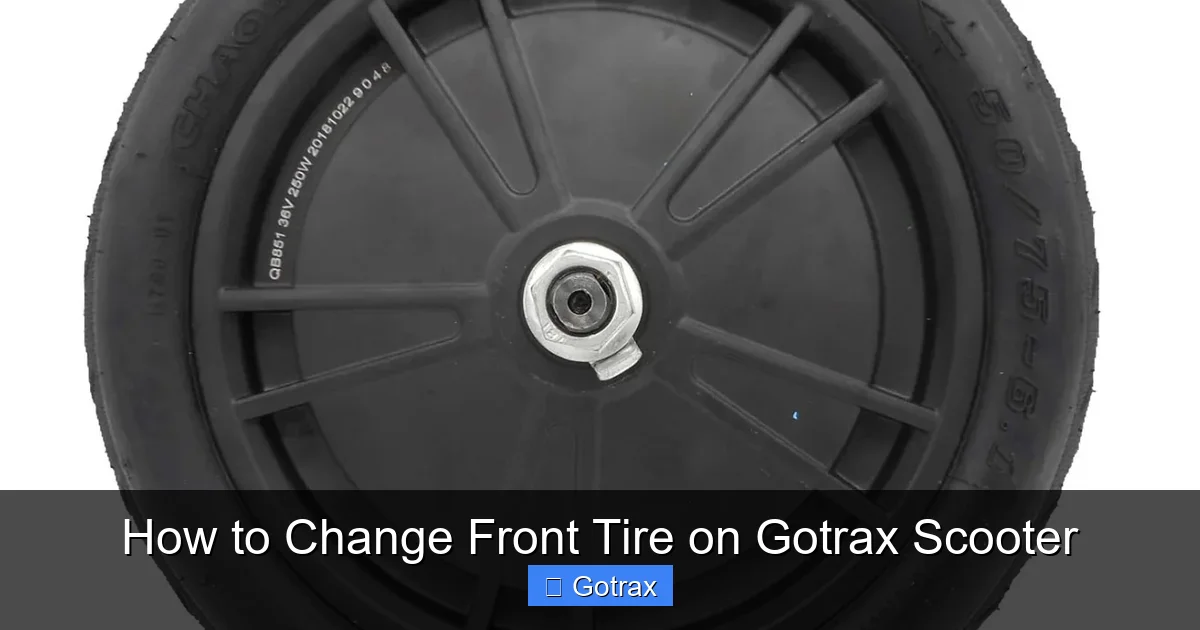
Changing the front tire on your Gotrax scooter is simpler than you think—with the right tools and guidance. This guide walks you through every step, from removing the wheel to installing a new tire, so you can get back riding safely and smoothly.
Key Takeaways
- Safety first: Always power off your scooter and work on a stable, flat surface to prevent accidents.
- Use the right tools: A hex key, tire levers, and a pump are essential for a smooth tire replacement.
- Check tire compatibility: Ensure your new tire matches your Gotrax model’s size (usually 8.5” or 9.5”).
- Inspect inner tube and rim: Look for damage or debris before installing the new tire to avoid repeat flats.
- Inflate properly: Use a pressure gauge to inflate the tire to the recommended PSI (typically 40–50 PSI).
- Test before riding: Spin the wheel and check alignment before taking your scooter for a test ride.
- Prevent future flats: Avoid sharp objects, maintain proper tire pressure, and inspect tires regularly.
How to Change Front Tire on Gotrax Scooter
If you’ve noticed your Gotrax scooter riding rough, wobbling, or going flat more often than usual, it might be time to change the front tire. Whether you’re dealing with a puncture, wear and tear, or just upgrading to a better tread, replacing the front tire is a manageable DIY task—even if you’re not a mechanic.
In this comprehensive guide, we’ll walk you through the entire process of changing the front tire on your Gotrax scooter. You’ll learn what tools you need, how to safely remove the old tire, install a new one, and ensure everything is properly aligned and inflated. By the end, you’ll have the confidence to handle tire changes on your own, saving time and money on professional repairs.
Gotrax scooters are popular for their affordability, portability, and ease of use. Models like the Gotrax GXL, XR, and G4 all feature pneumatic (air-filled) front tires that can go flat due to nails, glass, or general wear. While some riders opt to patch a tube, replacing the entire tire is often faster and more reliable—especially if the tire itself is cracked or worn.
This guide is designed for beginners and intermediate users alike. We’ll keep the language simple, the steps clear, and include plenty of practical tips to help you avoid common mistakes. Let’s get started!
What You’ll Need
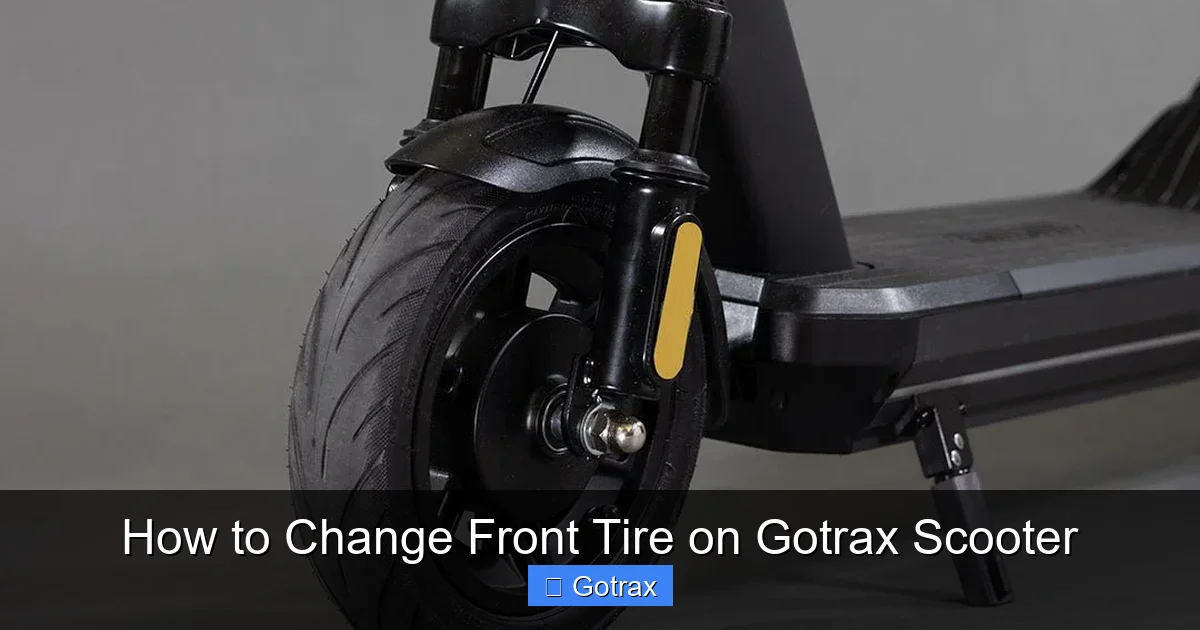
Visual guide about How to Change Front Tire on Gotrax Scooter
Image source: cdn.shopify.com
Before you begin, gather all the necessary tools and materials. Having everything ready will make the process smoother and prevent frustration mid-task.
Essential Tools
- Hex key (Allen wrench): Most Gotrax scooters use a 5mm or 6mm hex key to remove the front axle nut. Check your scooter’s manual or inspect the bolt to confirm the size.
- Tire levers: These plastic or metal tools help pry the tire bead over the rim. You’ll need at least two, but three can make the job easier.
- Bike pump with pressure gauge: A floor pump with a built-in gauge is ideal for accurate inflation. Hand pumps work too, but they’re slower and less precise.
- Wrench (optional): Some models may require a 15mm wrench to loosen the axle nut, especially if it’s tight or rusted.
- Clean rag: For wiping down the rim and checking for debris.
Replacement Parts
- New front tire: Make sure it matches your scooter’s size. Common sizes include 8.5” x 2” (for GXL, XR) and 9.5” x 2.5” (for G4). Check the sidewall of your current tire or consult your user manual.
- Inner tube (optional): If you’re only replacing the tire, you can reuse the existing tube—unless it’s damaged. But it’s smart to have a spare tube on hand just in case.
- Tubeless sealant (optional): Some riders add sealant to prevent future flats, though this is more common on mountain bikes.
Workspace Setup
Choose a clean, well-lit area with enough space to lay out your tools. A garage, driveway, or even a large table works. Make sure the surface is flat and stable. If possible, flip your scooter upside down so it rests on the handlebars and deck—this gives you better access to the front wheel.
Step 1: Prepare Your Scooter
Safety and preparation are key. Rushing this step can lead to mistakes or injury.
Power Off the Scooter
Turn off your Gotrax scooter completely. Remove the battery if possible (on models like the G4). This prevents accidental activation and reduces the risk of electric shock.
Flip the Scooter
Carefully flip the scooter upside down. Rest it on the handlebars and deck. Use a soft surface like a towel or mat to protect the grips and display. Make sure it’s stable—you don’t want it tipping over while you’re working.
Loosen the Front Brake (If Applicable)
Some Gotrax models have front disc brakes. If yours does, you’ll need to disconnect the brake caliper to remove the wheel. Use a hex key to loosen the two bolts holding the caliper to the fork. Gently slide the caliper off the rotor. Don’t disconnect the brake line—just move it aside.
Tip: Take a photo of the brake setup before disconnecting it. This makes reassembly much easier.
Step 2: Remove the Front Wheel
Now it’s time to take off the wheel. This step requires a bit of muscle, but it’s straightforward.
Locate the Axle Nut
Look at the center of the front wheel. You’ll see a nut on one side (usually the left) and a quick-release lever or bolt on the other. Most Gotrax scooters use a hex bolt, not a quick-release.
Loosen the Axle Bolt
Insert your hex key into the bolt and turn it counterclockwise. If it’s tight, use a wrench for extra leverage. Don’t remove the bolt completely yet—just loosen it enough so the wheel can move.
Slide Out the Wheel
Once the bolt is loose, gently wiggle the wheel side to side while pulling it downward. The wheel should slide out of the fork dropouts. If it’s stuck, tap the axle lightly with a rubber mallet or the handle of your wrench.
Tip: Keep the axle bolt and any washers in a small container so you don’t lose them.
Step 3: Remove the Old Tire
With the wheel off, you can now remove the old tire. This part can be tricky, especially if the tire is tight.
Deflate the Tire Completely
If there’s any air left, press the valve stem to release it. For Schrader valves (like on car tires), use a small tool to depress the pin. For Presta valves (thinner, with a lock nut), unscrew the tip first.
Break the Bead
The bead is the edge of the tire that sits inside the rim. To remove the tire, you need to break this seal. Stand the wheel upright and press down on the tire near the rim. Use your body weight to push the tire away from the rim on both sides. You should hear a popping sound as the bead releases.
Insert Tire Levers
Slide one tire lever under the bead and hook it to a spoke. Insert a second lever about 2–3 inches away. Gently pry the bead over the rim. Once part of the tire is off, you can often slide the lever around the rim to remove that entire side.
Remove the Inner Tube
Pull the inner tube out through the valve hole. Inspect it for punctures, cracks, or wear. If it’s damaged, replace it. If not, you can reuse it—just make sure it’s clean and dry.
Remove the Tire
With one side of the tire off the rim, pull the rest of the tire over the opposite side. It should come off easily now. Set the old tire aside.
Step 4: Inspect the Rim and Hub
Before installing the new tire, take a moment to check the wheel for damage.
Check the Rim
Look inside the rim for sharp edges, cracks, or debris like glass or thorns. Use a rag to wipe it clean. If you find anything sharp, sand it down gently with fine-grit sandpaper.
Inspect the Spokes
Make sure all spokes are tight and none are broken. Loose spokes can cause wobbling and affect tire performance.
Check the Hub Bearings
Spin the hub (the center part of the wheel). It should spin smoothly without grinding or wobbling. If it feels rough, the bearings may need lubrication or replacement—but that’s a more advanced repair.
Step 5: Install the New Tire
Now for the fun part—putting on the new tire. Take your time to avoid pinching the tube.
Partially Inflate the New Tube
Give the new inner tube a small puff of air—just enough to give it shape. This prevents it from getting twisted or pinched during installation.
Insert the Tube into the Tire
Place the tube inside the new tire, making sure the valve stem lines up with the valve hole in the rim.
Mount the Tire on the Rim
Start by placing one side of the tire bead onto the rim. This is usually the easier side. Then, work the other side over the rim. Use your hands to push the bead into place. If it’s tight, use tire levers—but be careful not to pinch the tube.
Tip: Start opposite the valve stem. It’s easier to work around that area last.
Seat the Bead
Once the tire is on, check that the bead is evenly seated all around the rim. Spin the wheel and look for any bulges or uneven spots. If the bead isn’t seated, deflate the tube slightly and adjust the tire by hand.
Step 6: Inflate the Tire
Proper inflation is crucial for safety and performance.
Attach the Pump
Connect your pump to the valve stem. Make sure it’s secure to avoid air leaks.
Inflate Gradually
Pump air into the tire in short bursts. Stop frequently to check the pressure with your gauge. Most Gotrax scooters recommend 40–50 PSI for the front tire. Overinflating can cause blowouts; underinflating leads to poor handling and increased wear.
Listen for the Bead to Pop
As you inflate, you may hear the bead “pop” into place. This is normal. Once the tire is fully inflated, double-check that the bead is seated evenly.
Step 7: Reinstall the Wheel
With the new tire ready, it’s time to put the wheel back on.
Align the Wheel
Slide the wheel back into the fork dropouts. Make sure it’s centered and the axle sits properly in the slots.
Reconnect the Brake (If Applicable)
If you disconnected the front brake, slide the caliper back over the rotor. Tighten the bolts securely, but don’t overtighten.
Tighten the Axle Bolt
Insert the axle bolt and tighten it with your hex key. Use a wrench if needed. The bolt should be snug—don’t overtighten, as this can damage the fork or axle.
Spin the Wheel
Give the wheel a spin to make sure it rotates freely and doesn’t rub against the brake or fork. If it wobbles, the wheel may not be seated correctly—loosen the bolt, adjust, and retighten.
Step 8: Final Checks and Test Ride
Before you hit the road, do a few final checks.
Check Tire Pressure Again
After reinstalling, the pressure may have dropped slightly. Use your gauge to confirm it’s still at the recommended PSI.
Inspect for Leaks
Listen for hissing sounds or feel around the valve and bead for air leaks. If you find a leak, deflate the tire and recheck the installation.
Test the Brakes
Squeeze the front brake lever to ensure it engages properly. The wheel should stop smoothly without squeaking or slipping.
Take a Short Test Ride
Start with a slow ride in a safe area. Listen for unusual noises and feel for vibrations or wobbling. If everything feels good, you’re ready to ride!
Troubleshooting Common Issues
Even with careful work, problems can happen. Here’s how to fix the most common ones.
Tire Won’t Inflate
- Check the valve: Make sure it’s not clogged or damaged.
- Inspect the tube: Look for punctures or pinches.
- Verify the pump: Ensure it’s compatible with your valve type.
Wheel Wobbles After Installation
- Recheck alignment: Loosen the axle bolt and center the wheel.
- Inspect spokes: Tighten any loose ones.
- Check tire seating: Deflate and reseat the bead if needed.
Brake Rubs Against the Tire
- Adjust the caliper: Loosen the bolts and reposition it so it clears the rotor.
- Check rotor alignment: If the rotor is bent, it may need straightening or replacement.
Flat Tire Keeps Coming Back
- Inspect the rim: Look for sharp edges or tape damage.
- Check the tire: Look for embedded debris like glass or thorns.
- Use a tire liner: Add a protective layer between the tube and tire for extra puncture resistance.
Maintenance Tips to Prevent Future Flats
Changing a tire is no fun, so here’s how to avoid it in the future.
- Check tire pressure weekly: Proper inflation reduces the risk of pinch flats and improves ride quality.
- Inspect tires regularly: Look for cuts, cracks, or embedded objects.
- Avoid rough terrain: Stick to smooth paths when possible.
- Use puncture-resistant tires: Consider upgrading to tires with reinforced sidewalls or Kevlar belts.
- Carry a repair kit: Keep a spare tube, tire levers, and a mini pump with you on long rides.
Conclusion
Changing the front tire on your Gotrax scooter might seem intimidating at first, but with the right tools and a little patience, it’s a task anyone can master. By following this step-by-step guide, you’ve learned how to safely remove the old tire, install a new one, and ensure everything is properly aligned and inflated.
Not only does this save you money on professional repairs, but it also gives you greater confidence in maintaining your scooter. Regular tire care—like checking pressure and inspecting for damage—can extend the life of your tires and keep your rides smooth and safe.
Remember, safety comes first. Always work in a stable environment, use the correct tools, and double-check your work before riding. With practice, you’ll be able to change a tire in under 30 minutes.
So the next time you hear that dreaded hiss or feel a wobbly ride, don’t panic—grab your tools and get to work. Your Gotrax scooter will thank you with miles of reliable, enjoyable rides.