
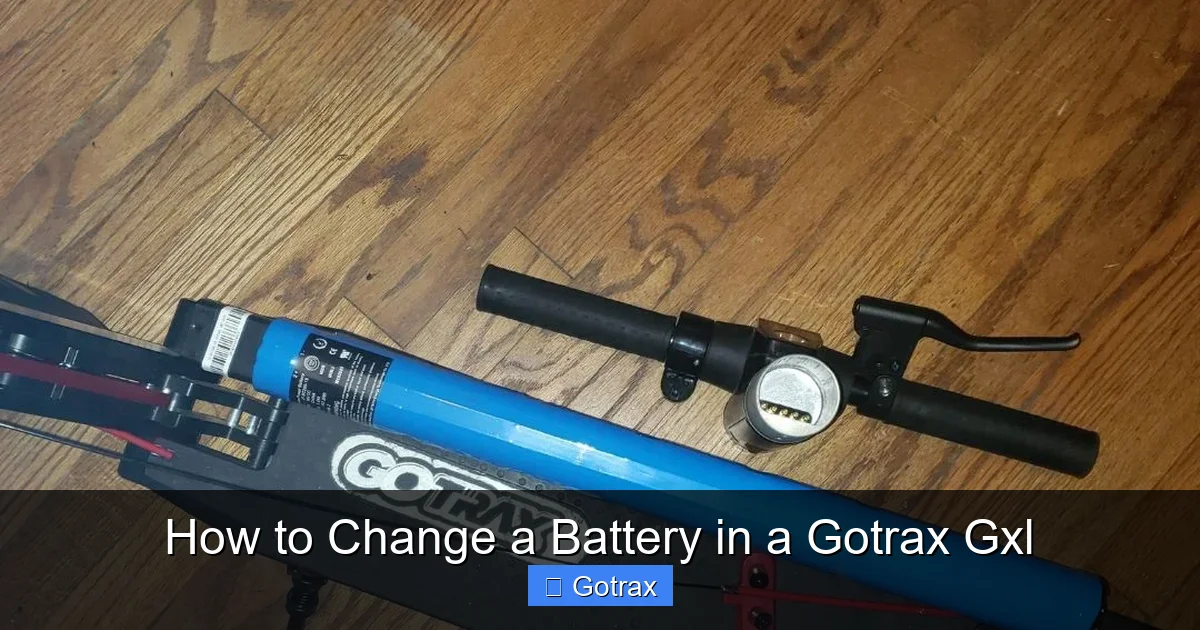
Changing the battery in your Gotrax GXL electric scooter is simpler than you think. This guide walks you through every step—from safety prep to final testing—so you can get back on the road fast. Save money and extend your scooter’s life with this DIY fix.
Key Takeaways
- Safety first: Always disconnect the scooter from power and wear protective gear before starting any repair.
- Right tools matter: You’ll need a Phillips screwdriver, socket wrench, and possibly a multimeter—no fancy equipment required.
- Battery compatibility is key: Only use a Gotrax-approved or equivalent 36V 7.8Ah lithium-ion battery to avoid damage or safety risks.
- Take photos during disassembly: Snap pictures of wiring and connections to make reassembly easier and error-free.
- Test before riding: After installation, charge fully and run a short test ride to ensure everything works properly.
- Know your warranty: Opening the deck may void your warranty—check Gotrax policy before proceeding.
- When to call a pro: If you’re unsure about electrical work or see damaged wiring, consult a technician.
How to Change a Battery in a Gotrax GXL
If your Gotrax GXL isn’t holding a charge like it used to—or worse, won’t turn on at all—it might be time for a new battery. Don’t panic! Replacing the battery in your Gotrax GXL isn’t as intimidating as it sounds. With the right tools, a bit of patience, and this detailed guide, you can do it yourself in under an hour.
In this comprehensive how-to, we’ll walk you through every step: from gathering your tools and safely opening the scooter’s deck, to removing the old battery, installing the new one, and testing your ride. Whether you’re a seasoned DIYer or a first-time fixer, we’ve got you covered. By the end, you’ll not only have a fully functional scooter but also the confidence to tackle future maintenance tasks.
Let’s get started!
Why Replace Your Gotrax GXL Battery?

Visual guide about How to Change a Battery in a Gotrax Gxl
Image source: m.media-amazon.com
Lithium-ion batteries, like the one in your Gotrax GXL, have a limited lifespan—typically 300 to 500 charge cycles. Over time, they lose capacity, meaning your scooter won’t go as far on a single charge. You might notice it dying halfway through your usual route or taking longer to charge. In some cases, the scooter may not power on at all.
Replacing the battery restores your scooter’s range and performance. It’s also far more cost-effective than buying a brand-new scooter. A replacement battery costs around $150–$200, while a new Gotrax GXL runs $400–$500. Plus, you’re reducing electronic waste by keeping your scooter in use longer.
What You’ll Need
Before you begin, make sure you have the following tools and materials:
- Phillips-head screwdriver (size #2 recommended)
- Socket wrench with 10mm socket
- New 36V 7.8Ah lithium-ion battery (Gotrax-compatible)
- Electrical tape or zip ties (for securing wires)
- Multimeter (optional, for testing voltage)
- Work gloves and safety glasses
- Clean, flat workspace (like a table or garage floor)
- Smartphone or camera (to take reference photos)
Pro tip: Buy your battery from a reputable seller. Look for listings that specify “Gotrax GXL compatible” or “36V 7.8Ah” to ensure a proper fit and safe performance.
Safety First: Preparing for the Job
Working with electric scooters involves handling high-voltage components. Safety should always come first.
Step 1: Power Down Completely
Turn off your Gotrax GXL and remove the key (if applicable). Unplug it from any charger. Wait at least 10 minutes to allow any residual charge in the system to dissipate.
Step 2: Wear Protective Gear
Put on work gloves to protect your hands from sharp edges and safety glasses to shield your eyes from dust or debris.
Step 3: Choose a Safe Workspace
Work in a dry, well-lit area with plenty of room. Avoid carpets or surfaces that can generate static electricity. A wooden table or concrete garage floor works best.
Step 4: Ground Yourself
Touch a metal object (like a doorknob) to discharge any static electricity before handling the battery or internal components.
Step-by-Step: Removing the Old Battery
Now that you’re prepped, it’s time to open up your scooter and remove the old battery.
Step 1: Flip the Scooter Upside Down
Carefully turn your Gotrax GXL upside down so the deck is facing up. Place a soft cloth or foam pad underneath to protect the handlebars and stem from scratches.
Step 2: Remove the Deck Screws
Use your Phillips screwdriver to remove the screws along the edge of the deck. There are typically 8–10 screws—6 along the sides and 2–4 near the center. Keep them in a small container so you don’t lose them.
Tip: Some screws may be hidden under rubber foot pads. Gently peel back the pads with a flat tool if needed.
Step 3: Lift the Deck Cover
Once all screws are removed, carefully lift the plastic deck cover. It’s attached to the frame with clips, so wiggle it gently if it feels stuck. Don’t force it—you could break the clips.
Step 4: Locate the Battery
Inside, you’ll see the battery pack mounted near the center of the frame. It’s a rectangular black box with wires connected to it. You’ll also see the motor controller and wiring harness nearby.
Step 5: Disconnect the Battery Wires
The battery has two main connectors: a thick power cable (usually red and black) and a smaller connector with multiple wires (often white or gray). These carry data and balance signals.
Important: Always disconnect the main power cable first. Use your hands to gently pull the connector apart—do not yank or cut the wires.
Then, disconnect the smaller multi-wire connector. Take a photo of how the wires are connected before removing them. This will help during reinstallation.
Step 6: Remove the Battery Mounting Bolts
The battery is secured to the frame with two 10mm bolts. Use your socket wrench to remove them. Keep the bolts safe—you’ll need them for the new battery.
Step 7: Lift Out the Old Battery
Once the bolts are removed, carefully lift the battery out of the frame. It weighs about 4–5 pounds, so use both hands. Place it on a non-conductive surface like wood or cardboard.
Installing the New Battery
With the old battery out, it’s time to install the new one.
Step 1: Position the New Battery
Place the new battery into the frame in the same orientation as the old one. Make sure the label faces up and the connectors are accessible.
Step 2: Secure with Mounting Bolts
Reinsert the two 10mm bolts and tighten them with your socket wrench. Don’t overtighten—just snug enough to hold the battery firmly.
Step 3: Reconnect the Wires
Refer to the photo you took earlier. Connect the multi-wire connector first, then the main power cable. Push them in until they click or feel secure.
Double-check that the polarity is correct: red to red (positive), black to black (negative). Reversing polarity can damage the scooter or cause a fire.
Step 4: Secure Loose Wires
Use zip ties or electrical tape to bundle any loose wires and keep them away from moving parts. This prevents wear and short circuits.
Reassembling the Scooter
Now that the new battery is in place, it’s time to put everything back together.
Step 1: Replace the Deck Cover
Carefully lower the deck cover back onto the frame. Align the clips and press down gently until it snaps into place.
Step 2: Reinsert the Screws
Put the screws back in their original holes. Tighten them evenly—don’t overtighten, as this can crack the plastic.
Step 3: Flip the Scooter Right Side Up
Turn your Gotrax GXL back to its normal position. Give it a gentle shake to make sure nothing is loose.
Testing Your New Battery
Before you hit the road, you need to test the installation.
Step 1: Charge the Battery
Plug in your charger and let the battery charge fully. A new battery may take 4–6 hours to reach 100%. The charging light should turn green when complete.
Step 2: Power On the Scooter
Turn on the scooter using the power button. The display should light up, and the battery indicator should show a full charge.
Step 3: Test the Throttle and Brakes
Stand next to the scooter (don’t ride yet) and gently twist the throttle. The motor should engage smoothly. Test the brakes to ensure they respond quickly.
Step 4: Take a Short Test Ride
Find a safe, flat area like a driveway or empty parking lot. Ride slowly for 5–10 minutes. Listen for unusual noises and check that the scooter accelerates and brakes properly.
If everything works, you’re good to go!
Troubleshooting Common Issues
Even with careful installation, problems can occur. Here’s how to fix the most common ones.
Scooter Won’t Turn On
- Check that the battery is fully charged.
- Ensure all connectors are firmly plugged in.
- Inspect the power button and fuse (located near the battery).
- Use a multimeter to test battery voltage—it should read around 36V.
Battery Drains Quickly
- Make sure the new battery is genuine or high-quality compatible.
- Check for parasitic drains—like a stuck light or faulty controller.
- Avoid extreme temperatures, which reduce battery life.
Strange Noises or Vibrations
- Ensure the battery is securely bolted down.
- Check that wires aren’t pinched or rubbing against moving parts.
- Inspect the motor and wheels for debris.
Charging Issues
- Use only the original Gotrax charger.
- Clean the charging port with a dry cloth.
- If the charger light doesn’t turn on, try a different outlet.
If problems persist, contact Gotrax customer support or visit an authorized repair center.
Tips for Extending Battery Life
A new battery is an investment—protect it with good habits.
- Charge regularly: Don’t let the battery drop below 20%. Frequent shallow discharges are better than deep ones.
- Avoid extreme temps: Don’t charge or store the scooter in very hot or cold environments.
- Store properly: If not using for weeks, charge to 50–60% and store in a cool, dry place.
- Use the right charger: Third-party chargers can damage the battery or reduce its lifespan.
- Keep it clean: Wipe down the scooter and charging port regularly to prevent dust buildup.
When to Call a Professional
While changing a battery is a DIY-friendly task, some situations call for expert help.
- You’re uncomfortable working with electrical components.
- The wiring looks damaged, burnt, or melted.
- You don’t have the right tools or a safe workspace.
- The scooter has water damage or corrosion.
- You’re still under warranty and unsure about voiding it.
Gotrax offers repair services through authorized dealers. You can also find certified e-scooter technicians in many cities.
Final Thoughts
Replacing the battery in your Gotrax GXL is a smart, money-saving move that anyone can do with a little preparation. Not only does it restore your scooter’s performance, but it also gives you a deeper understanding of how your ride works.
By following this guide, you’ve learned how to safely remove the old battery, install a new one, and test your scooter for optimal performance. Remember to prioritize safety, use the right tools, and take your time.
With proper care, your new battery should last 1–2 years—or even longer with good habits. So charge up, hop on, and enjoy the ride!