
If you’re working with electronics, troubleshooting electrical systems, or even just trying to figure out why your car battery won’t hold a charge, there’s one tool that stands above the rest: the digital multimeter. Whether you’re a seasoned technician, a DIY homeowner, or a hobbyist tinkering with Arduino projects, a reliable digital multimeter is an absolute must-have in your toolbox. Yet, despite its importance, many people either don’t own one or settle for a cheap, inaccurate model that fails when they need it most. That’s where this guide comes in.
This comprehensive buying guide is designed to help you make an informed, confident decision when selecting a digital multimeter. We’ll walk you through every critical factor—from accuracy and safety ratings to build quality and feature sets—so you can find the right meter for your needs, whether you’re diagnosing a faulty outlet or calibrating a precision circuit. The market is flooded with options, ranging from $10 no-name gadgets to $500+ professional-grade instruments, and it’s easy to get overwhelmed. Our goal is to cut through the noise and give you the expert-level insight you need to choose wisely.
By the end of this guide, you’ll understand exactly what separates a good multimeter from a great one, how to avoid common pitfalls, and where to get the best value for your money. We’ll break down technical specs into plain English, compare different types of meters, and offer real-world advice based on years of hands-on experience. Whether you’re buying your first multimeter or upgrading from an old model, this guide will ensure you invest in a tool that lasts, performs reliably, and keeps you safe.

What to Look for When Buying Buying Guide
1. Accuracy and Resolution
When it comes to digital multimeters, accuracy is king. This refers to how close the meter’s reading is to the true value of the electrical parameter being measured. For example, if you’re measuring a 12-volt battery, an accurate multimeter will display something very close to 12.00V, not 11.5V or 13.2V. Resolution, on the other hand, is the smallest change in value the meter can detect. A meter with high resolution might show 12.001V, while a lower-resolution one might only show 12.0V.
Why does this matter? In precision electronics work—like repairing medical devices or calibrating sensors—even small errors can lead to big problems. A multimeter with poor accuracy might mislead you into thinking a component is faulty when it’s actually fine, or worse, cause you to overlook a dangerous voltage fluctuation. Look for meters that specify their accuracy as a percentage plus a number of digits (e.g., ±0.5% + 2 digits). The lower the percentage and digit count, the better.
For most DIYers and general-purpose use, an accuracy of ±1% is acceptable. But if you’re working on sensitive circuits or need reliable data for documentation, aim for ±0.5% or better. Also, check the meter’s resolution—especially for low-voltage measurements. A 4.5-digit display (19,999 counts) offers better resolution than a 3.5-digit one (1,999 counts), allowing you to see finer details in your readings.
2. Safety Ratings and Certifications
Safety should never be an afterthought when working with electricity. A multimeter is only as good as its ability to protect you from shocks, arcs, and short circuits. Look for meters that meet international safety standards such as CAT (Category) ratings and are certified by recognized bodies like UL (Underwriters Laboratories), CSA (Canadian Standards Association), or TÜV.
The CAT rating system is especially important. It indicates the meter’s ability to withstand voltage transients in different environments. For example, a CAT III 600V meter is suitable for use in fixed installations like distribution panels, while a CAT II 300V meter is better for plug-in appliances. If you’re working on household wiring, automotive systems, or industrial equipment, you’ll want at least a CAT III rating to ensure protection against high-energy surges.
Additionally, check for features like fused current inputs, overload protection, and high-energy fuse types (like ceramic fuses with high interrupting capacity). These prevent catastrophic failures if you accidentally measure current in the wrong range or short a live circuit. A good multimeter will also have shrouded input jacks and recessed terminals to reduce the risk of accidental contact.
Never use a multimeter that lacks proper safety certifications. Cheap, uncertified meters may look similar to professional models, but they often use substandard components that can fail under stress, putting you at serious risk. Your life is worth more than saving $20 on a meter.
3. Measurement Functions and Ranges
A multimeter’s functionality determines what you can measure and how versatile the tool will be. At a minimum, look for a meter that can measure voltage (AC and DC), current (AC and DC), and resistance. These are the “big three” for most electrical work. But depending on your needs, you may also want additional functions like capacitance, frequency, temperature, continuity testing, diode testing, and even duty cycle or transistor hFE measurement.
Voltage measurement is essential for checking batteries, outlets, and power supplies. Make sure the meter supports both AC and DC voltage, with appropriate ranges (e.g., 200mV to 1000V DC). For current, check if it can measure both low (mA) and high (amps) currents, and whether it has a separate input jack for high-current measurements (usually up to 10A). Some meters also offer True RMS (Root Mean Square) capability, which provides accurate readings for non-sinusoidal waveforms—critical when working with variable frequency drives or modern electronics.
Resistance measurement is useful for checking resistors, continuity, and insulation. Look for a meter with a wide range (e.g., 200Ω to 20MΩ) and auto-ranging capability, which automatically selects the best range for the measurement. Auto-ranging saves time and reduces the chance of user error.
For hobbyists and electronics enthusiasts, extra functions like capacitance (for testing capacitors), frequency (for motors and oscillators), and temperature (using a K-type thermocouple) can be incredibly useful. Some advanced meters even include data logging, Bluetooth connectivity, or PC interface capabilities for recording measurements over time.
4. Build Quality and Durability
A multimeter is a tool that should last decades, not months. Build quality directly impacts longevity, reliability, and safety. Look for meters with rugged, impact-resistant casings made from high-quality plastics like polycarbonate or ABS. Rubberized grips or protective boots are a plus, especially if you’re working in harsh environments like construction sites or garages.
Check the quality of the display. A backlit LCD with good contrast and wide viewing angles makes it easier to read in low-light conditions. Some meters also feature bar graphs or analog-style displays for quick trend monitoring. Avoid meters with dim, pixelated screens or flimsy buttons that feel cheap or unresponsive.
The internal components matter too. High-end meters often use precision resistors, stable reference voltages, and high-quality analog-to-digital converters (ADCs). These contribute to better accuracy and longer calibration intervals. While you can’t see these components, reputable brands will often highlight them in their specifications.
Durability also extends to drop resistance and environmental sealing. Some meters are rated IP67, meaning they’re dust-tight and can withstand immersion in water up to 1 meter for 30 minutes. Others may have shock-absorbing corners or reinforced probes. If you’re working in wet, dirty, or high-vibration environments, these features can make a big difference.
5. Ease of Use and User Interface
Even the most feature-rich multimeter is useless if it’s too complicated to operate. A good user interface makes measurements faster, safer, and more accurate. Look for intuitive rotary dials with clearly labeled functions, large buttons, and logical probe placement. Auto-ranging meters are generally easier to use than manual-ranging ones, especially for beginners.
Consider the display layout. Is the information easy to read at a glance? Are units and symbols clearly marked? Some meters include helpful features like hold buttons (to freeze a reading), relative mode (to zero out background resistance), or min/max recording (to capture peak values). These can save time during diagnostics.
Probe quality also affects usability. Look for probes with sharp, rigid tips for precise contact, flexible silicone leads that resist kinking, and shrouded connectors for safety. Replaceable probe tips are a bonus, as worn tips can compromise accuracy. Some meters come with alligator clips or hook probes for hands-free measurements.
For advanced users, features like data logging, Bluetooth connectivity, or PC software integration can enhance productivity. But for most people, simplicity and clarity are more important than flashy extras.
6. Brand Reputation and Reliability
Not all multimeter brands are created equal. Some have decades of experience and a proven track record in the industry, while others are generic importers with little quality control. Trusted brands like Fluke, Keysight (formerly Agilent), Klein Tools, Brymen, and Amprobe are known for their reliability, accuracy, and customer support.
Fluke, for example, is the gold standard in professional multimeters, widely used by electricians, engineers, and technicians worldwide. Their meters are built to last, rigorously tested, and backed by strong warranties. Klein Tools offers excellent value for electricians, with rugged designs and CAT IV safety ratings. Brymen has gained a cult following among electronics enthusiasts for offering high-end features at mid-range prices.
While brand name shouldn’t be the only factor, it’s a strong indicator of quality. Generic or no-name brands may save you money upfront, but they often lack proper calibration, safety certifications, or customer support. If something goes wrong, you’re on your own.
That said, don’t assume all expensive meters are better. Some brands inflate prices based on marketing rather than performance. Always compare specs, read reviews, and consider your specific needs before making a decision.
7. Warranty and Customer Support
A multimeter is a long-term investment, and a solid warranty reflects the manufacturer’s confidence in their product. Most reputable brands offer warranties ranging from 1 to 5 years, with some even providing lifetime coverage on certain models. Fluke, for instance, offers a 3-year warranty on many of its meters, while Brymen provides a 5-year warranty on its high-end models.
Warranty terms matter. Does it cover accidental damage? Is calibration included? Can you get a replacement quickly? Some companies also offer repair services or loaner programs, which can be invaluable if your meter fails during a critical project.
Customer support is equally important. Can you reach a real person if you have questions? Are there online resources, manuals, or video tutorials available? Brands with strong support networks make troubleshooting and maintenance much easier.
Before buying, check the warranty details and support options. A meter with a 1-year warranty and no customer service is a red flag, even if it looks good on paper.
8. Size and Portability
While not always a top priority, size and weight can affect how and where you use your multimeter. A compact, lightweight meter is easier to carry in a tool belt or backpack, especially for field technicians or electricians who move between job sites. Larger meters may offer more features or a bigger display, but they can be cumbersome in tight spaces.
Consider the meter’s footprint and how it fits in your hand. Ergonomic design matters—look for contoured grips and balanced weight distribution. Some meters include belt clips, magnetic hangers, or kickstands for hands-free use, which can be very convenient.
If you’re working in confined areas like electrical panels or behind appliances, a slim profile and flexible probes can make a big difference. Conversely, if you’re doing bench work, a larger meter with a sturdy base might be preferable.
Portability also includes battery life. Most digital multimeters run on 9V or AA batteries. Check the expected battery life—some meters can last hundreds of hours on a single set, while others drain quickly, especially with backlighting or continuous use. Auto power-off features help conserve battery when the meter is idle.
Different Types of Buying Guide

Common Buying Mistakes to Avoid
❌ Mistake: Buying the Cheapest Option Available
Why it’s bad: The lowest-priced multimeters often cut corners on safety, accuracy, and build quality. They may lack proper fusing, use low-grade components, or fail to meet safety standards. This can lead to inaccurate readings, equipment damage, or even personal injury.
What to do instead: Invest in a meter from a reputable brand with at least a CAT III rating and a 1-year warranty. Even a $50 meter from a trusted manufacturer is safer and more reliable than a $15 no-name model.
❌ Mistake: Ignoring Safety Ratings
Why it’s bad: Using a meter without proper CAT ratings in high-energy environments can result in arc flashes, explosions, or severe electric shock. Safety isn’t optional—it’s essential.
What to do instead: Always check the CAT rating and ensure it matches your working environment. For household wiring, choose at least CAT III 600V. For industrial settings, CAT IV is recommended.
❌ Mistake: Overlooking Auto-Ranging
Why it’s bad: Manual-ranging meters require you to guess the correct range before measuring. If you’re wrong, you risk damaging the meter or getting incorrect readings. This is especially frustrating for beginners.
What to do instead: Choose an auto-ranging meter unless you have a specific need for manual control. Auto-ranging simplifies operation and reduces errors.
❌ Mistake: Not Checking Probe Quality
Why it’s bad: Poor-quality probes can break, slip, or give false readings. Worn or damaged probes are a common cause of measurement errors and safety hazards.
What to do instead: Look for meters with high-quality, replaceable probes. Inspect probes regularly and replace them if they show signs of wear.
❌ Mistake: Assuming All Meters Are Accurate
Why it’s bad: Many budget meters claim high accuracy but fail to deliver in real-world conditions. Without proper calibration, even expensive meters can drift over time.
What to do instead: Buy from brands that offer calibration services or include calibration certificates. For critical work, consider annual recalibration.
❌ Mistake: Buying Based on Features Alone
Why it’s bad: A meter with 20 functions may sound impressive, but if it’s hard to use or lacks basic safety features, it’s not worth it. Feature bloat can complicate simple tasks.
What to do instead: Focus on the functions you actually need. A simple, reliable meter with voltage, current, and resistance is often better than a complex one with unused extras.
❌ Mistake: Not Considering Battery Life
Why it’s bad: A meter that drains batteries quickly can leave you stranded during a job. Frequent battery changes are inconvenient and add to long-term costs.
What to do instead: Choose a meter with long battery life and auto power-off. Some models even use rechargeable batteries or USB charging.
Budget Guidelines: How Much Should You Spend?
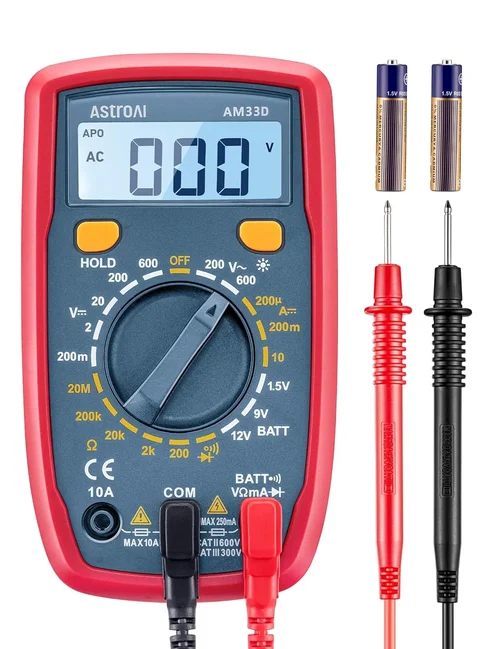
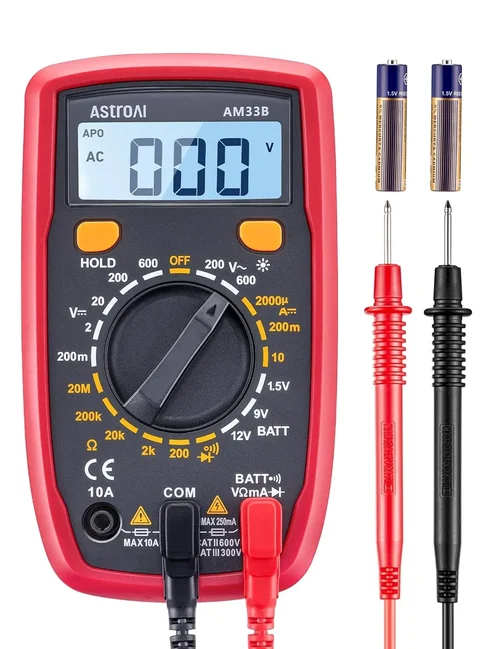
Entry-Level ($10 – $50): These meters are suitable for basic home use, such as checking batteries, testing outlets, or simple electronics projects. Expect limited accuracy (±1% to ±2%), basic safety features, and plastic builds. Brands like AstroAI and Neoteck offer decent options in this range, but avoid no-name brands. Ideal for occasional use, but not recommended for professional work.
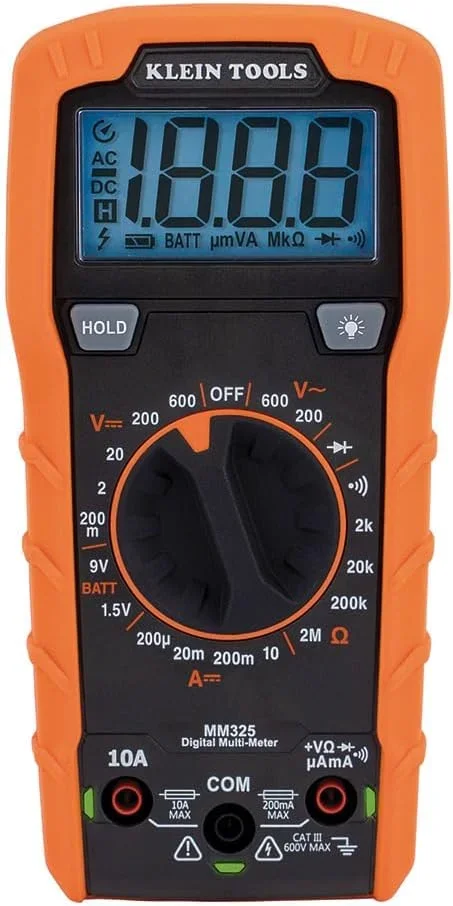
Mid-Range ($50 – $150): This is the sweet spot for most users. Meters in this range offer better accuracy (±0.5% to ±1%), improved build quality, and additional features like True RMS, capacitance, and temperature. Brands like Klein Tools, Amprobe, and Brymen excel here. These meters are durable, safe, and versatile enough for technicians, hobbyists, and small businesses.
Premium ($150 – $500+): Designed for professionals, these meters deliver high accuracy (±0.1% or better), advanced features (data logging, Bluetooth, PC connectivity), and rugged construction. Fluke, Keysight, and Hioki dominate this space. They’re built to withstand harsh environments and are often used in industrial, medical, or aerospace applications. Worth the investment if your work demands precision and reliability.
Luxury ($500+): These are top-tier instruments with laboratory-grade accuracy, extensive calibration options, and cutting-edge technology. They’re overkill for most users but essential for metrology labs, research facilities, or high-stakes engineering. Expect features like 6.5-digit resolution, thermal stability, and full certification packages.
Expert Tips for Getting the Best Deal
- Buy during seasonal sales: Look for discounts during Black Friday, Amazon Prime Day, or back-to-school seasons. Many retailers offer significant savings on tools.
- Check refurbished or open-box options: Reputable sellers like Fluke and Klein Tools sell certified refurbished meters at 20-40% off. These are tested, calibrated, and often come with warranties.
- Compare prices across retailers: Use price comparison sites or check multiple stores (Amazon, Home Depot, Grainger, etc.) to find the best deal.
- Read user reviews carefully: Look for consistent feedback on accuracy, durability, and customer service. Avoid products with many complaints about safety or performance.
- Consider bundled kits: Some meters come with probes, cases, or accessories at a lower total cost than buying separately.
- Verify return policies: Ensure you can return the meter if it doesn’t meet your expectations. A 30-day return window is standard.
- Test before buying (if possible): In-store demos let you check the display, buttons, and overall feel. Online, watch video reviews to see the meter in action.
- Invest in calibration: For professional use, budget for annual calibration to maintain accuracy and compliance.

Frequently Asked Questions
Q: What’s the difference between auto-ranging and manual-ranging multimeters?
A: Auto-ranging meters automatically select the correct measurement range, making them easier to use. Manual-ranging meters require you to set the range yourself, which can be more precise but also more error-prone. Auto-ranging is ideal for most users.
Q: Do I need a True RMS multimeter?
A: If you’re working with modern electronics, variable frequency drives, or non-sinusoidal waveforms (like those from LED dimmers or switch-mode power supplies), yes. True RMS meters provide accurate readings on distorted waveforms, while average-responding meters do not.
Q: Can I use a multimeter to test car batteries?
A: Yes. Set the meter to DC voltage and connect the probes to the battery terminals. A healthy 12V battery should read around 12.6V when fully charged. Lower readings may indicate a weak or discharged battery.
Q: How often should I calibrate my multimeter?
A: For professional use, annual calibration is recommended. For hobbyists, every 2-3 years is usually sufficient, unless the meter is dropped or exposed to extreme conditions.
Q: Are clamp meters better than standard multimeters?
A: Clamp meters excel at measuring current without breaking the circuit, making them safer and more convenient for high-current applications. However, they’re often more expensive and may lack some functions of standard meters. Many professionals use both.
Q: Can I measure current without breaking the circuit?
A: Only with a clamp meter or a multimeter with a clamp attachment. Standard multimeters require you to break the circuit and insert the meter in series.
Q: What’s the safest way to measure high voltage?
A: Always use a meter with the appropriate CAT rating, wear insulated gloves, and follow lockout/tagout procedures. Never work alone, and ensure the meter and probes are in good condition.
Q: Why is my multimeter reading zero or erratic?
A: Check the probes, battery, and input jacks. Loose connections, dead batteries, or incorrect settings can cause false readings. Also, ensure you’re using the correct function and range.
Q: Can I use a multimeter to test continuity?
A: Yes. Set the meter to continuity mode (usually indicated by a sound wave symbol). Touch the probes together—you should hear a beep. Then test the circuit or component. A beep indicates a complete path.
Q: Are expensive multimeters worth it?
A: For professionals and critical applications, yes. The accuracy, safety, and durability justify the cost. For casual use, a mid-range meter is usually sufficient.
Our Final Recommendations
Best for Budget-Conscious Buyers: Klein Tools MM300 – At under $50, this meter offers CAT III 600V safety, auto-ranging, and solid build quality. It’s perfect for DIYers and homeowners who need reliability without breaking the bank.
Best Overall Value: Brymen BM869s – Priced around $120, this meter delivers True RMS, 50,000-count resolution, and a rugged design. It’s a favorite among electronics enthusiasts for its performance-to-price ratio.
Best Premium Option: Fluke 87V – The gold standard for professionals, the Fluke 87V offers unmatched accuracy, durability, and safety. With True RMS, data logging, and a 3-year warranty, it’s worth every penny for serious work.
Best for Beginners: Amprobe AM-510 – This user-friendly meter includes auto-ranging, a backlit display, and essential safety features. It’s intuitive enough for newcomers but capable enough for light professional use.
Best for Advanced Users: Keysight U1282A – With 6.5-digit resolution, Bluetooth connectivity, and advanced diagnostics, this meter is ideal for engineers and technicians who demand precision and data integration.
Conclusion: Making the Right Choice
Choosing the right digital multimeter isn’t just about picking the most expensive or feature-packed model—it’s about finding the tool that matches your needs, environment, and skill level. Whether you’re fixing a lamp, diagnosing a car issue, or designing a circuit, a reliable multimeter empowers you to work safely and confidently.
Remember to prioritize safety, accuracy, and build quality over flashy extras. Invest in a reputable brand, check certifications, and don’t skimp on features that protect you and your equipment. A good multimeter is a lifelong companion in your toolbox, and the right one will serve you well for years to come.
So before you tackle your next project, ask yourself: Do I have a multimeter I can trust? If not, now’s the time to get one. With the insights from this guide, you’re equipped to make a smart, informed decision. Grab a reliable digital multimeter today—your future self will thank you.