
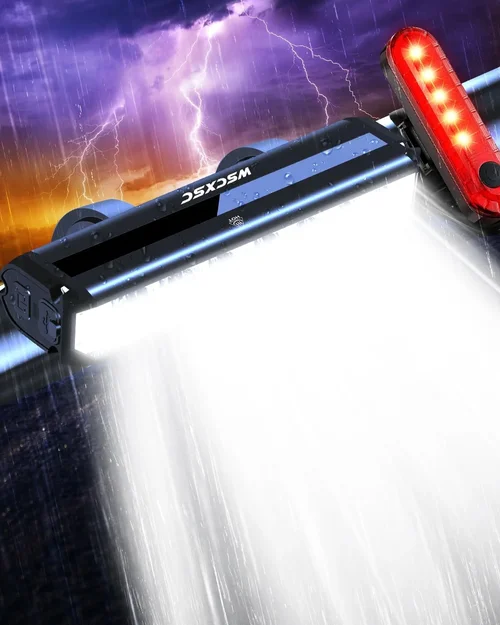
Riding your mountain bike after sunset opens up a whole new world of adventure—moonlit trails, quiet forests, and the thrill of navigating technical terrain under starlight. But without proper illumination, those magical night rides quickly turn into dangerous guessing games. That’s where a high-quality MTB headlight comes in. It’s not just about visibility; it’s about safety, confidence, and unlocking the full potential of your bike after dark. Whether you’re commuting home on a dimly lit path or shredding singletrack under the stars, the right headlight can mean the difference between a smooth ride and a close call.
This guide is designed to cut through the noise and help you make an informed decision. With dozens of models flooding the market—from ultra-bright 5,000-lumen beasts to minimalist USB-rechargeable commuter lights—it’s easy to feel overwhelmed. We’ll walk you through every critical factor, from lumen output and beam pattern to battery life and mounting systems. You’ll learn how to match your lighting needs to your riding style, avoid common pitfalls, and get the best value for your budget. By the end, you’ll know exactly what to look for—and which models deliver real-world performance, not just marketing hype.
The MTB headlight market has evolved dramatically in recent years. Advances in LED technology, lithium-ion batteries, and smart electronics have made today’s lights brighter, lighter, and more efficient than ever. Yet, with innovation comes complexity. Some lights boast impressive specs but fail in real-world conditions. Others prioritize flashy features over reliability. Our goal is to give you the tools to separate fact from fiction, so you invest in a light that truly enhances your night riding—not one that leaves you stranded in the dark.

What to Look for When Buying MTB Headlights
1. Brightness (Lumens & Beam Pattern)
Brightness is often the first thing riders consider—and for good reason. But raw lumen count alone tells only part of the story. A lumen measures total light output, but it doesn’t reveal how that light is distributed. Two lights with identical lumen ratings can perform dramatically differently depending on their optics and beam design.
For mountain biking, you need a balance between flood and spot. A wide flood illuminates the trail immediately in front of your wheel, helping you spot roots, rocks, and ruts. A focused spot beam reaches farther down the trail, giving you early warning of upcoming turns or obstacles. Look for lights that offer multiple beam modes or hybrid optics. For example, a 1,500-lumen light with a well-designed dual-beam system often outperforms a 3,000-lumen light with a narrow, harsh spotlight.
Consider your riding environment. Trail riders tackling technical, winding paths benefit from a wider, softer beam. Riders on fire roads or open singletrack can leverage a longer-reaching spot. And if you ride at high speeds, you’ll need more throw to react in time. Always check real-world beam shots—not just manufacturer diagrams—to see how the light performs in practice.
2. Battery Life & Runtime
Nothing kills a night ride faster than a dead battery. Runtime is crucial, especially on longer rides or multi-day adventures. Most modern MTB headlights use rechargeable lithium-ion batteries, either integrated into the light housing or housed in a separate pack.
Check the manufacturer’s runtime claims, but take them with a grain of salt. Many brands list “max brightness” runtimes, which are often unrealistically short. A light claiming 2 hours at 2,000 lumens might last only 45 minutes in real-world conditions due to thermal throttling or battery inefficiency. Look for lights that provide runtime estimates at multiple brightness levels—this gives you a clearer picture of what to expect.
Also consider battery capacity, measured in watt-hours (Wh). A higher Wh rating generally means longer runtime, but it also adds weight. Some lights offer removable or swappable batteries, which is ideal for endurance riders. Others feature USB-C fast charging, allowing you to top up during a lunch break or at a trailhead café.
3. Mounting System & Stability
A light is only as good as its mount. If it wobbles, shifts, or falls off mid-ride, it’s useless—and potentially dangerous. MTB headlights must withstand constant vibration, impacts, and sudden movements.
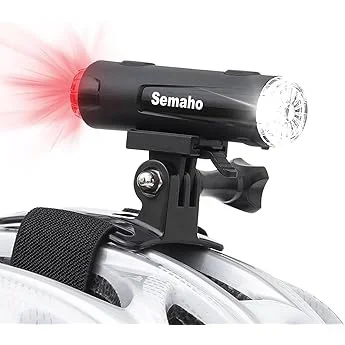
Look for robust mounting systems. Handlebar mounts should use secure clamps, preferably with rubber padding to prevent slippage. Some lights use GoPro-style mounts, which are versatile and widely compatible. Others feature proprietary brackets that lock the light in place with a twist or lever.
Consider where you mount the light. Handlebar mounting is standard and offers good stability, but it can interfere with dropper posts or cockpit space. Helmet mounts provide better beam direction—since the light follows your gaze—but add weight to your head and may feel unbalanced on long rides. Some riders use a combination: a handlebar light for wide illumination and a helmet light for focused vision.
Test the mount before committing. Does it hold firm over rocky terrain? Can you adjust the angle easily? Is it compatible with your bike’s handlebar diameter (common sizes are 31.8mm and 35mm)? A poor mount can ruin an otherwise excellent light.
4. Build Quality & Durability
Mountain biking is tough on gear. Your headlight will face mud, rain, dust, drops, and temperature extremes. A light that looks sleek in a store can fail in the field if it’s not built to last.
Look for lights with an IPX rating—ideally IPX6 or higher. IPX6 means the light is protected against powerful water jets, making it suitable for heavy rain and trail spray. IPX7 or IPX8 offers submersion protection, which is overkill for most riders but reassuring for extreme conditions.
Materials matter too. Aluminum housings dissipate heat better and resist impacts better than plastic. However, they’re heavier. Some high-end lights use magnesium alloy for a balance of strength and weight. Check for reinforced lens covers—polycarbonate is standard, but some brands use Gorilla Glass for scratch resistance.
Also consider heat management. High-output LEDs generate heat, which can reduce brightness and shorten battery life. Quality lights include heat sinks or thermal regulation systems to maintain performance. If a light dims significantly after 10 minutes, it’s likely overheating.
5. Features & Functionality
Modern MTB headlights come packed with features. Some are essential; others are nice-to-have. Focus on what enhances your ride, not what looks cool on paper.
Essential features include:
– Multiple brightness modes (high, medium, low, flash)
– Memory function (remembers your last setting)
– Battery indicator (LED or app-based)
– Easy mode switching (button or remote)
Advanced features to consider:
– Smart sensors that adjust brightness based on ambient light
– Bluetooth connectivity for app control and firmware updates
– Remote switch for handlebar control
– Anti-glare modes to avoid blinding oncoming riders
Avoid lights with overly complex interfaces. If you can’t change modes with gloves on or in the dark, the feature is more of a hindrance than a help. Simplicity and reliability should trump gadgetry.
6. Weight & Aerodynamics
Every gram counts on a mountain bike, especially when added to your head or handlebars. A heavy light can cause neck fatigue on long rides or affect bike handling.
Helmet-mounted lights should be lightweight—ideally under 150g—to avoid pulling your head down. Handlebar lights can be heavier, but aim for under 250g unless you’re using a high-capacity battery pack.
Aerodynamics matter less for MTB than road cycling, but a bulky light can catch wind on fast descents. Look for streamlined designs that don’t protrude excessively.
Consider the weight distribution. A light with a separate battery pack allows you to place the pack on your frame or backpack, reducing handlebar or helmet load. This is especially useful for endurance or bikepacking trips.
7. Brand Reputation & User Feedback
Not all brands are created equal. Some specialize in bike lighting and have a proven track record. Others are generic electronics companies jumping on the trend.
Stick with reputable brands known for reliability and customer support. Look for companies that offer firmware updates, detailed manuals, and responsive service. Read user reviews on multiple platforms—Amazon, MTBR, Pinkbike, and Reddit. Pay attention to comments about real-world performance, not just specs.
Watch out for “Amazon-only” brands with no web presence or support. If a light fails and you can’t get help, you’re out of luck. Established brands like Exposure, NiteRider, Lezyne, and Bontrager have loyal followings for a reason.
8. Warranty & Customer Support
A good warranty is a sign of confidence in a product. Most quality MTB headlights come with a 1- to 2-year warranty. Some premium brands offer 3 years or even lifetime coverage.
Check what the warranty covers. Does it include battery degradation? Water damage? Accidental drops? Read the fine print. Some brands require registration or proof of purchase.
Customer support matters too. Can you contact them easily? Do they respond quickly? Are replacement parts available? A light with a great warranty but poor support isn’t much help if you’re stuck on a remote trail.
Different Types of MTB Headlights

Common Buying Mistakes to Avoid
❌ Mistake: Prioritizing Lumens Over Beam Quality
Why it’s bad: A high lumen count doesn’t guarantee good visibility. Lights with poor optics can create harsh glare, dark spots, or uneven coverage, making it harder to see the trail.
What to do instead: Focus on beam pattern and real-world performance. Look for lights with hybrid optics or adjustable beams. Check beam shot comparisons from trusted reviewers.
❌ Mistake: Ignoring Runtime in Real Conditions
Why it’s bad: Manufacturer runtime claims are often based on ideal lab conditions. In the real world, heat, vibration, and battery age reduce performance.
What to do instead: Look for lights with conservative runtime estimates or multiple mode options. Carry a backup battery or power bank for long rides.
❌ Mistake: Choosing a Light That’s Too Heavy
Why it’s bad: A heavy light, especially on your helmet, causes fatigue and affects balance. It can also strain your neck on long descents.
What to do instead: Opt for lightweight designs or lights with remote battery packs. Test the weight before buying—hold it in your hand or on your helmet.
❌ Mistake: Overlooking Mount Compatibility
Why it’s bad: A light that doesn’t fit your handlebar or helmet is useless. Some mounts are too bulky or incompatible with dropper posts.
What to do instead: Check your handlebar diameter and cockpit space. Choose a mount that’s secure, adjustable, and doesn’t interfere with other components.
❌ Mistake: Skipping Water Resistance
Why it’s bad: MTB trails are often muddy and wet. A light without proper sealing can fail in the rain or after a stream crossing.
What to do instead: Choose lights with at least IPX6 rating. Avoid cheap lights with no IP rating or vague “water-resistant” claims.
❌ Mistake: Buying Based on Price Alone
Why it’s bad: The cheapest light may save money upfront but cost more in the long run due to poor performance, short lifespan, or lack of support.
What to do instead: Balance budget with quality. Mid-range lights often offer the best value. Invest in a reliable brand with good support.
❌ Mistake: Ignoring User Reviews
Why it’s bad: Marketing materials highlight strengths but hide flaws. Real users reveal issues like overheating, poor battery life, or fragile mounts.
What to do instead: Read reviews from multiple sources. Look for detailed, long-term feedback. Avoid lights with consistently negative comments about durability or support.
Budget Guidelines: How Much Should You Spend?
Entry-Level ($30–$80): These lights are ideal for casual riders or short commutes. Expect 500–1,000 lumens, basic beam patterns, and limited runtime (1–3 hours). Build quality is often plastic, and water resistance may be minimal. Great for paved trails or well-lit areas, but not recommended for technical night riding.
Mid-Range ($80–$200): This is the sweet spot for most riders. Lights in this range offer 1,000–2,500 lumens, better optics, and improved durability. Many include USB-C charging, multiple modes, and IPX6+ ratings. You’ll find reliable brands with solid warranties. Perfect for regular trail riding and weekend adventures.
Premium ($200–$400): For serious night riders, racers, or endurance athletes. These lights deliver 2,500–5,000 lumens, advanced beam control, and long runtimes. Expect aluminum or magnesium housings, smart features, and excellent thermal management. Many include remote switches, app connectivity, and swappable batteries.
Luxury ($400+): Top-tier lights with cutting-edge technology. Think 5,000+ lumens, dual LEDs, customizable beam patterns, and professional-grade durability. These are for elite riders, bikepackers, or those who demand the absolute best. Often used in competitions or extreme conditions.
Expert Tips for Getting the Best Deal
– Buy during off-season sales: Look for discounts in late fall or winter when demand is low. Many brands clear inventory before new models launch.
– Check manufacturer websites: Some brands offer direct-to-consumer pricing, exclusive bundles, or refurbished units at lower costs.
– Consider last year’s model: New releases often come with minor upgrades. Older models can be significantly cheaper and nearly as good.
– Bundle with accessories: Some retailers offer lights with mounts, batteries, or taillights at a discount. Compare total value.
– Read return policies: Ensure you can return or exchange the light if it doesn’t meet expectations. Test it on a short ride before committing.
– Join rider forums: Communities like MTBR or Reddit often share deals, reviews, and group buys.
– Watch for firmware updates: Some smart lights improve over time. Check if the brand supports long-term updates.
– Test before buying: If possible, borrow a friend’s light or visit a shop. See how it feels on your bike and helmet.

Frequently Asked Questions
Q: How many lumens do I really need for mountain biking?
A: It depends on your speed and terrain. For slow, technical trails, 1,000–1,500 lumens is sufficient. For fast, open trails, aim for 2,000–3,000 lumens. Racers or endurance riders may need 3,000+.
Q: Can I use a road bike light for mountain biking?
A: Not recommended. Road lights are designed for smooth surfaces and longer throw. They lack the wide flood needed for technical trails and may not be durable enough for off-road use.
Q: Are USB-rechargeable lights reliable?
A: Yes, if they’re from a reputable brand. Modern USB-C lights charge quickly and hold charge well. Just ensure they have proper water sealing and battery protection.
Q: Should I use a helmet light or handlebar light?
A: It depends. Helmet lights follow your gaze, which is great for tight turns. Handlebar lights are more stable and don’t add head weight. Many riders use both for maximum coverage.
Q: How do I prevent my light from overheating?
A: Choose lights with heat sinks or thermal regulation. Avoid running max brightness for long periods. Use lower settings when possible.
Q: Can I use my MTB light for commuting?
A: Absolutely. Many MTB lights are versatile. Just use lower brightness settings in urban areas to avoid blinding others.
Q: What’s the difference between IPX6 and IPX7?
A: IPX6 protects against powerful water jets (like a hose). IPX7 means the light can be submerged in water up to 1 meter for 30 minutes. For MTB, IPX6 is usually sufficient.
Q: How often should I charge my light?
A: Charge after every ride if possible. Lithium-ion batteries last longer when kept between 20% and 80%. Avoid full discharges.
Q: Are expensive lights worth it?
A: If you ride frequently at night, yes. Premium lights offer better performance, durability, and support. For occasional use, a mid-range light is often enough.
Q: Can I upgrade my light’s battery?
A: Some lights allow battery swaps or upgrades. Check the manufacturer’s specs. Third-party batteries may void the warranty.
Our Final Recommendations
Best for Budget-Conscious Buyers: Lezyne Macro Drive 1300XXL – At around $90, it delivers 1,300 lumens, excellent beam quality, and a durable aluminum body. Great for trail riders who want reliability without breaking the bank.
Best Overall Value: NiteRider Lumina 1200 Boost – Priced under $150, it offers 1,200 lumens, a wide beam, and a robust mount. Ideal for most riders seeking a balance of performance and price.
Best Premium Option: Exposure Six Pack MK11 – At $400+, it’s a powerhouse with 5,000 lumens, swappable batteries, and race-ready optics. Perfect for serious night riders and racers.
Best for Beginners: Bontrager Ion 700 RT – Simple to use, 700 lumens, USB-C charging, and a clean beam. Great for new riders or casual night commutes.
Best for Advanced Users: Light & Motion Trail 1000 Boost – With 1,000 lumens, smart sensors, and app control, it’s packed with features for tech-savvy riders who want customization and performance.
Conclusion: Making the Right Choice
Choosing the best MTB headlight isn’t just about brightness—it’s about matching your light to your riding style, environment, and needs. A great light enhances your confidence, extends your riding season, and keeps you safe when the sun goes down. By focusing on beam quality, runtime, durability, and real-world performance, you’ll avoid common pitfalls and invest in a tool that truly serves you.
Don’t let marketing hype or flashy specs cloud your judgment. Read reviews, test when possible, and prioritize reliability over gadgets. Whether you’re a weekend warrior or a midnight shredder, the right headlight can transform your night rides from stressful to exhilarating.
Now that you’re armed with expert knowledge, it’s time to light up the trail. Ride safe, ride bright, and never let the darkness hold you back.