
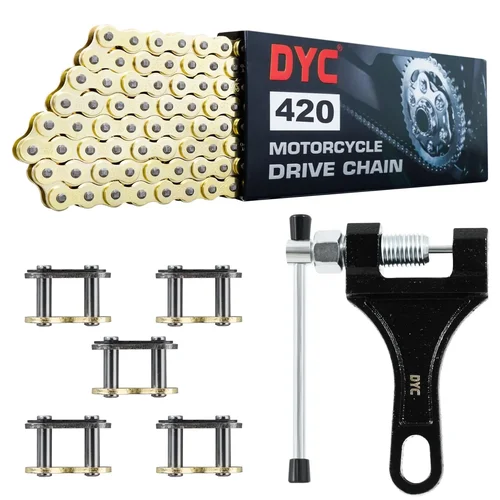
When it comes to dirt biking, few components are as critical—and often overlooked—as the chain. It’s the unsung hero that transfers power from your engine to the rear wheel, enduring extreme stress, dirt, mud, sand, and constant vibration. A failing or poorly chosen chain doesn’t just reduce performance—it can lead to sudden breakdowns, costly repairs, or even dangerous accidents on the trail. Whether you’re a weekend warrior hitting local trails or a competitive racer pushing your machine to its limits, choosing the right dirt bike chain is not just a maintenance task; it’s a safety and performance decision.
This comprehensive buying guide is designed to cut through the noise and help you make an informed, confident choice in 2026. We’ll walk you through every essential factor—from material composition and tensile strength to compatibility, maintenance needs, and budget considerations. You’ll learn how to match the right chain type to your riding style, terrain, and bike model, avoid common pitfalls, and maximize both durability and value. With the dirt bike chain market more diverse than ever—featuring everything from budget-friendly OEM replacements to high-performance O-ring and X-ring models—this guide ensures you won’t waste money on the wrong product or compromise on reliability.
The market today offers a wide spectrum of options, ranging from basic non-sealed chains ideal for casual riders to premium sealed chains engineered for extreme conditions and long-distance endurance. Brands like DID, RK, Renthal, and JT Sprockets continue to lead with innovation, while newer entrants bring competitive pricing and modern materials. Whether you ride a lightweight 125cc two-stroke or a heavy-duty 450cc four-stroke, understanding what makes one chain better than another—and why—will save you time, money, and frustration. By the end of this guide, you’ll know exactly what to look for, what to avoid, and how to get the best chain for your specific needs.

What to Look for When Buying a Dirt Bike Chain
1. Chain Type: O-Ring vs. X-Ring vs. Non-Sealed
The type of chain you choose dramatically affects performance, lifespan, and maintenance requirements. Non-sealed chains, often called “standard” or “bushing” chains, are the most basic and affordable option. They consist of inner and outer plates connected by pins and bushings, with no sealing mechanism to retain lubrication. While they’re lightweight and simple, they require frequent cleaning and lubrication—especially in dirty or wet conditions—and typically wear out faster due to increased friction and contamination.
O-ring chains, on the other hand, feature rubber seals (O-rings) between the inner and outer plates. These seals trap grease inside the chain’s pins and bushings, reducing metal-to-metal contact and significantly extending service life. O-ring chains are ideal for most recreational and trail riders who want durability without excessive maintenance. They perform well in muddy, sandy, and wet environments, though the seals can harden over time if not properly maintained.
X-ring chains represent the next evolution. They use a four-lip seal design that offers superior grease retention, reduced friction, and better resistance to dirt intrusion compared to traditional O-rings. This results in smoother operation, less drag, and even longer life—making X-ring chains the preferred choice for serious off-road enthusiasts, enduro riders, and racers. While they come at a higher price point, the performance and longevity gains often justify the investment, especially for high-mileage or high-stress applications.
2. Tensile Strength and Load Capacity
Tensile strength refers to the maximum force a chain can withstand before breaking, measured in pounds per square inch (psi) or newtons (N). For dirt bikes, this is crucial because the chain must handle sudden bursts of power, especially during acceleration, hill climbing, or jumping. A chain with insufficient tensile strength may stretch prematurely or snap under load—leading to catastrophic failure.
Most modern dirt bike chains range from 4,000 to over 9,000 pounds of tensile strength. Entry-level chains typically fall between 4,000 and 6,000 psi, suitable for lighter bikes and casual use. Mid-range O-ring and X-ring chains often exceed 7,000 psi, while premium racing chains can reach 8,500 psi or more. Always check your owner’s manual or manufacturer specifications to ensure the chain you select meets or exceeds your bike’s recommended load rating.
It’s also important to consider the chain’s pitch and width. Most dirt bikes use a 520-pitch chain (5/8 inch between links), but some older or smaller models may use 428 or 525. Using the wrong pitch can cause misalignment, poor engagement with sprockets, and rapid wear. Additionally, a wider chain (like 525) may offer more strength but adds weight and rotational mass, which can affect handling and acceleration.
3. Material and Construction Quality
The materials used in a chain’s construction directly impact its durability, resistance to wear, and overall performance. High-quality chains are typically made from alloy steel that undergoes heat treatment processes like carburizing or nitriding. These treatments harden the surface of the pins, bushings, and plates while maintaining a tough core, resulting in excellent wear resistance without brittleness.
Look for chains that specify “nickel-plated” or “titanized” finishes. Nickel plating adds a protective layer that resists corrosion and reduces friction, while titanized chains feature a titanium nitride coating for extreme hardness and a distinctive gold color. These finishes not only improve longevity but also give the chain a smoother feel and quieter operation.
Avoid chains made from low-carbon steel or those with minimal surface treatment. These are more prone to rust, wear quickly, and often lack the precision engineering needed for consistent performance. Reputable brands will disclose material specs and manufacturing processes—don’t hesitate to research or contact customer support if details are unclear.
4. Compatibility with Your Dirt Bike
Not all chains are created equal—and not all chains fit all bikes. Compatibility starts with the correct pitch (e.g., 520, 525), but also includes the number of links, master link type, and overall length. Installing a chain that’s too short can cause immediate tension issues and damage to the transmission or rear wheel. One that’s too long may slap, skip, or even derail under load.
To determine the right chain length, consult your bike’s service manual or count the links on your current chain (including the master link). Most manufacturers list recommended chain lengths for each model. If you’ve changed sprocket sizes (front or rear), you may need to adjust the chain length accordingly. For example, upgrading to a larger rear sprocket for more low-end torque typically requires a longer chain.
Also consider the master link design. Some chains use a clip-style master link, which is easy to install but can be less secure if not properly seated. Others use a rivet-style master link, which requires a special tool to install but offers greater strength and reliability—especially important for high-performance or racing applications. Always ensure the master link matches the chain type and is installed correctly to prevent failure.
5. Maintenance Requirements
How much time and effort are you willing to dedicate to chain maintenance? This is a critical question that influences your chain choice. Non-sealed chains demand the most attention: they should be cleaned and lubricated after every ride, especially in muddy or sandy conditions. Without regular care, dirt and grit embed into the pins and bushings, accelerating wear and reducing efficiency.
O-ring and X-ring chains require far less frequent maintenance because the seals keep lubrication in and contaminants out. However, they still benefit from periodic cleaning and re-lubrication—ideally every few rides or after particularly dirty sessions. Use a chain cleaner and a high-quality chain lube designed for sealed chains. Avoid WD-40 or general-purpose oils, as they can degrade rubber seals over time.
Consider your riding environment. If you frequently ride in wet, muddy, or salty conditions (like coastal trails), a sealed chain with corrosion-resistant plating is essential. For dry, dusty desert riding, even a well-maintained non-sealed chain might suffice—but sealed chains still offer better longevity. Ultimately, the best chain is one you’ll actually maintain consistently.
6. Brand Reputation and Reliability
When it comes to critical components like chains, brand matters. Established manufacturers like DID (Daido Kogyo), RK, Renthal, and JT Sprockets have decades of experience engineering chains for motorcycles, ATVs, and dirt bikes. These companies invest in rigorous testing, precision manufacturing, and quality control, resulting in products that consistently meet or exceed industry standards.
DID, for example, is renowned for its VM and EK series chains, widely used in professional racing and OEM applications. RK offers the SSO and SX-R series, known for their balance of strength and affordability. Renthal focuses on high-performance applications with its Pro Taper and FatBar-compatible drivetrain components. JT Sprockets provides reliable, budget-friendly options without sacrificing essential durability.
Avoid no-name or generic chains sold at rock-bottom prices. While they may appear similar, they often use inferior materials, inconsistent tolerances, and poor-quality seals. These chains may fail prematurely, stretch quickly, or even break under normal riding conditions. Reading user reviews and checking forums like ThumperTalk or Reddit’s r/dirtbikes can provide real-world insights into a brand’s reliability.
7. Warranty and Customer Support
A strong warranty is a sign of confidence in a product’s quality. Most reputable chain manufacturers offer limited warranties ranging from 6 months to 2 years, covering defects in materials and workmanship. However, warranties typically do not cover normal wear, improper installation, or damage from misuse—so read the fine print carefully.
Customer support is equally important. If you encounter an issue—such as a defective master link or premature stretching—responsive support can save you time and hassle. Brands with dedicated technical teams, detailed installation guides, and accessible customer service (via phone, email, or live chat) tend to provide a better overall experience.
Additionally, consider availability of replacement parts. Can you easily find master links, spare links, or repair kits for your chain? Some brands offer complete service kits, while others require you to buy a whole new chain for minor repairs. This can impact long-term cost and convenience, especially if you’re traveling or riding in remote areas.
8. Price vs. Value
It’s tempting to go for the cheapest chain available—but dirt bike chains are not an area to cut corners. A $30 chain might save you money upfront, but if it stretches after 500 miles or breaks during a ride, you’ll end up spending more on replacements, labor, and potential damage to other components.
Instead, think in terms of value: cost per mile or cost per riding hour. A $70 X-ring chain that lasts 2,000 miles offers better value than a $40 O-ring chain that needs replacement every 800 miles. Factor in maintenance costs, downtime, and peace of mind. For most riders, mid-range O-ring or X-ring chains provide the best balance of affordability and performance.
Also consider bundled deals. Some retailers offer chain and sprocket kits at a discounted rate. Replacing both at the same time ensures even wear and optimal performance, and can save you 15–25% compared to buying separately. Just make sure all components are compatible and from trusted brands.
Different Types of Dirt Bike Chains

Common Buying Mistakes to Avoid
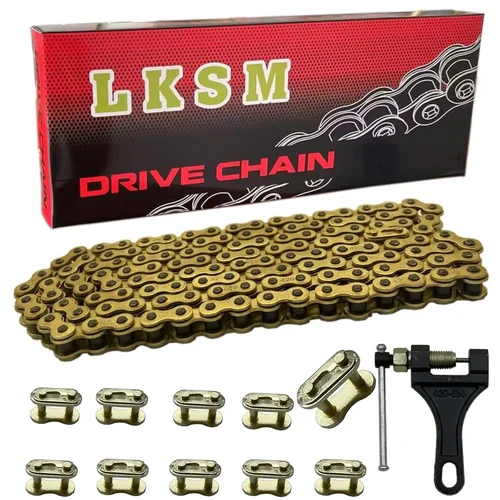
❌ Mistake: Choosing Based on Price Alone
Why it’s bad: Opting for the cheapest chain available often leads to premature wear, frequent replacements, and potential safety risks. Low-cost chains may use substandard materials, inconsistent manufacturing, or weak seals that fail under stress.
What to do instead: Focus on value, not just cost. Invest in a mid-range O-ring or X-ring chain from a reputable brand. The longer lifespan and reduced maintenance will save you money and hassle in the long run.
❌ Mistake: Ignoring Compatibility
Why it’s bad: Installing a chain with the wrong pitch, length, or master link type can cause misalignment, poor shifting, accelerated sprocket wear, or even chain failure. It may also void your warranty or damage your transmission.
What to do instead: Always verify your bike’s specifications before purchasing. Check the owner’s manual, count your current chain’s links, and confirm the correct pitch (usually 520 for modern dirt bikes). When in doubt, consult a mechanic or dealer.
❌ Mistake: Overlooking Maintenance Needs
Why it’s bad: Assuming a sealed chain requires no maintenance is a common error. While O-ring and X-ring chains are more forgiving, they still need periodic cleaning and lubrication. Neglecting this leads to seal degradation, increased friction, and reduced lifespan.
What to do instead: Establish a regular maintenance routine. Clean your chain after muddy or wet rides, and apply a quality chain lube every few rides. Use a chain brush and avoid harsh solvents that can damage seals.
❌ Mistake: Buying the Wrong Chain for Your Riding Style
Why it’s bad: A non-sealed chain may suffice for occasional trail rides, but it will wear out quickly on a high-torque 450cc motocross bike. Conversely, spending $150 on a racing chain for casual weekend use is overkill and unnecessary.
What to do instead: Match the chain to your riding intensity and environment. Trail riders should consider O-ring chains, while racers and enduro riders benefit from X-ring or titanized models. Assess your typical terrain, frequency of use, and bike power output.
❌ Mistake: Skipping the Master Link Inspection
Why it’s bad: A poorly installed or defective master link is a common cause of chain failure. Clip-style links can pop off if not secured properly, and rivet-style links may shear if over-tightened or misaligned.
What to do instead: Always inspect the master link before and after installation. Ensure clip links are fully seated and secured with the retaining clip. For rivet links, use a proper chain tool and follow torque specifications. Carry a spare master link when riding remotely.
❌ Mistake: Not Replacing Sprockets with the Chain
Why it’s bad: Installing a new chain on worn sprockets causes rapid chain stretch, poor engagement, and accelerated wear on both components. This creates a cycle of frequent replacements and reduced performance.
What to do instead: Replace the chain and sprockets as a set whenever possible. Even if the sprockets look okay, microscopic wear can affect chain performance. Many retailers offer chain and sprocket kits at a discount—take advantage of these deals.
❌ Mistake: Ignoring User Reviews and Expert Opinions
Why it’s bad: Relying solely on product descriptions or marketing claims can lead to disappointment. Real-world performance often differs from lab tests, especially under extreme conditions.
What to do instead: Read verified customer reviews on trusted platforms like RevZilla, Rocky Mountain ATV/MC, or Amazon. Check forums and YouTube reviews from experienced riders. Look for consistent feedback on durability, ease of installation, and value.
Budget Guidelines: How Much Should You Spend?
Entry-Level ($25 – $45): This tier includes basic non-sealed chains and budget O-ring models. Ideal for casual riders, vintage bike owners, or those on a tight budget. Expect shorter lifespan and higher maintenance. Best for light use in dry conditions. Brands like JT Sprockets offer decent options in this range, but avoid no-name generics.
Mid-Range ($50 – $80): The sweet spot for most riders. High-quality O-ring and entry-level X-ring chains from reputable brands fall here. These offer excellent durability, reduced maintenance, and reliable performance for trail, enduro, and motocross use. Models like the DID 520VX3 or RK 520SO are popular choices. This range provides the best balance of cost, performance, and longevity.
Premium ($80 – $120): Designed for serious riders and enthusiasts. Features include X-ring seals, nickel or titanized plating, and high tensile strength (8,000+ psi). These chains are built for high-mileage use, harsh terrain, and competitive riding. Brands like DID, RK, and Renthal dominate this space. Expect minimal stretch, excellent corrosion resistance, and long service life.
Luxury ($120+): Top-tier chains for professional racers, long-distance adventurers, or collectors. These include racing-specific models with ultra-high tensile strength, precision engineering, and advanced coatings. Examples include the DID 520ERV3 or RK GB520MXU. While overkill for most recreational riders, they deliver unmatched performance and reliability under extreme conditions.
Expert Tips for Getting the Best Deal
- Buy During Off-Season Sales: Retailers often discount dirt bike parts in late fall and winter when riding activity slows. Look for Black Friday, Cyber Monday, and end-of-season clearance events to save 20–40%.
- Shop at Specialty Retailers: Online stores like Rocky Mountain ATV/MC, RevZilla, and MotoSport offer competitive pricing, expert support, and frequent promotions. They also provide detailed fitment guides and customer reviews.
- Bundle Chain and Sprocket Kits: Purchasing a chain and sprocket set together typically saves 15–25% compared to buying separately. It also ensures compatibility and even wear.
- Check for Manufacturer Rebates: Some brands offer mail-in rebates or instant discounts during promotional periods. Sign up for brand newsletters to stay informed.
- Read Return Policies: Ensure the retailer allows returns or exchanges if the chain doesn’t fit or arrives defective. Avoid sellers with strict no-return policies.
- Inspect Before Installing: Check for defects like bent plates, stiff links, or damaged seals before mounting. A quick visual and manual inspection can prevent installation issues.
- Use a Chain Tool for Precision: Invest in a quality chain breaker tool. It ensures clean cuts, proper riveting, and safe master link installation—especially important for rivet-style links.
- Keep Records for Warranty Claims: Save your receipt and note the installation date. Most warranties require proof of purchase and proper maintenance records.

Frequently Asked Questions
Q: How often should I replace my dirt bike chain?
A: It depends on riding conditions, maintenance, and chain type. As a general rule, inspect your chain every 5–10 hours of riding. Replace it when it stretches beyond 1.5% of its original length (use a chain checker tool). O-ring and X-ring chains typically last 1,500–3,000 miles with proper care, while non-sealed chains may need replacement every 500–1,000 miles.
Q: Can I use a 525 chain on a 520 setup?
A: Technically, a 525 chain is wider and stronger, but it may not fit properly on 520 sprockets due to differences in roller width and plate spacing. This can cause poor engagement, increased wear, and potential damage. Always use the correct pitch specified for your bike.
Q: Do I need a special tool to install a chain?
A: For clip-style master links, basic pliers and a screwdriver may suffice. However, for rivet-style master links, a chain breaker and rivet tool are essential to ensure a secure, professional installation. Using improper tools can damage the chain or create a safety hazard.
Q: Can I clean my chain with a pressure washer?
A: Avoid high-pressure washers, especially on sealed chains. The force can push water and dirt past the seals, leading to corrosion and premature wear. Use a soft brush, mild detergent, and low-pressure rinse instead.
Q: Is a gold chain better than a black one?
A: Color alone doesn’t determine performance. Gold chains are often titanized or nickel-plated for enhanced durability and corrosion resistance. However, some black chains use similar treatments. Focus on the specifications, not the color.
Q: How do I know if my chain is too loose or too tight?
A: Proper chain tension allows about 1–1.5 inches of vertical movement when pressed midway between the sprockets. Too tight increases wear and strain on components; too loose can cause slapping, skipping, or derailment. Adjust using the rear axle adjusters and check regularly.
Q: Can I repair a broken chain in the field?
A: Yes, with a spare master link and basic tools. Carry a quick-link repair kit when riding remotely. Remove the damaged section, reconnect with the master link, and ensure it’s securely fastened. This is a temporary fix—replace the chain as soon as possible.
Q: Are aftermarket chains better than OEM?
A: Not necessarily. OEM chains are designed specifically for your bike and meet manufacturer standards. However, premium aftermarket chains (like DID or RK) often exceed OEM specs in strength and durability. Choose based on your needs and budget.
Q: Do I need to lubricate an O-ring chain?
A: Yes, but less frequently than non-sealed chains. Apply a light coat of chain lube every few rides or after cleaning. Avoid over-lubing, as excess lube attracts dirt and can degrade seals.
Q: What’s the difference between 520 and 520H chains?
A: The “H” denotes a heavy-duty version with thicker plates and higher tensile strength. 520H chains are ideal for high-torque applications like 450cc four-strokes or dual-sport bikes. Use 520H if your manual recommends it or if you’re upgrading for performance.
Our Final Recommendations
Best for Budget-Conscious Buyers: JT Sprockets JTC520SO O-Ring Chain – A reliable, affordable O-ring chain that offers solid performance for casual and trail riders. Priced under $60, it’s a great entry point without sacrificing essential durability.
Best Overall Value: DID 520VX3 X-Ring Chain – Combines excellent sealing, high tensile strength (8,500+ psi), and long lifespan. Ideal for most riders seeking a balance of performance and cost. Widely praised in user reviews and used by many enduro enthusiasts.
Best Premium Option: RK 520MXU X-Ring Chain – Features titanized plating, ultra-high strength, and minimal stretch. Perfect for racers, long-distance riders, or those who demand the best. Comes with a rivet master link for maximum security.
Best for Beginners: Renthal R1 520 O-Ring Chain – Easy to install, low maintenance, and compatible with most modern dirt bikes. Great for new riders learning proper chain care and setup.
Best for Advanced Users: DID 520ERV3 Racing Chain – Engineered for professional motocross and supercross. Offers maximum strength, minimal weight, and exceptional performance under extreme conditions. Requires precise installation and regular inspection.
Conclusion: Making the Right Choice
Choosing the best chain for your dirt bike isn’t just about picking the strongest or most expensive option—it’s about finding the right match for your riding style, bike, and maintenance habits. From understanding the differences between O-ring and X-ring designs to evaluating material quality, compatibility, and long-term value, this guide has equipped you with the knowledge to make a confident, informed decision.
Remember, your chain is a critical link in your bike’s drivetrain. A well-chosen, properly maintained chain enhances performance, extends the life of your sprockets, and keeps you safe on the trail. Don’t let a failing chain ruin your ride—invest in quality, follow best practices, and prioritize regular inspection and care.
Whether you’re shredding motocross tracks, exploring backcountry trails, or just enjoying weekend rides with friends, the right chain makes all the difference. Use this guide as your roadmap, avoid common pitfalls, and choose a chain that delivers reliability, durability, and peace of mind. Your bike—and your adventures—deserve nothing less.