
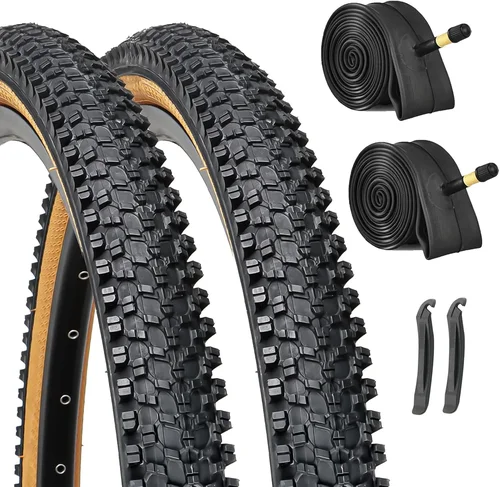
When it comes to mountain biking, few components have as direct an impact on your ride quality, safety, and overall enjoyment as your tires. Whether you’re shredding singletrack, climbing rocky trails, or cruising through muddy backwoods paths, the right set of tires can mean the difference between a confident, smooth ride and a frustrating, slip-sliding struggle. Yet, for many riders—especially those just getting into the sport or working within tight budgets—tires often become an afterthought. That’s a mistake. Even on a budget, choosing the right MTB tires is one of the smartest upgrades you can make.
This comprehensive buying guide is designed to help you navigate the crowded and often confusing world of budget mountain bike tires in 2026. We’ll cut through the marketing hype, decode technical jargon, and give you the practical knowledge you need to make a smart, informed decision—no matter your riding style or price range. Whether you’re a weekend warrior, a daily commuter who hits the trails after work, or a beginner looking to upgrade from stock rubber, this guide will equip you with everything you need to know. You’ll learn how to evaluate performance, durability, and value, avoid common pitfalls, and ultimately find the best budget MTB tires that deliver real-world performance without breaking the bank.
The market for affordable mountain bike tires has never been better. Thanks to advancements in rubber compounds, tread design, and manufacturing techniques, today’s budget tires offer performance that rivals what used to be considered mid-tier options just a few years ago. Brands like Maxxis, Schwalbe, WTB, and Continental now offer entry-level and mid-range models that balance grip, rolling resistance, and longevity at prices that won’t make your wallet cry. At the same time, a growing number of value-focused brands—such as Geax, Vittoria, and even direct-to-consumer labels—are pushing innovation and competition, giving riders more choices than ever. In this guide, we’ll explore all of it, so you can ride with confidence, knowing your tires are working for you—not against you.

What to Look for When Buying Budget MTB Tires
1. Tread Pattern and Aggressiveness
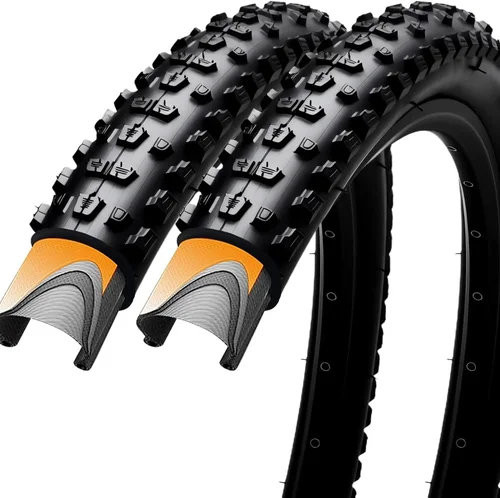
The tread pattern is arguably the most visible and important feature of any mountain bike tire. It directly affects how well your bike grips the trail, handles corners, and sheds mud or debris. On budget tires, tread design can vary widely—from minimal, fast-rolling patterns ideal for hardpack and light trails to aggressive, widely spaced knobs built for loose dirt, rocks, and technical terrain.
When evaluating tread, consider your primary riding conditions. If you mostly ride smooth, dry trails or gravel paths, a less aggressive tread with tightly packed center knobs will reduce rolling resistance and improve speed. However, if you frequently encounter loose soil, wet roots, or rocky descents, you’ll want a more open, aggressive pattern with larger side knobs for cornering traction. Look for tires that offer a balanced compromise—many budget-friendly models now feature directional treads with reinforced shoulder knobs for better lean-angle grip without sacrificing too much on flat terrain.
2. Rubber Compound and Grip
The rubber compound used in a tire determines how it feels on the trail—its grip, responsiveness, and wear rate. Premium tires often use advanced multi-compound blends, but many budget options now incorporate dual or even triple compounds to improve performance without a huge cost increase.
Softer compounds provide better traction, especially on wet or technical terrain, but they wear out faster. Harder compounds last longer and roll more efficiently but can feel slippery when the trail gets tricky. For budget-conscious riders, look for tires that use a dual-compound design: a harder center strip for longevity and lower rolling resistance, paired with softer side knobs for cornering grip. This setup is common in mid-tier models from brands like Maxxis (e.g., the DHF/DHR II in lower-tier compounds) and Schwalbe (Nobby Nic Performance).
Avoid tires that use only a single, hard compound—these may save money upfront but will likely disappoint on anything beyond smooth, dry trails. Also, check for terms like “grip additive” or “silica-enhanced” in the product description; these indicate improved wet-weather performance, which is crucial if you ride in damp climates.
3. Casing Construction and Weight
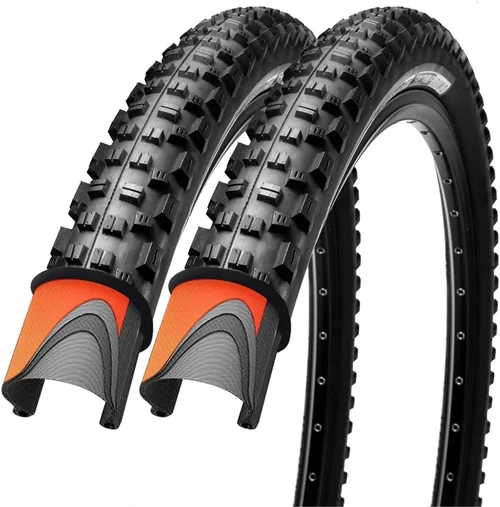
The casing is the internal structure of the tire, made from layers of fabric (usually nylon) that determine its strength, weight, and ride quality. Budget tires typically use lighter, thinner casings—often labeled as “single-ply” or “60 TPI” (threads per inch)—which reduce cost and weight but sacrifice durability and puncture resistance.
Higher TPI numbers (like 120 or 180) indicate a finer, more flexible casing that conforms better to the terrain, improving grip and comfort. However, these are rare in true budget models. Most affordable tires fall in the 60–90 TPI range, which is acceptable for casual or light trail use but may feel harsh on rough terrain or be more prone to sidewall tears.
If you ride aggressively or on rocky trails, consider spending a little more for a tire with reinforced sidewalls or a “double-ply” casing, even if it means buying one tire now and the other later. Some budget lines, like WTB’s Trail Boss or Geax’s AKA, offer surprisingly robust casings at entry-level prices.
4. Tubeless Compatibility
Tubeless setups have become the standard for modern mountain biking, offering lower rolling resistance, better traction (thanks to lower tire pressures), and reduced risk of pinch flats. The good news? Many budget MTB tires are now tubeless-ready (TLR or TR), meaning they can be used with sealant and no inner tube—often with just a tubeless valve and rim tape.
When shopping, look for “Tubeless Ready” or “UST” in the product name or description. These tires have reinforced beads and tighter tolerances to hold air without a tube. Converting to tubeless can be a game-changer, even on a budget, and many affordable tires perform surprisingly well in this setup.
5. Size and Fit
Mountain bike tires come in a variety of widths and diameters, and choosing the right size is critical for performance and safety. The most common diameters are 27.5″ (650b) and 29″, with widths ranging from 2.0″ to 2.6″ or more.
Wider tires (2.3″–2.6″) offer more traction, cushioning, and stability, making them ideal for technical trails, rough terrain, or riders who prioritize comfort. Narrower tires (2.0″–2.2″) roll faster and are lighter, better suited for cross-country racing or smooth trails.
Make sure the tire you choose fits your rim width. A tire that’s too wide for your rim can cause poor handling and increased risk of burping air (in tubeless setups). Most modern rims are designed for 2.2″–2.5″ tires, but always check your rim’s internal width and the manufacturer’s recommended tire size range.
Also, consider your frame and fork clearance. Some older or budget hardtails have limited space, so a 2.6″ tire might not fit even if the rim supports it. Measure the gap between your current tire and the frame/fork to be safe.
6. Durability and Puncture Resistance
No one wants to be sidelined by a flat, especially on a remote trail. Budget tires often skimp on puncture protection to keep costs down, but many now include basic reinforcement layers—like Kevlar belts or thicker rubber in high-wear zones.
Look for features such as “puncture shield,” “anti-flat layer,” or “reinforced casing” in the product specs. These don’t guarantee flat-free riding, but they significantly reduce the risk. Some brands, like Continental and Schwalbe, integrate their proprietary protection technologies (e.g., Continental’s “Protection” layer or Schwalbe’s “SnakeSkin”) even into lower-tier models.
That said, don’t expect the same level of durability as high-end tires. Budget models may wear faster, especially if ridden aggressively or on abrasive surfaces. Rotate your tires (swap front and rear) to extend their life, and inspect them regularly for cuts, embedded debris, or worn knobs.
7. Rolling Resistance and Speed
Rolling resistance affects how much effort it takes to keep your bike moving—especially important on climbs, long rides, or when you’re trying to maintain speed on flat sections. Aggressive treads with tall, widely spaced knobs create more drag, while smoother, tightly packed patterns roll more efficiently.
For budget riders who want a balance of grip and speed, look for tires with a “fast-rolling” design—center knobs that are low-profile and closely spaced, with taller side knobs only on the shoulders. This allows you to ride quickly on straight sections while still having grip when you lean into corners.
Some budget tires now use “low-resistance” rubber compounds or optimized knob shapes to reduce drag. While they won’t match the efficiency of premium race tires, they can make a noticeable difference over long distances.
8. Brand Reputation and Value
Not all budget tires are created equal. Some brands consistently deliver reliable performance at low prices, while others cut too many corners. Stick with reputable manufacturers known for quality control and real-world testing.
Maxxis, Schwalbe, WTB, and Continental are industry leaders with strong budget offerings. Their entry-level models may not have the latest tech, but they’re built to last and perform predictably. Emerging brands like Geax, Vittoria (with their Trail series), and even house brands from retailers like REI or Decathlon can also offer surprising value—just read reviews and check return policies.
Avoid no-name or ultra-cheap tires from unknown sellers, especially on marketplaces like Amazon or eBay. These often use inferior rubber, inconsistent casing construction, and may not meet safety standards. A tire failure at speed can lead to serious injury.
Different Types of Budget MTB Tires

Common Buying Mistakes to Avoid
❌ Mistake: Prioritizing Price Over Performance
Why it’s bad: The cheapest tire isn’t always the best value. Ultra-budget options often use poor-quality rubber, weak casings, and outdated tread designs that compromise safety and ride quality. You may end up replacing them more frequently or experiencing flats and blowouts.
What to do instead: Set a realistic budget—aim for at least $35–$50 per tire—and focus on getting the best performance within that range. Look for tires that balance cost with proven features like tubeless compatibility, dual compounds, and reputable branding.
❌ Mistake: Ignoring Your Riding Style and Terrain
Why it’s bad: A tire designed for smooth XC trails will struggle in mud or on rocky descents, and vice versa. Using the wrong tire type leads to poor grip, increased wear, and a less enjoyable ride.
What to do instead: Honestly assess where and how you ride most often. If you’re unsure, choose a versatile trail tire that handles a mix of conditions. Many budget all-mountain tires offer excellent adaptability.
❌ Mistake: Overlooking Tubeless Compatibility
Why it’s bad: Running tubes on modern rims wastes potential performance. You miss out on lower rolling resistance, better traction, and fewer flats.
What to do instead: Even on a budget, invest in tubeless-ready tires and convert your setup. The initial cost of sealant and valves is minimal compared to the long-term benefits.
❌ Mistake: Buying Mismatched Front and Rear Tires
Why it’s bad: The front and rear tires experience different forces—the front needs steering precision and cornering grip, while the rear handles acceleration and braking. Using the same tire on both wheels may not optimize performance.
What to do instead: Consider a “mullet” setup: a more aggressive tire up front (e.g., Maxxis Minion DHF) and a faster-rolling, durable tire in the rear (e.g., Maxxis High Roller II). Many budget riders use this strategy to balance grip and efficiency.
❌ Mistake: Neglecting Tire Pressure
Why it’s bad: Running incorrect pressure—too high or too low—can ruin even the best tire. Overinflation reduces grip and comfort; underinflation increases pinch flat risk and can damage rims.
What to do instead: Use a quality floor pump with a gauge and adjust pressure based on your weight, terrain, and riding style. Start with manufacturer recommendations and fine-tune from there.
❌ Mistake: Skipping Research and Reviews
Why it’s bad: Marketing claims can be misleading. A tire labeled “high-performance” may be anything but.
What to do instead: Read real user reviews on sites like Pinkbike, MTBR, or Amazon. Look for consistent feedback on grip, durability, and value. Expert reviews from outlets like Vital MTB or Bikerumor also provide reliable insights.
❌ Mistake: Forgetting About Seasonal Changes
Why it’s bad: Tires that work great in summer may be dangerous in winter or wet seasons. Mud, snow, and ice require specialized tread and compounds.
What to do instead: Consider swapping tires seasonally if you ride year-round. Many riders keep a set of aggressive mud tires for winter and switch to faster-rolling models in dry months.
Budget Guidelines: How Much Should You Spend?
– Entry-Level ($25–$40): This range includes basic tires from reputable brands or budget lines from major manufacturers. Expect single-compound rubber, 60 TPI casings, and minimal puncture protection. Best for casual riders, commuters, or those on very smooth trails. Examples: WTB Trail Boss Comp, Schwalbe Smart Sam.
– Mid-Range ($40–$60): The sweet spot for most riders. These tires often feature dual compounds, tubeless compatibility, and improved tread designs. You’ll find models from Maxxis, Schwalbe, and Continental that offer excellent value. Ideal for regular trail riding, light enduro, and mixed conditions. Examples: Maxxis Ardent Race, Continental Trail King Protection.
– Premium ($60–$80): For enthusiasts and serious riders who want near-high-end performance without the top-tier price. These tires use advanced rubber blends, reinforced casings, and optimized tread patterns. Great for aggressive trail riding, racing, or riders who prioritize durability. Examples: Maxxis Minion DHF EXO, Schwalbe Magic Mary Addix.
– Luxury ($80+): Top-tier tires with the latest tech—triple compounds, ultra-high TPI casings, and race-proven designs. While not “budget” in the strictest sense, some models occasionally drop into sale ranges. Best for competitive riders or those who demand maximum performance. Examples: Maxxis Assegai Double Down, Schwalbe Hans Addix Soft.
Expert Tips for Getting the Best Deal
– Buy During Off-Season Sales: Late fall and winter are prime times for tire discounts as shops clear inventory for new models. Look for Black Friday, Cyber Monday, and end-of-season sales at retailers like Jenson USA, Chain Reaction Cycles, and REI.
– Shop Direct from Brands: Some manufacturers offer exclusive deals or refurbished tires directly through their websites. Maxxis and Schwalbe, for example, occasionally run promotions or sell “blemished” tires at reduced prices.
– Consider Last Year’s Models: Tire technology evolves slowly. A 2024 model with the same specs as a 2026 version can save you 20–30% with no real performance loss.
– Bundle with Other Purchases: Some retailers offer discounts when you buy tires with rims, sealant, or valves. This can offset the overall cost and ensure compatibility.
– Check Return Policies: Even budget tires can have defects or fit issues. Buy from retailers with generous return windows (30 days or more) so you can test them risk-free.
– Join Loyalty Programs: Stores like REI, Backcountry, and Competitive Cyclist offer member discounts, early access to sales, and reward points that can be applied to future purchases.
– Watch for Clearance Sections: Online retailers often have hidden clearance pages with deep discounts on discontinued or overstocked tires. Set up alerts or check weekly.
– Don’t Forget Local Bike Shops: Many LBS offer price matching or loyalty discounts. Supporting local businesses also ensures you get expert advice and quick service.

Frequently Asked Questions
Q: Can I use road bike tires on my mountain bike?
A: Technically, if the diameter matches (e.g., 29″ road tires on a 29″ MTB), it’s possible—but not recommended. Road tires lack the tread, width, and durability needed for off-road use. You’ll have poor grip, increased risk of punctures, and a harsh ride. Stick to tires designed for mountain biking.
Q: How often should I replace my MTB tires?
A: It depends on usage, terrain, and tire quality. As a rule of thumb, inspect your tires every few months. Replace them when knobs are worn down by 50%, you see casing threads, or you experience frequent flats. Most budget tires last 500–1,000 miles under normal conditions.
Q: Are wider tires always better?
A: Not necessarily. Wider tires (2.4″+) offer more grip and comfort but add weight and rolling resistance. For smooth trails or racing, a 2.2″ tire may be faster and more efficient. Choose width based on your riding style and terrain.
Q: Can I convert any tire to tubeless?
A: Only if it’s labeled “Tubeless Ready” or “UST.” Non-tubeless tires lack the reinforced bead and airtight construction needed to hold sealant. Attempting to convert them can lead to air leaks or blowouts.
Q: Do I need special tools for tubeless setup?
A: Basic tools include a tubeless valve, rim tape, sealant, and a pump with a high-volume chamber (or an air compressor). Many budget kits include everything you need for under $30.
Q: How do I know if a tire fits my rim?
A: Check your rim’s internal width (usually printed on the rim or available from the manufacturer). Most modern rims support 2.2″–2.5″ tires. Use a tire compatibility chart or consult your wheel maker’s guidelines.
Q: Are cheaper tires more prone to flats?
A: Generally, yes—due to thinner casings and less puncture protection. However, many mid-budget tires now include basic anti-flat layers. Pairing them with tubeless sealant significantly reduces flat risk.
Q: Should I buy the same brand for front and rear?
A: Not required, but mixing brands can sometimes lead to inconsistent feel or performance. If you mix, ensure both tires are compatible in width and intended use.
Q: Can I ride budget tires in winter or snow?
A: Some budget tires perform adequately in light snow, but for serious winter riding, consider dedicated studded or wide, aggressive tires. Budget models often lack the soft compound and deep tread needed for icy conditions.
Q: Do tire inserts work with budget tires?
A: Yes—tire inserts like CushCore or Vittoria Air-Liner can enhance sidewall support and reduce pinch flats, even on budget tires. They’re especially useful for aggressive riding or lower pressures.
Our Final Recommendations
– Best for Budget-Conscious Buyers: WTB Trail Boss Comp (2.4″) – At around $35, this tire offers surprising grip and durability for the price. Great for beginners and casual trail riders.
– Best Overall Value: Maxxis Ardent Race (2.2″/2.3″) – A versatile, fast-rolling tire with excellent cornering grip. Priced around $50, it’s a favorite among trail riders for its balance of speed and control.
– Best Premium Option (Under $70): Schwalbe Nobby Nic Performance ADDIX (2.35″) – Features a dual compound, tubeless-ready design, and reliable performance across varied terrain. A step up in quality without breaking the bank.
– Best for Beginners: Continental Trail King Protection (2.2″) – Durable, predictable, and easy to set up tubeless. Ideal for new riders learning trail dynamics.
– Best for Advanced Users on a Budget: Geax AKA (2.4″) – An aggressive, Italian-made tire with excellent mud clearance and grip. Often discounted, it rivals premium models at a fraction of the cost.
Conclusion: Making the Right Choice
Choosing the right budget MTB tires doesn’t have to be overwhelming—or expensive. With the right knowledge, you can find tires that deliver real performance, durability, and value without stretching your budget. Remember, the best tire is the one that matches your riding style, terrain, and expectations. Don’t just chase the lowest price; invest in quality that enhances your ride and keeps you safe on the trail.
Use this guide as your roadmap. Evaluate your needs, avoid common pitfalls, and take advantage of seasonal deals and expert tips. Whether you’re upgrading your first bike or refreshing a trusted steed, the right set of budget tires can transform your mountain biking experience. So go ahead—roll out with confidence, knowing you’ve made a smart, informed choice. Your trails are waiting.