
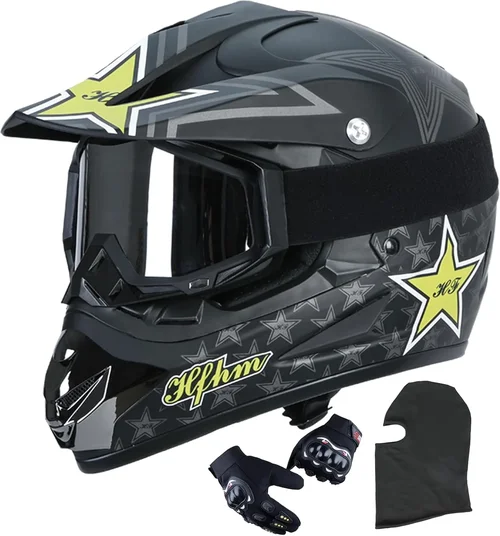
When it comes to off-road riding, your helmet isn’t just a piece of gear—it’s your first and most important line of defense. Whether you’re tearing up trails on a weekend adventure or learning the ropes on your first dirt bike, a reliable helmet can mean the difference between a close call and a serious injury. Yet, many riders—especially beginners or those on a tight budget—often compromise on safety in favor of affordability. That’s where this guide comes in. We’re here to show you that you don’t have to break the bank to get a high-quality, safe, and comfortable dirt bike helmet.
In this comprehensive buying guide, we’ll walk you through everything you need to know to make an informed decision without overspending. You’ll learn how to evaluate key features like impact protection, ventilation, fit, and certification standards—all while staying within your budget. We’ll break down the different types of budget helmets available, compare top contenders, and highlight common pitfalls to avoid. Whether you’re shopping for your first helmet or upgrading from an older model, this guide will arm you with the knowledge to choose wisely.
The market for budget dirt bike helmets has evolved significantly in recent years. Thanks to advancements in materials and manufacturing, today’s affordable helmets offer far better protection and comfort than their predecessors. Brands like Fox, Bell, TSG, and Fly Racing now offer entry-level models that meet or exceed safety standards while keeping prices under $150. At the same time, counterfeit and substandard helmets continue to flood online marketplaces, making it more important than ever to know what to look for. This guide cuts through the noise, focusing only on legitimate, certified helmets that deliver real value.

What to Look for When Buying a Budget Dirt Bike Helmet
1. Safety Certifications and Standards
Before anything else, safety must be your top priority. A helmet’s certification is the single most important indicator of its ability to protect your head in a crash. In the United States, the two primary certifications to look for are DOT (Department of Transportation) and ECE (Economic Commission for Europe). DOT certification is the minimum legal requirement for helmets sold in the U.S., but it’s also the least rigorous. ECE certification, used widely in Europe and increasingly adopted by U.S. riders, involves more comprehensive testing, including impact absorption, retention system strength, and field of vision.
For even greater assurance, look for helmets that meet the Snell M2020 standard. While Snell-certified helmets are often more expensive, some budget models now carry this certification, offering top-tier protection at a lower price point. Avoid helmets that lack any certification or claim to be “DOT-compliant” without official labeling—these are often counterfeit or poorly made.
Always check the inside of the helmet for a certification sticker. It should be permanently affixed and include the certification type, model number, and size. If the sticker is missing, peeling, or looks suspiciously printed, walk away. A real certification sticker is your guarantee that the helmet has passed rigorous crash testing.
2. Fit and Comfort
A helmet can have the best safety ratings in the world, but if it doesn’t fit properly, it won’t protect you. A poorly fitting helmet can shift during a crash, leaving your head exposed, or cause discomfort that distracts you while riding. The ideal fit is snug but not tight—your helmet should feel like a firm handshake, not a vice.
To find the right fit, measure your head circumference just above your eyebrows using a soft tape measure. Most manufacturers provide size charts based on head size, but keep in mind that fit can vary between brands. Try on multiple helmets if possible, and pay attention to pressure points. The helmet should sit level on your head, with the front edge about an inch above your eyebrows. It shouldn’t rock forward, backward, or side to side when you shake your head.
Cheek pads and liner thickness also play a role in fit. Many budget helmets come with removable, washable liners that allow for some customization. Look for helmets with multi-density EPS (expanded polystyrene) liners, which provide better impact absorption and a more tailored fit. Some models even offer interchangeable cheek pads to fine-tune the snugness.
Comfort extends beyond fit. Consider padding quality, weight, and breathability. A heavier helmet can cause neck fatigue on long rides, while poor ventilation leads to overheating and sweat buildup. Look for helmets with moisture-wicking liners and strategically placed vents that allow airflow without compromising structural integrity.
3. Ventilation and Airflow
Off-road riding is physically demanding, and a hot, stuffy helmet can quickly become unbearable. Proper ventilation is essential for maintaining focus and comfort, especially during long trail rides or in warm climates. Budget helmets often skimp on airflow, but many affordable models now include well-designed vent systems that rival more expensive options.
Look for helmets with multiple intake and exhaust vents. Intake vents are typically located at the front and top of the helmet, drawing in cool air, while exhaust vents at the rear and sides allow hot air to escape. The best designs create a continuous airflow path that keeps your head cool without creating excessive wind noise or drag.
Some budget helmets feature adjustable vents, allowing you to open or close them based on weather conditions. This is a valuable feature if you ride in varying climates. Others use mesh-covered vents to prevent debris from entering while maintaining airflow. Avoid helmets with only a few small, poorly placed vents—these offer minimal benefit and can trap heat.
Also consider the internal channeling. High-quality helmets route air through internal ducts that direct airflow over your head and face shield. This not only improves cooling but also reduces fogging on the visor. If you wear goggles, ensure the helmet’s vent design doesn’t interfere with the seal around the eye port.
4. Weight and Balance
Helmet weight might seem like a minor detail, but it has a significant impact on comfort and performance—especially during long rides or aggressive maneuvers. A heavy helmet can strain your neck muscles, leading to fatigue and reduced control. On the other hand, an ultra-light helmet may sacrifice durability or protection.
For budget helmets, aim for a weight between 3.0 and 3.8 pounds (1.36 to 1.72 kg). Helmets under 3.0 pounds are rare in this price range and may use thinner shells or less padding, potentially compromising safety. Helmets over 4.0 pounds are generally too heavy for extended off-road use.
Balance is just as important as weight. A well-balanced helmet distributes its mass evenly, reducing strain on your neck and improving stability at high speeds. Test the balance by wearing the helmet and tilting your head forward and backward. If the helmet feels front-heavy or pulls backward, it may affect your riding posture.
Materials play a key role in weight. Most budget helmets use polycarbonate shells, which are lightweight and impact-resistant but not as strong as fiberglass or carbon fiber. Some models combine polycarbonate with other composites to improve strength without adding bulk. Avoid helmets with metal reinforcements unless they’re clearly labeled and certified—these can increase weight and create weak points in the shell.
5. Visor and Eye Port Design
The visor and eye port are critical for visibility and protection. A well-designed visor shields your eyes from sun, rain, and flying debris while allowing for goggle compatibility. Budget helmets often have fixed visors, but many now include adjustable or removable options for added versatility.
Look for a visor that’s long enough to provide adequate sun protection but not so long that it obstructs your view when looking up. A curved or contoured visor reduces glare and improves aerodynamics. Some models feature a goggle retention system—a small lip or clip that holds your goggles in place, preventing them from slipping during rough terrain.
The eye port should be wide enough to accommodate most off-road goggles without pinching or restricting movement. A narrow eye port can cause discomfort and limit peripheral vision. Measure the opening if possible, or read user reviews to see if others have experienced fit issues with specific goggle brands.
Consider the visor’s attachment system. Screw-mounted visors are more secure but require tools to adjust. Snap-on or tool-less systems are convenient but may loosen over time. Some budget helmets use a hybrid system with both screws and snaps for added stability.
6. Durability and Build Quality
Even on a budget, you should expect your helmet to withstand the rigors of off-road riding. Durability isn’t just about surviving a crash—it’s about resisting everyday wear and tear, including drops, UV exposure, and moisture. A flimsy helmet may look fine on the shelf but fail when you need it most.
Inspect the shell for signs of poor construction, such as uneven seams, rough edges, or thin spots. The shell should feel solid and resistant to flexing. Press gently on different areas—if it creaks or bends easily, it’s likely made from low-grade materials. High-quality polycarbonate shells have a smooth, glossy finish and consistent thickness.
The chin bar and retention system are also critical. The chin strap should be made from strong, abrasion-resistant webbing with a secure buckle. Look for double D-ring closures, which are more reliable than quick-release buckles. The chin bar itself should be rigid and well-integrated into the shell, not just glued or loosely attached.
Check the liner and padding for stitching quality. Loose threads or thin padding are red flags. The liner should be firmly attached and resistant to tearing. Removable liners are a plus, as they allow for cleaning and replacement, extending the helmet’s lifespan.
7. Brand Reputation and Reviews
Not all budget helmets are created equal, and brand reputation can be a strong indicator of quality. Established brands like Bell, Fox, TSG, and Fly Racing have built their names on safety and innovation, even in their entry-level lines. These companies invest in research, testing, and customer support, which often translates to better products.
That said, don’t dismiss lesser-known brands outright. Some newer companies offer excellent value by cutting marketing costs and focusing on core features. The key is to research thoroughly. Read professional reviews from trusted sources like Motocross Action, Dirt Rider, or GearJunkie. These outlets conduct real-world testing and often highlight strengths and weaknesses that aren’t obvious from product descriptions.
User reviews are also valuable, but approach them with caution. Look for patterns—if multiple reviewers mention the same issue, such as poor ventilation or a loose visor, it’s likely a real problem. Be wary of reviews that seem overly positive or generic, as these may be fake. Focus on detailed, balanced feedback from riders with similar experience levels.
Check the brand’s warranty and customer service policies. A reputable company will stand behind its products with a solid warranty (typically 1–2 years) and responsive support. Avoid brands that offer no warranty or require you to pay for return shipping on defective items.
8. Warranty and Return Policy
A good warranty is a sign that a manufacturer believes in its product. Most budget helmets come with a 1-year limited warranty covering defects in materials and workmanship. Some brands, like Bell and Fox, offer extended warranties or crash replacement programs, which can save you money if your helmet is damaged in a non-crash incident.
Read the fine print carefully. Many warranties exclude damage from crashes, normal wear and tear, or improper use. They may also require you to register the helmet online within a certain timeframe. Keep your receipt and packaging, as these are often required for claims.
Return policies are just as important, especially when buying online. Look for retailers that offer at least a 30-day return window with free return shipping. This gives you time to test the helmet for fit and comfort. Some stores, like RevZilla and Rocky Mountain ATV/MC, even provide fit guarantees, allowing you to exchange sizes at no extra cost.
Avoid sellers with strict no-return policies or those that charge restocking fees. These are often signs of low-confidence products. If a helmet can’t be returned, you’re taking a bigger risk—especially if you’re unsure about sizing or compatibility with your goggles.
Different Types of Budget Dirt Bike Helmets

Common Buying Mistakes to Avoid
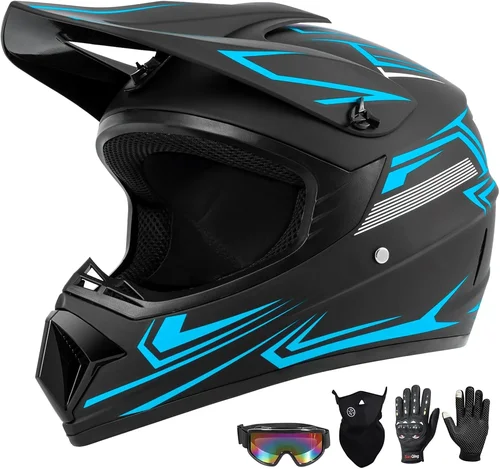
❌ Mistake: Prioritizing Price Over Safety
Why it’s bad: The cheapest helmet is rarely the best value. Helmets under $50 often lack proper certification, use substandard materials, or have poor impact absorption. In a crash, these helmets may shatter or fail to protect your head, leading to serious injury or worse.
What to do instead: Set a minimum budget of $80 and focus on certified helmets from reputable brands. Look for DOT or ECE certification, and avoid “novelty” helmets that aren’t designed for impact protection.
❌ Mistake: Buying the Wrong Size
Why it’s bad: A helmet that’s too big can shift during a crash, leaving your head exposed. One that’s too tight causes discomfort and distraction. Many riders buy based on hat size or guesswork, leading to poor fit.
What to do instead: Measure your head circumference and consult the manufacturer’s size chart. Try on helmets in person if possible, or buy from retailers with generous return policies. Remember, fit can vary between brands.
❌ Mistake: Ignoring Ventilation
Why it’s bad: Poor airflow leads to overheating, sweat buildup, and fogged goggles—conditions that reduce focus and increase fatigue. Riders often overlook ventilation, especially in colder months, but it’s crucial year-round.
What to do instead: Look for helmets with multiple intake and exhaust vents. Test airflow by wearing the helmet indoors for 10–15 minutes. If your head feels hot or sweaty, keep looking.
❌ Mistake: Overlooking Goggle Compatibility
Why it’s bad: Not all helmets work well with all goggles. A poor fit can cause pressure points, gaps, or slippage, compromising eye protection. This is especially common with budget helmets that have narrow eye ports.
What to do instead: Check the eye port dimensions and read reviews from riders who use the same goggles. If possible, try the helmet with your goggles before buying. Look for models with goggle retention systems.
❌ Mistake: Buying from Unauthorized Sellers
Why it’s bad: Counterfeit helmets are widespread on online marketplaces. These helmets may look authentic but lack proper certification, use fake stickers, or have structural flaws. They offer no real protection.
What to do instead: Buy from authorized dealers or well-known retailers like RevZilla, Rocky Mountain ATV/MC, or your local motorcycle shop. Verify the seller’s authorization status on the brand’s website.
❌ Mistake: Skipping the Warranty Check
Why it’s bad: A helmet with no warranty or a restrictive policy leaves you unprotected if it arrives defective or fails prematurely. Some brands offer no coverage at all, especially on discounted models.
What to do instead: Always check the warranty terms before purchasing. Look for at least a 1-year limited warranty and a clear return policy. Register your helmet online if required.
❌ Mistake: Assuming All “DOT” Helmets Are Equal
Why it’s bad: DOT certification is self-certified by manufacturers, meaning they test their own helmets. This lack of第三方 oversight can lead to inconsistencies. Some DOT helmets barely meet the minimum standard.
What to do instead: Prefer helmets with ECE or Snell certification, which involve independent testing. If only DOT is available, choose models from established brands with a history of safety compliance.
Budget Guidelines: How Much Should You Spend?
- Entry-Level ($80–$110): This range offers solid protection for casual riders and beginners. Helmets here typically feature DOT certification, basic ventilation, and removable liners. Brands like Fly Racing and TSG offer reliable models in this tier. Expect polycarbonate shells and standard padding. Ideal for weekend trail rides or learning the basics.
- Mid-Range ($110–$140): The sweet spot for most riders. Helmets in this range often include ECE certification, improved ventilation, and better fit systems. You’ll find multi-density EPS liners, adjustable visors, and enhanced comfort features. Models from Bell and Fox often fall here, offering excellent value for the price.
- Premium ($140–$180): For enthusiasts and frequent riders. These helmets may include Snell certification, advanced shell materials, and premium padding. Look for features like tool-less visor adjustment, enhanced aerodynamics, and superior noise reduction. While still budget-friendly, they rival mid-tier helmets from premium brands.
- Luxury ($180+): Top-tier budget helmets that blur the line with high-end models. These often use composite shells, advanced ventilation systems, and customizable fit options. While rare under $200, they’re worth considering if you ride frequently or in demanding conditions.
Expert Tips for Getting the Best Deal
- Shop During Off-Season: Prices drop significantly in late fall and winter when demand is low. Look for end-of-season sales from retailers like Rocky Mountain ATV/MC or RevZilla. You can save 20–30% on last year’s models.
- Sign Up for Newsletters: Many retailers offer exclusive discounts to email subscribers. You’ll get alerts about flash sales, clearance events, and promo codes. Just be sure to unsubscribe later if you don’t want spam.
- Check Manufacturer Rebates: Brands like Bell and Fox occasionally offer rebates or gift cards with helmet purchases. These can effectively reduce the price by $20–$50. Visit the brand’s website for current promotions.
- Buy Last Year’s Model: New helmet designs are released annually, but the differences are often minor. Last year’s model is usually identical in safety and performance but sold at a discount. Look for “previous generation” or “closeout” listings.
- Use Price Tracking Tools: Websites like CamelCamelCamel (for Amazon) or Honey can track price history and alert you when a helmet drops in price. This helps you avoid overpaying during peak seasons.
- Consider Refurbished or Open-Box: Some retailers sell refurbished helmets that have been inspected and certified. These are often 20–40% cheaper and come with warranties. Just ensure they’re from authorized sellers.
- Test Before You Buy: If possible, visit a local shop to try on helmets. Fit is subjective, and what works for one rider may not work for another. Many shops allow you to test helmets with your goggles.
- Read the Return Policy: Even the best deals aren’t worth it if you can’t return the helmet. Choose retailers with free returns and a 30-day window. This gives you time to test fit and comfort.

Frequently Asked Questions
Q: Can I wear a street helmet for dirt biking?
A: Technically yes, but it’s not recommended. Street helmets lack the extended chin bar, visor, and ventilation needed for off-road riding. They’re also heavier and less durable. A dirt-specific helmet offers better protection and comfort for trail use.
Q: How often should I replace my helmet?
A: Replace your helmet every 5 years, or immediately after any impact—even if there’s no visible damage. The EPS liner degrades over time and may not absorb impact effectively. Also replace if the helmet shows signs of wear, such as cracked padding or a loose shell.
Q: Are cheaper helmets less safe?
A: Not necessarily. Many budget helmets meet the same safety standards as expensive ones. The difference lies in materials, comfort, and additional features. As long as the helmet is certified and fits well, it can provide excellent protection.
Q: Can I modify my helmet?
A: No. Drilling holes, painting, or adding accessories can compromise the helmet’s structural integrity. Even stickers can interfere with impact absorption. Only use manufacturer-approved accessories.
Q: What’s the difference between DOT and ECE?
A: DOT is a U.S. standard that focuses on impact resistance and retention. ECE is a European standard that includes additional tests for field of vision, abrasion resistance, and dynamic performance. ECE is generally considered more rigorous.
Q: Do I need a new helmet for every ride?
A: No, but you should inspect your helmet before each ride. Look for cracks, loose parts, or worn padding. Store it in a cool, dry place away from direct sunlight to prolong its life.
Q: Can I share my helmet with others?
A: It’s not recommended. Helmets are designed to fit one person’s head shape. Sharing can lead to poor fit and hygiene issues. If you must share, ensure it’s the same size and model, and clean the liner thoroughly.
Q: Are youth helmets just smaller versions of adult helmets?
A: Not always. Quality youth helmets are designed specifically for smaller heads and lighter impacts. They often have softer liners and reduced weight. Avoid using adult helmets for kids—they won’t fit properly and may not protect as well.
Q: What should I do if my helmet gets damaged in a crash?
A: Replace it immediately—even if it looks fine. The internal structure may be compromised. Most manufacturers offer crash replacement discounts, so contact them for a reduced-price replacement.
Q: Can I wear glasses under my helmet?
A: Yes, but ensure the helmet has enough room in the eye port and cheek area. Look for helmets with glasses channels or removable cheek pads. Test the fit with your glasses on to avoid pressure points.
Our Final Recommendations
- Best for Budget-Conscious Buyers: Fly Racing Kinetic Raze – At around $90, this helmet offers ECE certification, excellent ventilation, and a comfortable fit. It’s a standout in the entry-level category.
- Best Overall Value: Bell MX-9 Adventure MIPS – Priced around $140, it includes MIPS technology for added rotational impact protection, a sun visor, and dual-sport versatility. Great for riders who want more than just basic protection.
- Best Premium Option: Fox Racing V3 Helmet – At $170, it’s at the top of the budget range but offers Snell certification, a lightweight composite shell, and superior airflow. Ideal for serious riders who refuse to compromise.
- Best for Beginners: TSG Pass Helmet – Around $120, it’s easy to fit, well-ventilated, and comes with a removable liner. Its simple design makes it perfect for new riders.
- Best for Advanced Users: Bell Moto-10 Spherical – While slightly above budget at $190, it’s worth the stretch for its advanced safety tech, lightweight build, and race-inspired design. A true performance helmet at a near-budget price.
Conclusion: Making the Right Choice
Choosing the right budget dirt bike helmet doesn’t have to be overwhelming. By focusing on safety certifications, proper fit, ventilation, and brand reputation, you can find a helmet that protects you without draining your wallet. Remember, the cheapest option isn’t always the best value—invest in a helmet that meets your needs and meets recognized safety standards.
Take the time to research, try on different models, and read real user reviews. Don’t rush the decision, and never compromise on safety for the sake of savings. Your helmet is your most important piece of gear, and it’s worth getting right.
Whether you’re hitting the trails for the first time or upgrading from an old helmet, use this guide as your roadmap. Prioritize your safety, stay within your budget, and enjoy every ride with confidence. And when you find the perfect helmet, share your experience—help other riders make informed choices too. Safe riding starts with the right gear.