
Turning on your Gotrax hoverboard is simple once you know the right steps. This guide walks you through powering up your device, checking battery levels, and troubleshooting common startup issues—all while keeping safety a top priority.
Key Takeaways
- Always charge your hoverboard fully before first use: A full charge ensures optimal performance and prevents unexpected shutdowns during your ride.
- Press and hold the power button for 3–5 seconds: This activates the Gotrax hoverboard’s control system and lights up the LED indicators.
- Check the battery indicator before riding: Green means ready to go; red or flashing signals low battery and potential safety risks.
- Ensure both foot pads are level and stable: The hoverboard won’t power on if it detects imbalance or uneven pressure.
- Calibrate the hoverboard after transport or drops: This resets the internal gyroscope and improves balance and responsiveness.
- Never attempt to turn on the hoverboard while in motion: Always place it on a flat, dry surface before powering up.
- Contact Gotrax support if the board won’t turn on after troubleshooting: Persistent issues may indicate hardware problems covered under warranty.
How to Turn on a Gotrax Hoverboard: A Complete Step-by-Step Guide
So, you’ve just unboxed your brand-new Gotrax hoverboard—or maybe you’re dusting off an old one from the garage—and you’re ready to glide around the neighborhood. But before you hop on and start cruising, there’s one essential step: turning it on correctly. While it might seem as simple as pressing a button, there are a few key steps and safety checks that ensure your Gotrax hoverboard powers up smoothly and safely every time.
In this comprehensive guide, we’ll walk you through exactly how to turn on a Gotrax hoverboard, from initial setup to troubleshooting common startup problems. Whether you’re a first-time rider or a seasoned hoverboard enthusiast, this guide will help you master the basics and avoid frustrating hiccups. We’ll cover everything from charging best practices to calibration tips, so you can enjoy a smooth, safe, and fun ride every time you power up.
By the end of this article, you’ll know not only how to turn on your Gotrax hoverboard but also how to maintain it for long-term performance. Let’s get started!
What You’ll Need Before Turning On Your Gotrax Hoverboard
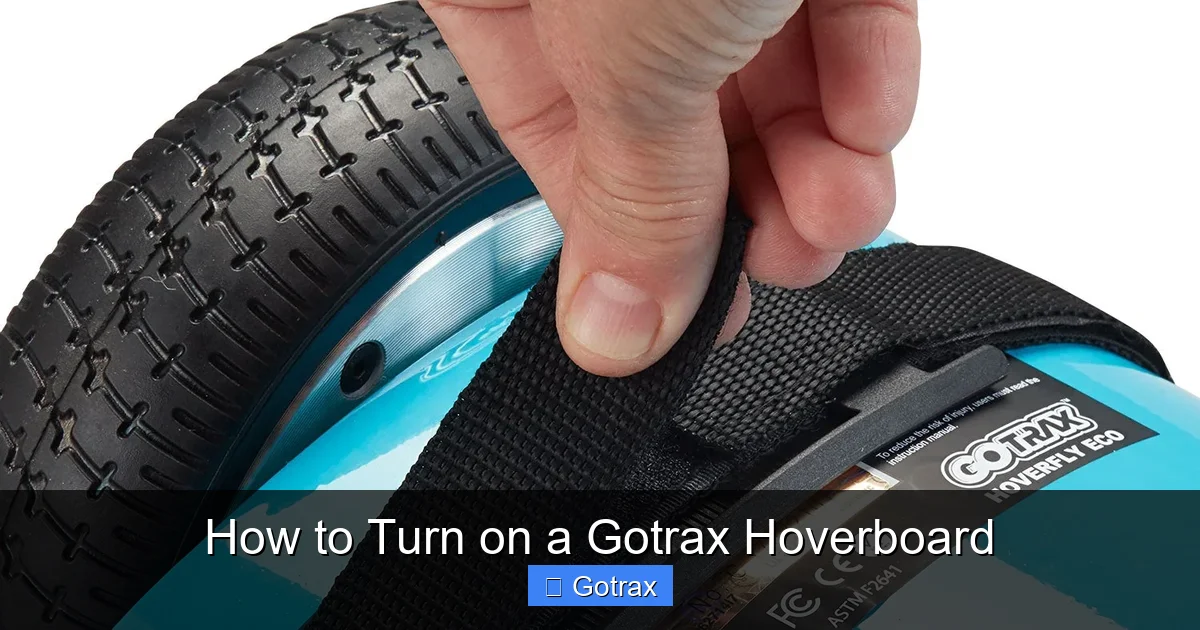
Visual guide about How to Turn on a Gotrax Hoverboard
Image source: gotrax.com
Before you even think about pressing that power button, make sure you have a few things ready. Proper preparation prevents problems down the road—literally.
First and foremost, you’ll need your Gotrax hoverboard, of course. But also make sure you have the original charger that came with it. Using third-party chargers can damage the battery or cause overheating, so stick with the manufacturer-recommended equipment.
Next, find a flat, dry, and stable surface to place your hoverboard. This could be a hardwood floor, tile, or concrete—just avoid carpets, rugs, or uneven ground. The hoverboard uses internal gyroscopes and sensors to detect balance, and placing it on an unstable surface can confuse those systems and prevent it from turning on.
Also, ensure the area is free of water, oil, or debris. Moisture is a major enemy of electronics, and even a small puddle can short-circuit your hoverboard. Safety first!
Finally, make sure you’re wearing appropriate footwear—closed-toe shoes with good grip. You won’t be riding yet, but it’s a good habit to get into. And while you’re at it, consider wearing a helmet and knee pads, especially if you’re new to hoverboarding.
Step 1: Charge Your Gotrax Hoverboard Fully
One of the most common reasons people can’t turn on their Gotrax hoverboard is because the battery is dead or low. Even if the board was fully charged when you bought it, batteries can lose charge over time—especially if it’s been sitting in storage.
So, before anything else, plug in your hoverboard and let it charge completely.
How to Charge Your Gotrax Hoverboard
Start by locating the charging port on your hoverboard. It’s usually on the side or back of the board, protected by a small rubber flap. Gently lift the flap and insert the charger’s connector. Make sure it’s plugged in securely—loose connections can cause charging issues.
Next, plug the other end of the charger into a wall outlet. Avoid using extension cords or power strips if possible, as they can reduce charging efficiency. Once connected, the charger’s LED light will typically turn red, indicating that charging has begun.
Now, let it charge. Most Gotrax hoverboards take between 3 to 5 hours to reach a full charge, depending on the model and battery capacity. You’ll know it’s fully charged when the charger’s LED light turns green.
Important Charging Tips
Never leave your hoverboard charging unattended for long periods. While modern Gotrax models have built-in overcharge protection, it’s still best practice to unplug it once fully charged.
Also, avoid charging in extreme temperatures. Don’t charge your hoverboard in direct sunlight, near heaters, or in freezing conditions. Ideal charging temperature is between 50°F and 86°F (10°C to 30°C).
If you’re charging for the first time after purchase, it’s recommended to charge for at least 6 hours, even if the light turns green earlier. This helps condition the lithium-ion battery for better long-term performance.
Step 2: Place the Hoverboard on a Stable, Level Surface
Now that your hoverboard is charged, it’s time to prepare it for startup. But don’t just plop it down anywhere—placement matters.
Place your Gotrax hoverboard on a flat, level surface. This is crucial because the hoverboard uses internal sensors to detect its orientation. If it’s tilted or unbalanced when you try to turn it on, the system may not activate properly.
For best results, use a smooth, hard floor like tile, wood, or concrete. Avoid carpets, rugs, or uneven surfaces like grass or gravel. These can interfere with the foot pads’ ability to sense pressure and balance.
Make sure the hoverboard is centered and not leaning to one side. Both wheels should be touching the ground evenly. If one side is higher than the other, gently adjust it until it’s level.
Why Surface Matters
The Gotrax hoverboard relies on gyroscopic sensors and accelerometers to maintain balance. These sensors need a stable reference point to function correctly. If the board is on an uneven surface, it may interpret the tilt as movement and refuse to power on—or worse, behave unpredictably when you step on.
Additionally, placing the board on a slippery surface increases the risk of it sliding when you step on. Always choose a surface with good traction.
Step 3: Locate the Power Button
Now that your hoverboard is charged and properly positioned, it’s time to find the power button.
On most Gotrax hoverboards, the power button is located on the side of the deck, near the rear wheel. It’s usually a small, round button, often marked with a power symbol (a circle with a vertical line).
Some models may have the button on the top deck, but side placement is more common. If you’re unsure, check your user manual or look for a small, recessed button with a light indicator nearby.
The button may be flush with the surface or slightly raised. It’s designed to be pressed firmly but not excessively hard.
Identifying the Power Button on Different Models
Gotrax offers several hoverboard models, including the GXL, G2, G4, and GMAX. While the basic operation is similar across models, the exact location of the power button may vary slightly.
– On the Gotrax GXL and G2, the power button is typically on the left side, near the rear.
– On the G4 and GMAX, it’s often on the right side, closer to the center.
– Some newer models feature a touch-sensitive power button or a combination of button and LED panel.
If you can’t find the button, refer to the quick-start guide that came with your hoverboard or visit the Gotrax website for model-specific diagrams.
Step 4: Press and Hold the Power Button
Here’s the moment of truth: turning on your Gotrax hoverboard.
With the board on a flat surface and fully charged, press and hold the power button for 3 to 5 seconds. You don’t need to press it rapidly or repeatedly—just a steady, firm press.
As you hold the button, you should see the LED lights on the hoverboard begin to illuminate. These lights indicate that the board is powering up and running system checks.
What to Expect When Powering On
When you successfully turn on your Gotrax hoverboard, you’ll notice several things:
– The LED battery indicator lights up. These are usually located near the power button or on the front of the board.
– The wheels may make a slight whirring sound as the motors initialize.
– The foot pads may vibrate briefly as the sensors calibrate.
The LED lights will show the current battery level:
– Green: 70–100% charged (ready to ride)
– Yellow: 30–70% charged (still usable, but consider charging soon)
– Red: Below 30% (charge immediately)
– Flashing red: Very low battery or error
If the lights don’t come on, or if they flash in a pattern, that could indicate a problem—more on that in the troubleshooting section.
Common Mistakes to Avoid
Don’t tap the button quickly—this won’t work. The hoverboard is designed to respond to a sustained press, not a quick tap.
Also, don’t press the button while the board is moving or tilted. Always ensure it’s stationary and level before powering on.
And never try to turn on the hoverboard while standing on it. Always power up before stepping on.
Step 5: Wait for the System to Initialize
After pressing the power button, give your hoverboard a few seconds to complete its startup sequence. This is called initialization, and it’s a critical step.
During this time, the hoverboard runs internal diagnostics, checks the battery, calibrates the gyroscopes, and prepares the motors for use. This usually takes 5 to 10 seconds.
You’ll know it’s ready when:
– The LED lights stop flashing and remain steady.
– The board emits a short beep or tone (on some models).
– The foot pads feel responsive when you gently press them.
If the lights keep flashing or the board beeps repeatedly, it may be signaling an error. Don’t panic—this is common and often fixable.
Why Initialization Matters
Skipping or rushing this step can lead to poor balance, jerky movements, or even sudden shutdowns while riding. The initialization process ensures that all systems are working correctly and that the hoverboard is safe to use.
Think of it like warming up your car on a cold morning—you wouldn’t drive off immediately. Same idea here.
Step 6: Step On and Start Riding (Safely)
Once your Gotrax hoverboard is powered on and initialized, you’re ready to ride—but do it safely.
Start by standing behind the board, one foot at a time. Place your dominant foot on the foot pad, then gently shift your weight onto it. Wait for the board to stabilize, then place your other foot on the opposite pad.
Keep your knees slightly bent and your weight centered. Don’t lean too far forward or backward at first.
Once both feet are on, the hoverboard will balance itself. To move forward, lean slightly forward. To go backward, lean back. To turn, shift your weight to one foot.
First-Time Riding Tips
Start slow. Don’t try to speed off immediately. Practice balancing and making small movements in a safe, open area.
Use a wall or railing for support if needed. Many beginners find it helpful to have something to hold onto while getting used to the feel.
And remember: always wear protective gear. A helmet is non-negotiable, especially for kids and new riders.
Troubleshooting: What to Do If Your Gotrax Hoverboard Won’t Turn On
Even with perfect preparation, sometimes your Gotrax hoverboard just won’t power up. Don’t worry—this happens. Here’s how to diagnose and fix common issues.
Issue 1: No Lights or Response When Pressing the Power Button
If nothing happens when you press the power button, the most likely cause is a dead or disconnected battery.
First, check that the charger is properly connected and that the outlet is working. Try plugging in another device to confirm the outlet has power.
If the charger light is red, the board is charging. Wait until it turns green, then try again.
If the charger light doesn’t turn on at all, the charger or charging port may be faulty. Try a different outlet or inspect the charger for damage.
If the battery is fully charged but still unresponsive, the battery itself may be damaged. This is more common in older boards or those that have been stored for long periods.
Issue 2: Flashing Red Lights or Error Codes
Gotrax hoverboards use LED light patterns to indicate errors. A flashing red light usually means low battery, but it can also signal other issues.
Common error patterns:
– 1 flash: Low battery
– 2 flashes: Motor error
– 3 flashes: Gyroscope error
– 4 flashes: Overheating
– 5 flashes: Charging port issue
Refer to your user manual for model-specific codes. In many cases, simply turning the board off, waiting 10 seconds, and turning it back on can reset the system.
Issue 3: Hoverboard Turns On But Shuts Off Immediately
If your hoverboard powers on but then shuts down after a few seconds, it could be due to overheating, low battery, or a sensor malfunction.
Let the board cool down for 15–20 minutes if it feels warm. Overheating can trigger automatic shutdowns to protect the electronics.
Also, ensure the foot pads are clean and free of debris. Dirt or moisture can interfere with sensor readings.
If the problem persists, try calibrating the hoverboard (see next section).
Issue 4: Hoverboard Won’t Balance or Feels Unstable
If the board turns on but doesn’t balance properly, it may need calibration. This is especially common after transport, drops, or long periods of inactivity.
Calibration resets the internal gyroscopes and helps the board relearn its neutral position.
How to Calibrate Your Gotrax Hoverboard
Calibration is a simple process that can fix many balance and startup issues.
Step-by-Step Calibration
1. Turn off the hoverboard completely.
2. Place it on a perfectly level surface.
3. Press and hold the power button for 10–15 seconds (longer than usual).
4. The LED lights will flash rapidly, indicating calibration mode.
5. Wait until the lights stop flashing and remain steady.
6. The board will beep or vibrate to confirm calibration is complete.
7. Turn the board off and back on normally.
After calibration, test the balance by gently pressing the foot pads. The board should respond smoothly and stay level.
When to Calibrate
Calibrate your hoverboard:
– After a fall or drop
– If it feels unbalanced
– After long periods of storage
– If it won’t turn on properly
Regular calibration helps maintain performance and extends the life of your hoverboard.
Safety Tips for Using Your Gotrax Hoverboard
Now that you know how to turn on your Gotrax hoverboard, let’s talk safety. Hoverboards are fun, but they can be dangerous if used improperly.
Always wear a helmet, knee pads, and elbow pads—especially if you’re a beginner.
Ride in safe areas: sidewalks, bike paths, or empty parking lots. Avoid busy streets, wet surfaces, and steep hills.
Never ride at night without proper lighting. Some Gotrax models have built-in LED lights, but consider adding extra lights or reflective gear.
And never modify your hoverboard. Tampering with the battery, motors, or software can void your warranty and create serious safety risks.
Conclusion
Turning on a Gotrax hoverboard is a simple process—once you know the steps. From charging the battery to pressing and holding the power button, each step plays a vital role in ensuring a safe and smooth ride.
By following this guide, you’ll not only master the basics of powering up your hoverboard but also learn how to troubleshoot common issues and maintain your device for long-term use.
Remember: safety comes first. Always charge fully, place on a level surface, and wear protective gear. With proper care, your Gotrax hoverboard will provide hours of fun and reliable transportation.
So go ahead—power up, step on, and enjoy the ride!