
Wondering if your Gotrax scooter is actually charging? This guide walks you through every sign—from LED lights to battery behavior—so you’ll never guess again. Stay powered up and ride confidently with these simple checks.
Key Takeaways
- Check the LED indicator light: Most Gotrax models use a red or green light to show charging status—red means charging, green means fully charged.
- Listen for charging sounds: Some models emit a soft hum or click when properly connected and charging.
- Monitor charging time: A typical Gotrax battery takes 4–6 hours to fully charge; longer times may signal an issue.
- Use the Gotrax app (if available): Certain models sync with the app to display real-time battery percentage and charging progress.
- Inspect the charger and ports: Damaged cables, loose connections, or dirty ports can prevent proper charging.
- Test the battery after charging: A fully charged scooter should power on instantly and show full bars on the display.
- Know your model’s quirks: Different Gotrax scooters (like the GXL, G2, or G4) have slightly different charging behaviors—always check your user manual.
How to Tell If Gotrax Is Charging: A Complete Step-by-Step Guide
So you’ve just come back from a quick errand or a weekend ride, and now it’s time to plug in your Gotrax electric scooter. But here’s the million-dollar question: Is it actually charging? You don’t want to wake up the next morning thinking your scooter is ready to go, only to find out it’s still at 10%. That’s frustrating—and totally avoidable.
The good news? Gotrax scooters are designed with user-friendly charging indicators, and once you know what to look for, you’ll never be left guessing again. Whether you’re a first-time owner or you’ve been riding for years, this guide will walk you through every way to confirm your Gotrax is charging—and what to do if it’s not.
In this comprehensive how-to guide, you’ll learn:
– The visual signs your Gotrax is charging (like LED lights)
– How to interpret sounds and physical feedback
– How to use the Gotrax app (if your model supports it)
– Common charging problems and how to fix them
– Tips to maintain your battery and charger for long-term performance
Let’s dive in and make sure your Gotrax is always ready when you are.
Step 1: Look for the LED Indicator Light

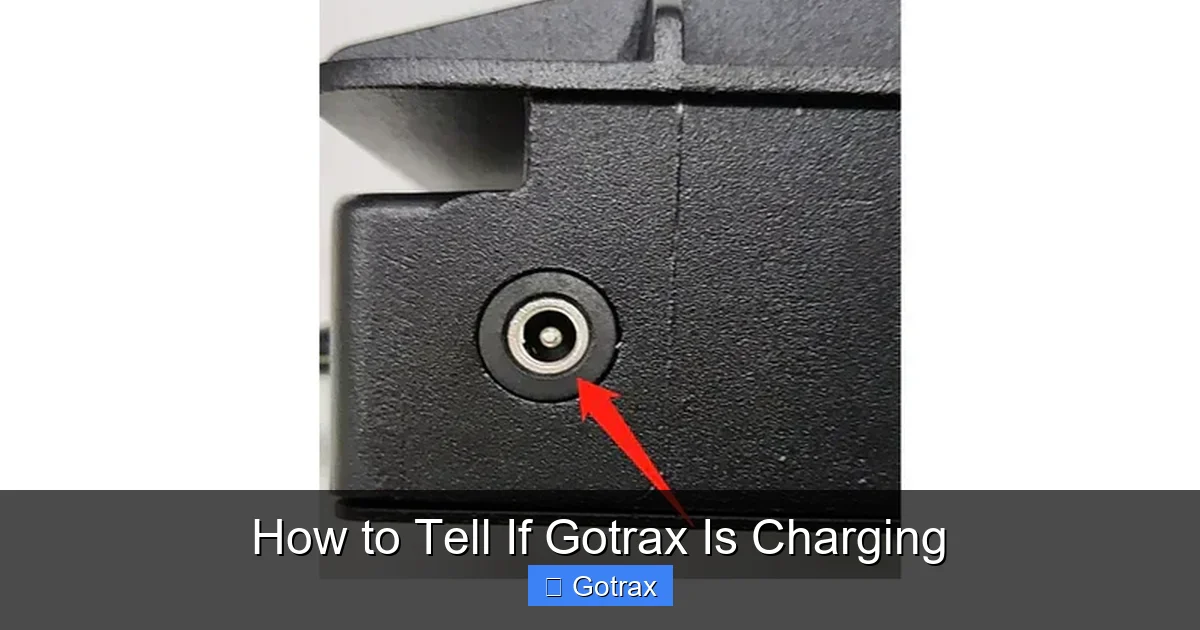
Visual guide about How to Tell If Gotrax Is Charging
Image source: gotrax.com
The most reliable and immediate way to tell if your Gotrax is charging is by checking the LED indicator light. This small but powerful light is usually located on the charger itself or near the charging port on the scooter, depending on your model.
Understanding the LED Colors
Gotrax uses a simple color-coded system to communicate charging status:
– Red Light: This means your scooter is currently charging. When you plug in the charger, the light should turn red almost instantly if the connection is good and the battery is accepting charge.
– Green Light: A solid green light indicates that the battery is fully charged. Once the scooter reaches 100%, the charger typically switches from red to green.
– Blinking Red or Green: A blinking light can mean different things depending on the model. In most cases, a blinking red light suggests a charging error—like a poor connection, overheating, or a faulty battery. A blinking green light might mean the battery is nearly full or the charger is in standby mode.
For example, if you plug in your Gotrax GXL and see a steady red light, you’re good to go. But if the light is off or blinking, it’s time to troubleshoot.
Where to Find the LED Light
On most Gotrax models, the LED light is located on the charger brick—the rectangular part that plugs into the wall. Some newer models, like the Gotrax G4, have an additional LED near the charging port on the scooter itself. Always check both locations if you’re unsure.
Pro tip: If the light is dim or hard to see, try charging in a well-lit area or use your phone flashlight to get a better view.
What If There’s No Light at All?
If you plug in the charger and see no light—red, green, or otherwise—it could mean:
– The charger isn’t plugged into the wall properly
– The outlet has no power
– The charger is damaged
– The scooter’s charging port is dirty or blocked
Start by checking the wall outlet with another device (like a lamp or phone charger). If that works, inspect the charger cable for fraying or bends. If everything looks fine but there’s still no light, your charger might be faulty and need replacement.
Step 2: Listen for Charging Sounds
While not all Gotrax models make noise when charging, some do—and these sounds can be a helpful clue.
Common Charging Sounds
– Soft Click or Hum: When you plug in the charger, you might hear a gentle click or a low hum from the charger brick. This usually means the charger has successfully connected and is delivering power.
– Silence: If you don’t hear anything, it doesn’t necessarily mean it’s not charging. Many chargers operate quietly, especially once the battery reaches a certain level.
However, if you used to hear a sound and now you don’t—even though the light is on—it could indicate a change in the charger’s performance. Keep an ear out for consistency.
When Sounds Might Be a Warning
Unusual sounds like buzzing, crackling, or sizzling are red flags. These could indicate:
– Electrical arcing inside the charger
– Overheating
– Water damage
– A short circuit
If you hear any of these, unplug the charger immediately and inspect it for damage. Never ignore strange noises—they could pose a fire risk.
Step 3: Check the Charging Time
Another way to tell if your Gotrax is charging is by tracking how long it takes to reach full power.
Average Charging Times by Model
Gotrax scooters typically take between 4 and 6 hours to charge from 0% to 100%. Here’s a quick breakdown:
– Gotrax G2: ~4–5 hours
– Gotrax GXL V2: ~5–6 hours
– Gotrax G4: ~6 hours
– Gotrax XR: ~5–6 hours
If your scooter is taking significantly longer—say, 8 or 9 hours—it might not be charging efficiently. This could be due to:
– A weak or damaged charger
– A aging battery that holds less charge
– Extreme temperatures (cold weather slows charging)
On the flip side, if your scooter seems to charge in under 2 hours, that’s also unusual. It could mean the battery isn’t holding a full charge anymore and needs replacement.
Use a Timer or Alarm
To avoid overcharging (which can degrade the battery over time), set a timer when you plug in your scooter. Most Gotrax chargers are designed to stop charging once the battery is full, but it’s still smart to unplug after 6 hours.
Pro tip: Charge your scooter in a cool, dry place. Avoid leaving it in direct sunlight or in a hot car—heat is the enemy of lithium-ion batteries.
Step 4: Use the Gotrax App (For Compatible Models)
If you own a newer Gotrax model like the G4 or GXL V2, you might have access to the official Gotrax app. This app connects to your scooter via Bluetooth and gives you real-time data—including charging status.
How to Use the App to Monitor Charging
1. Download the “Gotrax” app from the App Store (iOS) or Google Play (Android).
2. Turn on your scooter and enable Bluetooth on your phone.
3. Open the app and follow the pairing instructions.
4. Once connected, you’ll see the battery percentage, charging status, and estimated time to full charge.
If the app shows “Charging” and the percentage is increasing, you’re all set. If it says “Not Charging” or the percentage stays the same, there’s likely an issue with the connection or charger.
App Not Working? Try This
– Make sure your scooter is within 10 feet of your phone.
– Restart the app and your scooter.
– Check for app updates.
– If the problem persists, your scooter might not be compatible or the Bluetooth module could be faulty.
Note: Not all Gotrax models support the app. Check your user manual or the Gotrax website to confirm compatibility.
Step 5: Inspect the Charger and Charging Port
Even if the light is on and the app says it’s charging, a faulty connection could mean your scooter isn’t actually getting power.
Check the Charger Cable
Look closely at the charger cable for:
– Fraying or exposed wires
– Kinks or bends near the connectors
– Burn marks or discoloration
A damaged cable can prevent proper charging or even be a safety hazard. If you spot any issues, stop using the charger and contact Gotrax support for a replacement.
Clean the Charging Port
Dirt, dust, and debris can build up in the charging port on your scooter, blocking the connection. Use a dry toothbrush or compressed air to gently clean it out. Never use water or liquid cleaners—this can cause short circuits.
Pro tip: Store your scooter in a dry place and consider using a port cover (if available) to prevent dust buildup.
Ensure a Secure Connection
When you plug in the charger, make sure it’s fully inserted into the port. A loose connection can cause intermittent charging or no charging at all. You should feel a slight click when it’s properly seated.
If the charger keeps falling out, the port might be worn. In that case, contact Gotrax for repair options.
Step 6: Test the Battery After Charging
The ultimate test of whether your Gotrax charged properly is how it performs when you turn it on.
What to Look For
After charging for the recommended time:
– Turn on the scooter.
– Check the battery indicator on the display (usually shown as bars or a percentage).
– A fully charged scooter should show 4–5 bars or 100%.
– It should power on instantly without hesitation.
If the battery shows only 1–2 bars or dies quickly after turning on, it likely didn’t charge fully. This could be due to:
– A faulty charger
– A degraded battery
– A software glitch
Try charging again with a different outlet or charger. If the problem continues, it’s time to contact customer support.
Perform a Range Test
For extra peace of mind, take your scooter for a short test ride after charging. A healthy battery should give you the expected range (e.g., 12–19 miles depending on the model). If it dies much sooner, the battery may need replacement.
Troubleshooting Common Charging Issues
Even with all the right steps, charging problems can happen. Here’s how to fix the most common ones.
Issue 1: Charger Light Is Off
Possible causes:
– Dead outlet
– Faulty charger
– Blown fuse in the charger
Solution: Test the outlet with another device. If it works, try a different charger (if available). If the light still doesn’t turn on, the charger may need replacement.
Issue 2: Light Turns Green Too Fast
If the light switches to green in under 2 hours, the battery might not be holding a full charge. This is common in older scooters.
Solution: Monitor the battery during a ride. If it drains quickly, consider replacing the battery. Gotrax offers replacement batteries for most models.
Issue 3: Scooter Won’t Turn On After Charging
This could mean:
– The battery is completely dead
– There’s a software glitch
– The power button is faulty
Solution: Try a hard reset: unplug the charger, hold the power button for 10 seconds, then plug it back in and turn it on. If that doesn’t work, contact support.
Issue 4: Charger Gets Very Hot
Some warmth is normal, but if the charger is too hot to touch, it could be overheating.
Solution: Unplug it immediately. Let it cool down, then inspect for damage. Avoid charging in hot environments or on flammable surfaces.
Tips to Keep Your Gotrax Charging Smoothly
Prevention is key. Follow these best practices to avoid charging issues:
– Use only Gotrax-approved chargers. Third-party chargers may not deliver the correct voltage and can damage your battery.
– Charge regularly. Don’t let the battery drop to 0% too often. Aim to charge when it hits 20–30%.
– Store in a cool, dry place. Extreme temperatures reduce battery life.
– Clean the charging port monthly. Use a dry brush or compressed air.
– Update the app and firmware. Gotrax occasionally releases updates that improve charging performance.
Conclusion
Knowing how to tell if your Gotrax is charging doesn’t have to be complicated. By paying attention to the LED light, listening for sounds, tracking charging time, using the app (if available), and inspecting your equipment, you can ensure your scooter is always ready to ride.
Remember: a red light means it’s charging, green means it’s full, and no light means trouble. Keep your charger and port clean, avoid extreme temperatures, and don’t ignore warning signs like overheating or strange noises.
With these tips, you’ll extend the life of your battery, avoid frustrating dead scooters, and enjoy every ride with confidence. Now go plug in, power up, and hit the road!