
Adjusting the front brake on your Gotrax GXL is essential for safe and responsive riding. This guide walks you through every step, from checking brake pad wear to fine-tuning cable tension, so you can maintain optimal stopping power with confidence.
Key Takeaways
- Regular brake maintenance improves safety and performance: Properly adjusted brakes ensure quick, reliable stops, especially at higher speeds or on inclines.
- Check brake pad alignment and wear first: Misaligned or worn pads reduce braking efficiency and can damage the rim over time.
- Adjust cable tension using the barrel adjuster: This quick fix can restore responsiveness without tools, ideal for minor slack.
- Use Allen keys for precise caliper and cable adjustments: A 5mm and 6mm Allen wrench are essential for loosening bolts and repositioning components.
- Test brakes in a safe area after adjustment: Always verify performance before riding in traffic or on busy paths.
- Lubricate moving parts sparingly: Apply light lubricant to pivot points only—avoid contaminating brake pads or rims.
- Know when to replace parts: If pads are thinner than 1mm or cables frayed, replacement is safer than adjustment.
How to Adjust Front Brake on a Gotrax GXL
Riding your Gotrax GXL electric scooter should be smooth, fun, and—most importantly—safe. One of the most critical components ensuring your safety is the front brake. Over time, due to regular use, weather exposure, or vibrations from the road, the front brake on your Gotrax GXL may become less responsive. You might notice it takes longer to stop, the brake lever feels spongy, or the scooter pulls to one side when braking. These are all signs that your front brake needs adjustment.
The good news? Adjusting the front brake on a Gotrax GXL is a straightforward process that you can do at home with just a few basic tools. You don’t need to be a mechanic or spend money at a repair shop. With a little patience and the right steps, you can restore your scooter’s braking performance and ride with confidence.
In this comprehensive guide, we’ll walk you through every step of adjusting the front brake on your Gotrax GXL. We’ll cover everything from inspecting the brake components to fine-tuning the cable tension and testing your work. Whether you’re a beginner or have some experience with scooter maintenance, this guide is designed to be easy to follow, practical, and safe.
By the end of this article, you’ll know exactly how to adjust your front brake, troubleshoot common issues, and keep your Gotrax GXL in top condition. Let’s get started!
Why Brake Adjustment Matters
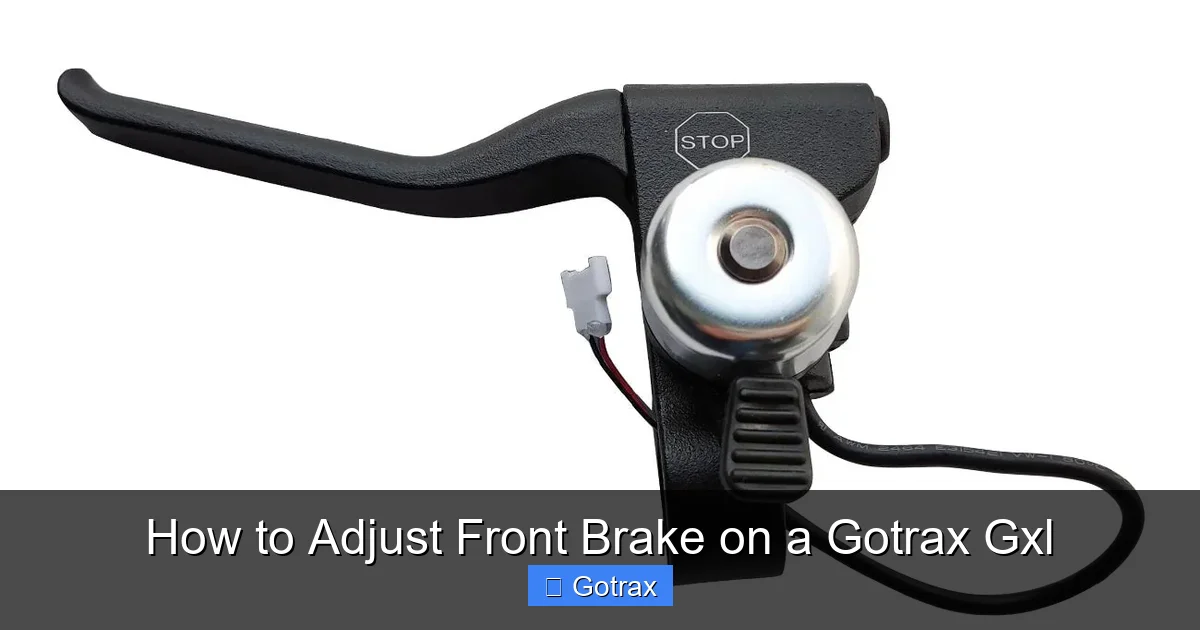
Visual guide about How to Adjust Front Brake on a Gotrax Gxl
Image source: gotrax.com
Before diving into the how-to, it’s important to understand why adjusting your front brake is so crucial. The front brake on your Gotrax GXL handles the majority of the stopping power—up to 70% in many cases. This is because when you brake, your weight shifts forward, increasing the traction on the front wheel. A properly functioning front brake allows you to stop quickly and safely, especially in emergencies.
If your brake is too loose, it won’t engage effectively, increasing your stopping distance. If it’s too tight, the brake may drag, causing wear on the pads and reducing your scooter’s range. Worse, a misaligned brake can cause uneven wear, noise, or even loss of control.
Regular maintenance, including brake adjustment, helps prevent these issues. It also extends the life of your brake components, saving you money in the long run. Think of it like changing the oil in a car—it’s a small task that makes a big difference in performance and safety.
Tools and Materials You’ll Need
Before you begin, gather the following tools and materials. Most are common household items or inexpensive purchases:
- 5mm Allen wrench: Used to loosen and tighten the brake caliper bolts.
- 6mm Allen wrench: For adjusting the brake cable anchor bolt.
- Phillips or flathead screwdriver: Helpful for minor adjustments or prying components.
- Clean rag: For wiping down parts and removing dirt or grease.
- Light lubricant (optional): Such as silicone spray or bike-specific lubricant for pivot points.
- Flashlight: To inspect hard-to-see areas like the brake pads and rim.
- Workstand or stable surface: To elevate the scooter so the front wheel spins freely.
Having these tools ready will make the process smoother and faster. If you don’t have an Allen wrench set, they’re widely available at hardware stores or online for under $10.
Step 1: Prepare Your Scooter
Safety first! Before making any adjustments, ensure your Gotrax GXL is powered off and placed on a stable, flat surface. If possible, use a scooter stand or prop the rear wheel up with a block so the front wheel can spin freely. This makes it easier to test the brake and check for rubbing.
Next, inspect the overall condition of the scooter. Look for any loose bolts, damaged cables, or signs of wear. If you notice anything unusual—like frayed wires or cracks in the frame—address those issues first or consult a professional.
Check the Brake Lever Feel
Sit on the scooter or hold it steady and squeeze the front brake lever. Pay attention to how it feels:
- Too loose: The lever travels too far before engaging the brake. This indicates slack in the cable.
- Too tight: The brake engages immediately or drags when released. This means the pads are too close to the rim.
- Spongy or soft: The lever feels mushy, suggesting air in the system (though the GXL uses mechanical brakes, so this is less common).
This quick test will help you determine what kind of adjustment is needed.
Step 2: Inspect the Brake Pads
The brake pads are the rubber or composite blocks that press against the wheel rim to slow you down. Over time, they wear down and may become misaligned. Inspecting them is a critical first step.
Locate the Brake Pads
On the Gotrax GXL, the front brake uses a V-brake system with two arms mounted on either side of the front wheel. At the end of each arm is a brake pad that contacts the rim when the lever is squeezed.
Check for Wear
Look at the thickness of the brake pads. If they’re worn down to less than 1mm, or if you can see the metal backing, it’s time to replace them. Worn pads reduce braking power and can damage the rim.
Also, check for uneven wear. If one pad is more worn than the other, it may be misaligned. This can cause the scooter to pull to one side when braking.
Clean the Pads and Rim
Dirt, oil, or debris on the brake pads or rim can reduce friction and cause squeaking. Use a clean rag to wipe both surfaces. If there’s grease or oil, use a mild degreaser or rubbing alcohol to clean them thoroughly. Never use heavy lubricants on brake components—this can make them slippery and dangerous.
Step 3: Adjust Brake Pad Alignment
Proper alignment ensures both pads contact the rim evenly and at the correct angle. Misaligned pads can cause noise, reduced braking, or uneven wear.
Loosen the Pad Bolts
Use the 5mm Allen wrench to slightly loosen the bolts that hold the brake pads in place. Don’t remove them completely—just enough to allow the pads to move.
Position the Pads
Squeeze the brake lever to bring the pads close to the rim. Observe how they make contact:
- The pad should hit the flat part of the rim, not the tire or the edge.
- Both pads should contact the rim at the same time.
- The pad should be angled so the front edge contacts slightly before the back (this helps prevent squealing).
Adjust the position of each pad as needed. You may need to twist or tilt them slightly.
Tighten the Bolts
Once the pads are properly aligned, tighten the bolts securely. Be careful not to overtighten, as this can strip the threads or damage the pad.
Step 4: Adjust Cable Tension
Cable tension determines how much the brake lever moves before the pads engage. If the cable is too loose, the brake won’t respond quickly. If it’s too tight, the brake may drag.
Use the Barrel Adjuster
The Gotrax GXL has a barrel adjuster located where the brake cable enters the brake lever. This is the easiest way to make small tension adjustments.
Turn the barrel adjuster counterclockwise to increase tension (tighten the cable) or clockwise to decrease tension (loosen the cable). Make small turns—about a quarter-turn at a time—and test the lever after each adjustment.
Fine-Tune with the Anchor Bolt
If the barrel adjuster isn’t enough, you’ll need to adjust the cable at the brake caliper.
Loosen the Anchor Bolt
Use the 6mm Allen wrench to loosen the bolt that clamps the brake cable to the caliper arm. This bolt is usually on the side of the brake arm.
Pull the Cable Taut
Gently pull the cable to remove slack. You want the brake pads to be close to the rim—about 1–2mm away when the lever is released. Don’t pull too hard, or the brake will drag.
Retighten the Bolt
Hold the cable in place and tighten the anchor bolt securely. Make sure the cable doesn’t slip when you release it.
Step 5: Center the Brake Caliper
If one brake pad is closer to the rim than the other, the caliper may be off-center. This can cause uneven wear and reduced performance.
Check Pad Clearance
Spin the front wheel and observe the gap between each pad and the rim. They should be equal on both sides.
Adjust the Caliper Position
Loosen the two bolts that mount the caliper to the fork (usually 5mm Allen bolts). Gently shift the entire caliper left or right until the pads are evenly spaced from the rim.
Once centered, tighten the bolts securely. Be careful not to overtighten, as this can damage the fork or caliper.
Step 6: Test and Fine-Tune
After making adjustments, it’s time to test your work.
Spin the Wheel
Lift the front wheel off the ground and spin it. It should rotate freely without the brake pads rubbing. If you hear a scraping sound, the pads are too close—loosen the cable slightly.
Squeeze the Brake Lever
Squeeze the lever several times. It should feel firm and responsive. The pads should contact the rim evenly, and the wheel should stop quickly.
Test Ride in a Safe Area
Take your scooter for a short test ride in a quiet, safe area—like an empty parking lot. Start at low speed and gradually increase. Test the brake at different speeds to ensure it stops smoothly and predictably.
If the brake feels too soft or too hard, return to the adjustment steps and fine-tune as needed.
Troubleshooting Common Issues
Even with careful adjustment, you might encounter problems. Here are some common issues and how to fix them:
Brake Squeaks or Squeals
This is usually caused by dirty pads, misaligned pads, or glazed (hardened) pad surfaces.
- Clean the pads and rim with rubbing alcohol.
- Realign the pads so they hit the rim at the correct angle.
- If the pads are glazed, lightly sand them with fine-grit sandpaper to restore grip.
Brake Drags or Doesn’t Release
This means the pads are too close to the rim or the cable is too tight.
- Loosen the cable using the barrel adjuster or anchor bolt.
- Check that the caliper springs are returning the arms properly. If not, clean and lubricate the pivot points.
Brake Feels Spongy or Weak
This could be due to excessive cable stretch, worn pads, or a loose connection.
- Check for frayed or kinked cables—replace if damaged.
- Ensure all bolts are tight.
- Replace worn brake pads.
Scooter Pulls to One Side When Braking
This indicates uneven pad contact or misaligned caliper.
- Realign the brake pads so both contact the rim simultaneously.
- Center the caliper as described earlier.
When to Replace Brake Components
Adjustment can only do so much. If your brake still doesn’t perform well after tuning, it may be time to replace parts.
Brake Pads
Replace pads when:
- They’re thinner than 1mm.
- The grooves are worn away.
- They’re cracked, hardened, or contaminated with oil.
Brake Cable
Replace the cable if:
- It’s frayed, kinked, or rusted.
- It doesn’t move smoothly through the housing.
- Adjustments no longer improve lever feel.
Brake Housing
If the cable housing is cracked or collapsed, it can restrict cable movement. Replace it along with the cable for best results.
Maintenance Tips for Long-Term Performance
To keep your front brake in top shape, follow these maintenance tips:
- Inspect monthly: Check pad wear, cable condition, and alignment every few weeks.
- Clean regularly: Wipe down the rim and pads after riding in wet or dirty conditions.
- Lubricate pivot points: Apply a drop of light lubricant to the caliper pivot bolts every few months.
- Avoid wet brakes: If you ride in the rain, dry the brakes by gently squeezing them after riding.
- Store properly: Keep your scooter in a dry place to prevent rust and corrosion.
Conclusion
Adjusting the front brake on your Gotrax GXL is a simple but essential maintenance task that enhances safety, performance, and longevity. By following the steps in this guide—inspecting pads, aligning components, adjusting cable tension, and testing your work—you can ensure your scooter stops reliably every time.
Remember, regular maintenance prevents bigger problems down the road. A few minutes of adjustment now can save you from costly repairs or accidents later. With the right tools and a little patience, you’ve got everything you need to keep your Gotrax GXL riding smoothly and safely.
So grab your Allen wrenches, give your brake a tune-up, and enjoy the confidence that comes with knowing your scooter is in great shape. Happy riding!