
It is incredibly frustrating. Your little driver is buckled up, excited to cruise the driveway, and they press down on the pedal. Instead of zooming off, all you hear is a repetitive “click, click, click” from under the seat, and the car doesn’t move an inch.
As a parent, your first thought is likely, “Great, the motor is completely blown, and this expensive toy is ruined.” Take a deep breath. I can reassure you right now: that clicking sound rarely means the car is destroyed. In fact, it is one of the most common issues with 12V and 24V kids’ electric vehicles. It usually sounds much worse than it actually is, pointing to a simple electrical hiccup rather than a total mechanical failure.
By the end of this quick troubleshooting guide, you will understand exactly what that clicking sound means, the five most common culprits behind it, and exactly how you can fix it yourself at home—without having to pay a repair shop or order a completely new ride-on.
Let’s get your little driver out of the Garage and back on the road!
When that repetitive clicking noise starts up, it is easy to assume the absolute worst—that the internal gears of the motor are completely stripped and grinding against each other.
But what you are actually hearing is the Control Board (sometimes called the motherboard or speed controller).
What Does the Clicking Sound Actually Mean?
Here is exactly what is happening beneath the seat of your child’s car:
The Control Board & The Relays
Think of the control board as the “brain” of the electric vehicle. Its entire job is to take the signal from the foot pedal and safely distribute the heavy electrical current from the battery to the rear motors.
Inside that plastic control board are several small electrical switches called relays. When your child presses the gas pedal, the board tells these relays to snap shut, completing the electrical circuit so the car can drive forward.
That mechanical “snap” of the relay closing is the exact clicking noise you are hearing.
So, Why Won’t It Move?
If you hear the click, it actually tells you two very important pieces of good news:
- The Foot Pedal Works: The pedal is successfully sending the signal to the “brain.”
- The Control Board is Trying: The board is receiving the signal and attempting to engage the motors by snapping those relays shut.
The problem is that even though the gate is opening, the necessary power isn’t making it to the wheels. This means the heavy electrical current is either completely insufficient (usually a bad battery) or it is being physically blocked somewhere between the battery, the board, and the motors.
Top 5 Reasons Your Ride-On Car is Clicking (and How to Fix Them)
Now that we know the brain is trying to do its job, let’s go through the top 5 reasons the power is failing and how to test them.
Reason 1: A Weak or “Dead” 12V Battery (The #1 Culprit)
By far, the most common reason a ride-on car clicks but refuses to move is a failing battery.
You might be thinking, “But the radio and headlights still turn on!” That is completely normal. Lights and small speakers draw very little power. However, the rear motors require a massive surge of amperage to push a 40-pound child across the grass. If the battery is weak, it can power the radio, but the moment the control board tries to pull heavy power for the motors, the battery fails. The board clicks, but nothing happens.
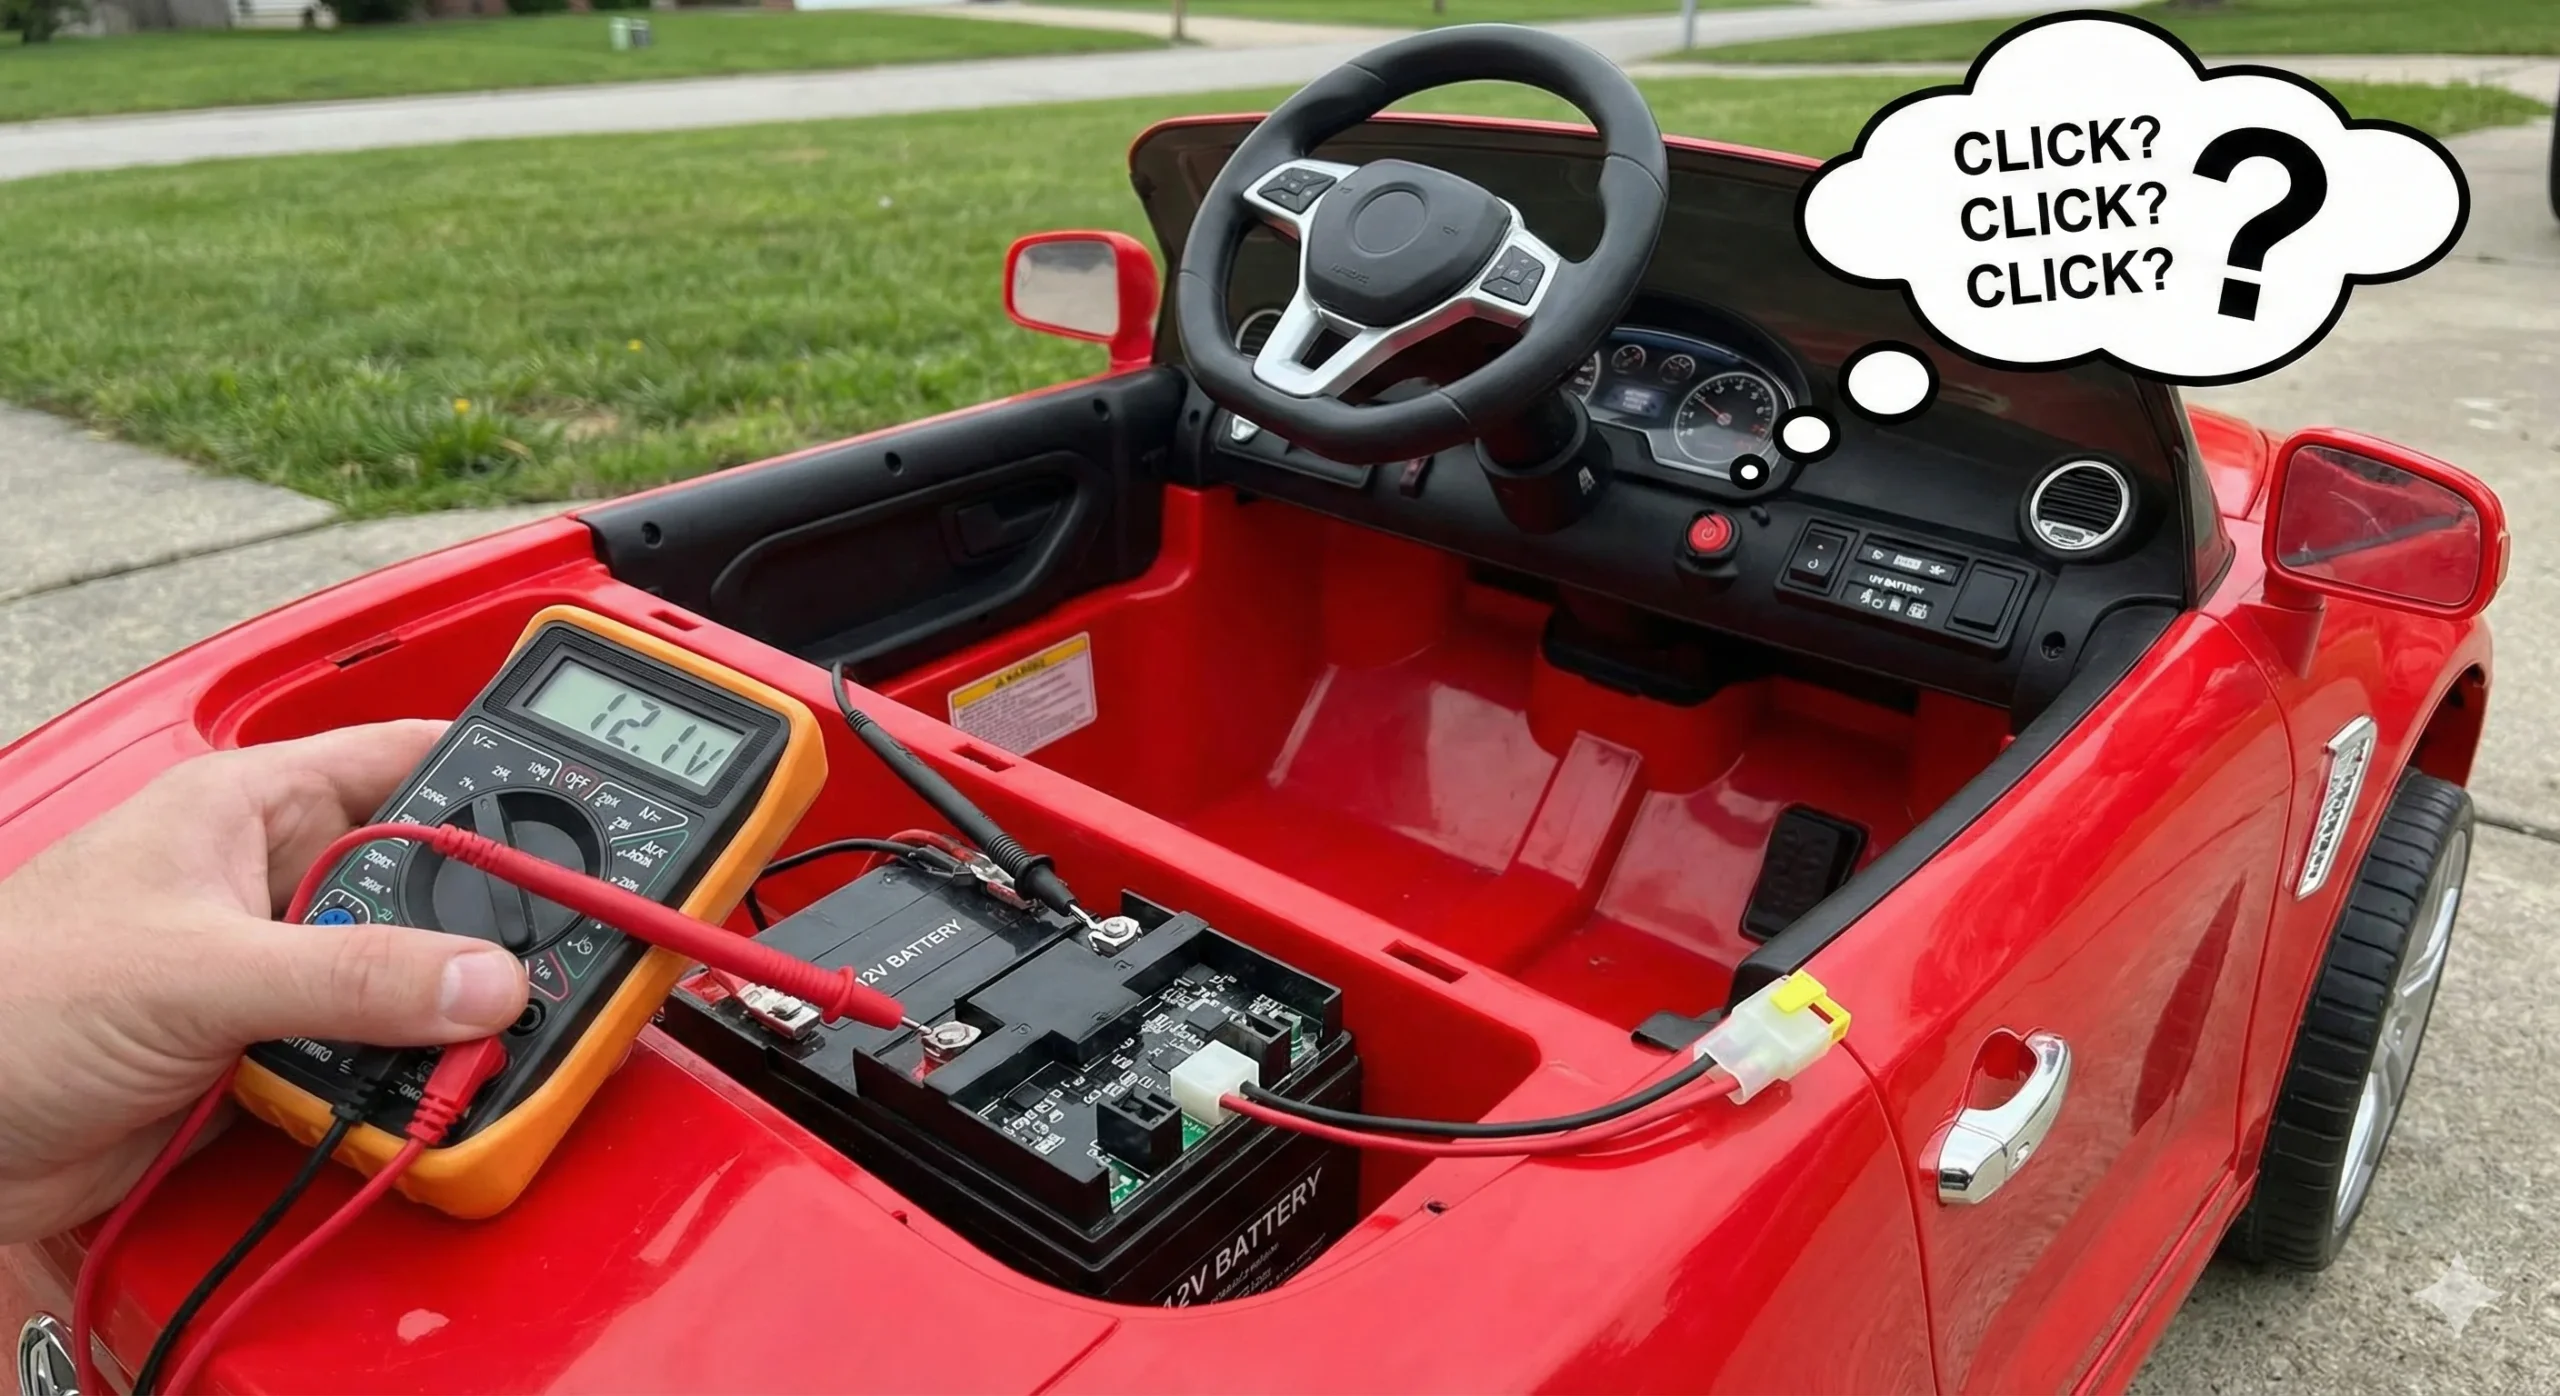
How to Test It: Do not guess—test it. You will need a basic digital multimeter.
- Set your multimeter to DC Voltage (usually indicated by a “V” with a solid and dashed line above it) and turn the dial to 20.
- Touch the red probe to the positive (+) terminal and the black probe to the negative (-) terminal.
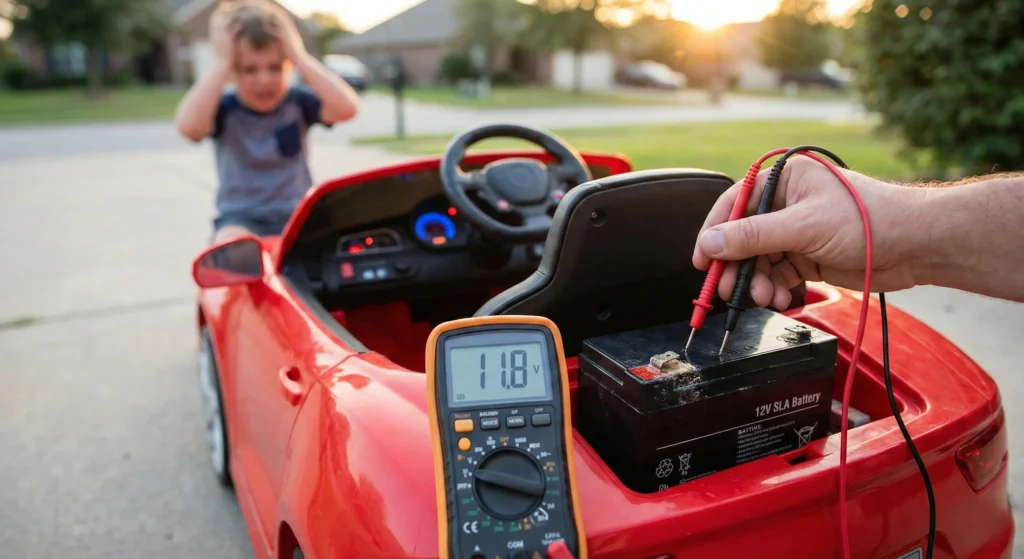
- The Results: A healthy, fully charged 12V battery should read between 12.6V and 12.8V. If your battery is reading around 12.4V, it is weak. If it is reading under 12.0V, it is essentially dead and cannot hold the charge required to drive the motors.
The Fix: If your battery is testing low even after a full night on the charger, it is time for a replacement. Standard SLA (Sealed Lead Acid) toy batteries generally only last 1 to 3 years before they stop holding a charge.
- Digital Multimeter Selection Guide: “Grab a reliable digital multimeter here if you don’t have one in your toolbox.”
- 12V Battery Replacement Guide: “Shop the Best Universal 12V Replacement Batteries on Amazon (Make sure to check your connector type!).”
Reason 2: Loose or Corroded Wiring Connections
Kids do not drive these cars gently. They bounce over curbs, smash into tree roots, and vibrate across gravel driveways. All of that intense shaking can easily rattle the push-fit wire connectors loose.
If a wire connecting the battery to the control board, or the board to the motors, is loose, the electrical circuit is broken. The board will click when you press the pedal, but the power hits a dead end.
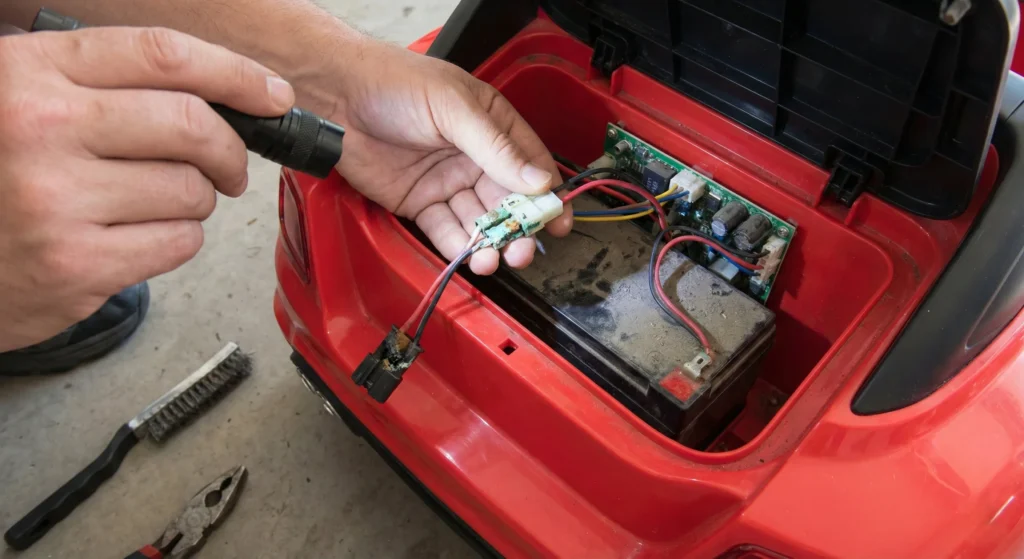
How to Test It: You are going to do a quick visual inspection of the wiring harness. Follow the thick wires from the battery down to the control board, and then follow the wires from the board to the rear wheels.
- Push-Fit Connectors: Firmly press every plastic connector together to make sure none have vibrated loose.
- Corrosion: Look closely at the metal spade terminals. Do you see any crusty green or white buildup? That corrosion acts as a barrier and blocks the electrical current.
- Burnt Wires: Look for any blackened or melted plastic around the connectors, which indicates the wires got too hot and shorted out.
The Fix: If you find a loose connection, simply push it back together tightly. If you see green corrosion, use a wire brush or some sandpaper to scrape the metal contacts clean so the electricity can flow freely again. If a wire is burnt or melted, you will need to splice in a new wire or replace that section of the harness.
- Corroded Connector Fix Guide: “If your connectors are badly corroded, it is safest to replace them. You can pick up a cheap set of insulated wire crimp connectors here.”
Reason 3: A Faulty Control Board (Motherboard)
If your battery is fully charged (reading over 12.6V) and your wires are perfectly tight, the issue likely lies within the control board itself.
Remember those relays we talked about earlier? The relays are mechanical switches inside the board. Over time, the internal metal contacts inside those relays can become pitted, burned, or coated in carbon from the electrical sparking. When your child presses the pedal, the relay still physically snaps shut (creating the clicking sound), but the burnt contacts prevent the electricity from actually passing through to the motors.
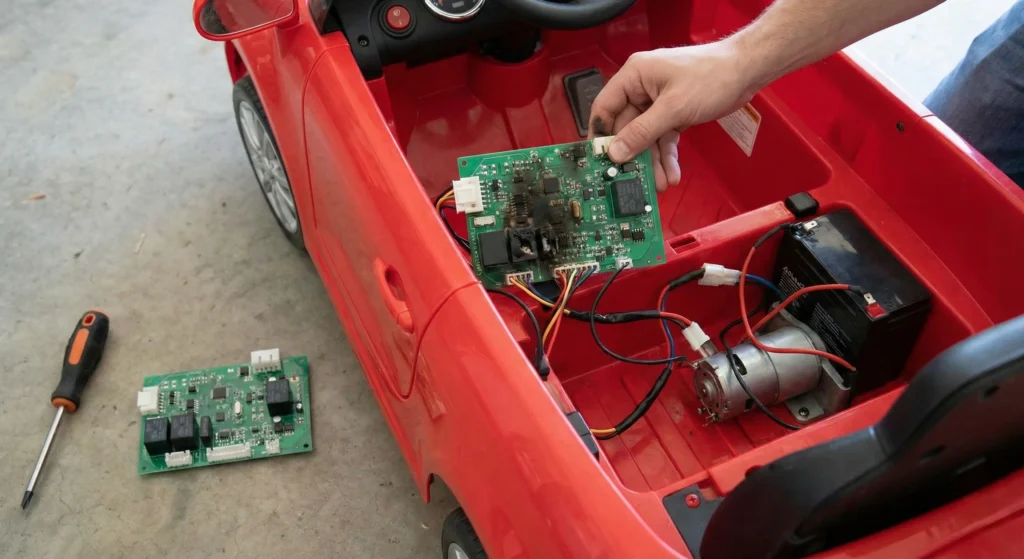
How to Test It: You can test this by bypassing the board. Unplug the wires that run directly to the rear motors. Using a piece of spare wire, touch the motor wires directly to your 12V battery. If the wheels suddenly spin to life, your motors are fine, and your control board is the bottleneck.
The Fix: You will need to replace the control board. Fortunately, these are inexpensive and “plug-and-play.” You simply unplug the plastic harnesses from the old board and plug them right into the new one.
- Universal 12V Weelye Control Board Purchase Guide: “Shop Universal 12V Weelye Control Boards on Amazon. (Pro-Tip: Make sure the model number on your new board matches the sticker on your old one, such as RX18 or RX23!).”
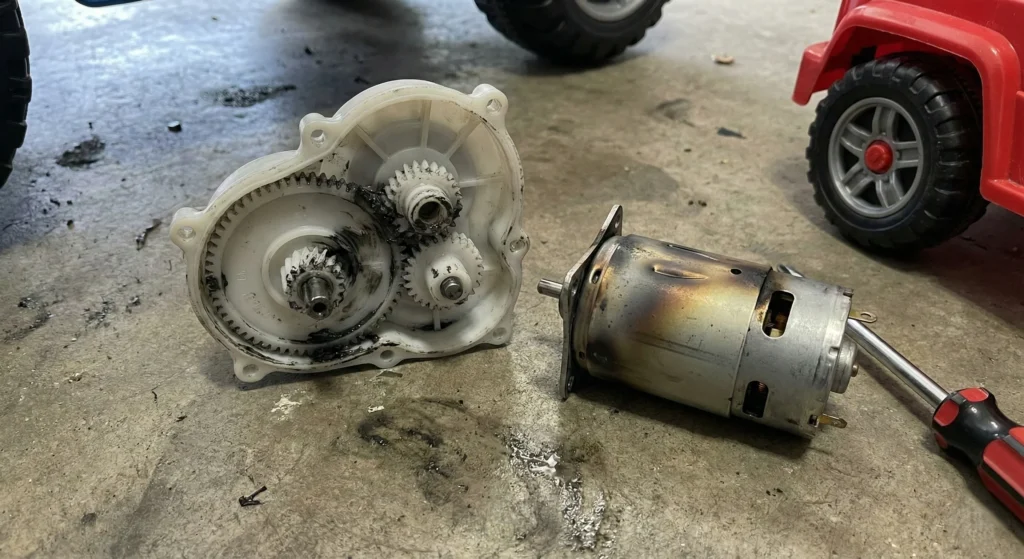
Reason 4: Burned Out Motors or Stripped Gearboxes
Electric motors are tough, but they have their limits. If your child has been driving their 12V car through thick mud, up steep hills, or carrying a friend who pushes the car over its weight limit, the motors have to work overtime.
This creates massive heat. Eventually, the motors will burn out, or the plastic gears inside the gearbox will melt and strip. When you press the pedal, the board clicks and sends the power, but the dead motors cannot spin.
How to Test It: Get close to the rear wheels and use your senses.
- Smell: Do you smell an acrid, burnt plastic, or “fishy” electrical odor near the wheels? That is a fried motor.
- Listen: Lift the back of the car and manually spin the rear wheels with your hands. If you hear a harsh grinding, crunching, or clunking noise, the internal gears are stripped.
The Fix: Replacing a single gear inside a gearbox is incredibly tedious. The industry standard is to simply replace the entire motor and gearbox assembly as one piece.
- 12V 550 Motor Gearbox Purchase Guide: “Grab a set of Replacement 12V 550 Motor Gearboxes here. Be sure to check your current motor to see if it is a 10,000 RPM or 30,000 RPM version so you match the speed!”
Reason 5: A Tripped or Weak Thermal Fuse
Many ride-on vehicles have a built-in safety mechanism called a thermal fuse or a self-resetting breaker. This is usually a small black box located on the wire between the battery and the control board.
If the motors draw too much power (like when the car is stuck against a fence but the child keeps holding the pedal down), the fuse gets hot and trips to prevent a fire. Usually, these automatically reset after a few minutes of cooling down. However, over time, these breakers can become “weak.” The moment the control board clicks to pull power, the weak fuse instantly trips and cuts the current.
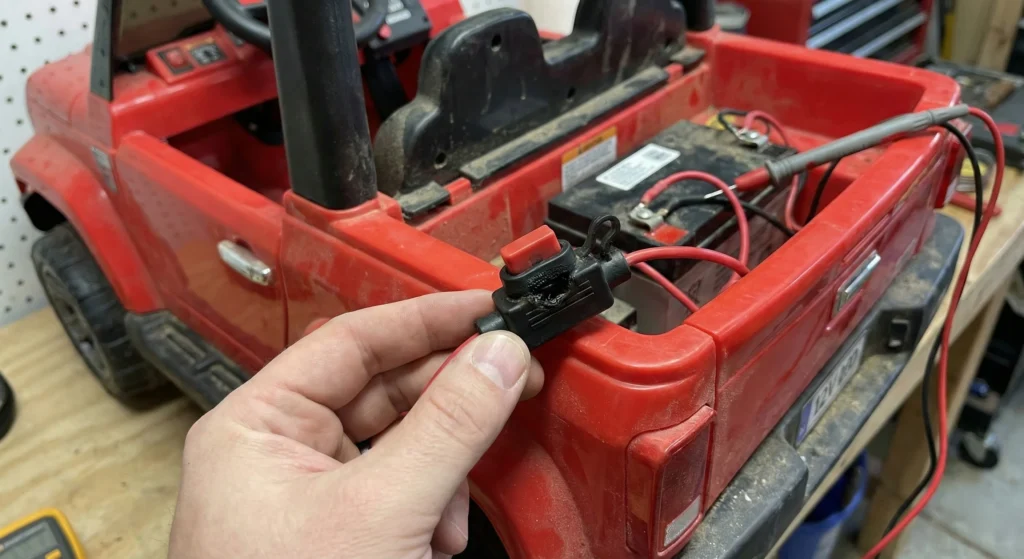
The Fix: If your fuse is a standard automotive blade fuse, pull it out and check if the metal horseshoe inside is broken. If it is a black auto-resetting box that looks melted or feels incredibly hot to the touch after just a few seconds of use, it needs to be swapped out.
- Buy 30-Amp Fuse Holder: “You can replace a faulty breaker with a standard 30-Amp Inline Blade Fuse Holder for a cheap, permanent fix.”
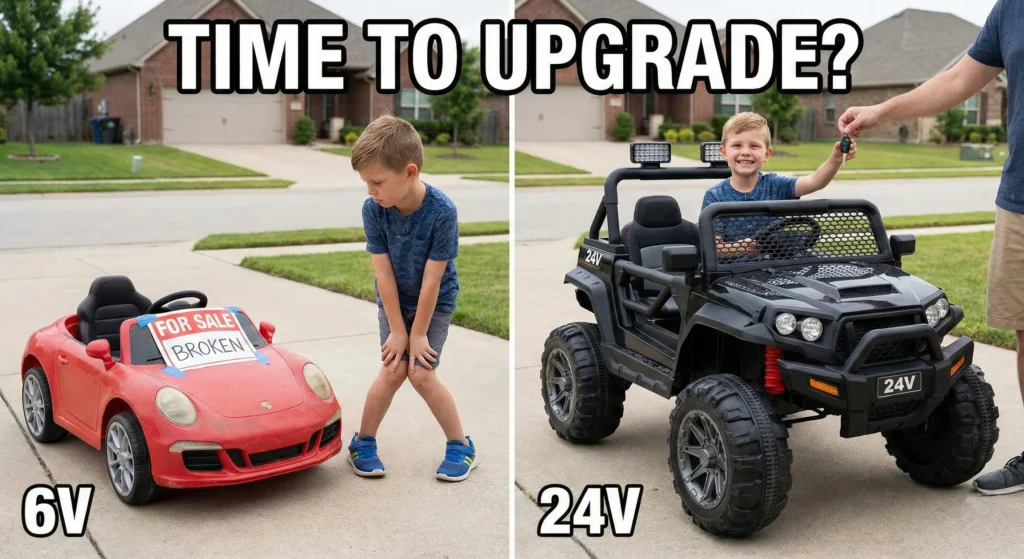
When Is It Time to Just Upgrade?
Sometimes, chasing down electrical gremlins just isn’t worth the time or the money. If your child’s 12V ride-on is several years old, you might find yourself needing a new battery, a new control board, and new motors all at once. By the time you add up the replacement parts, you are halfway to the cost of a brand-new vehicle.
Before you hit “checkout” on a cart full of repair parts, take a look at the driver.
12V ride-on cars are fantastic for ages 3 to 5, but they typically max out at a weight limit of around 50 to 60 lbs and a top speed of 3 to 4 mph. If your little driver is hitting their 6th birthday, starting to look a bit cramped in the seat, or constantly getting stuck in thick backyard grass, fixing that 12V car is only delaying the inevitable.
They have outgrown it. It is time to step up to a 24V system.
A 24V electric vehicle offers double the power, meaning it can easily carry heavier kids (often up to 100 lbs or more), hit speeds of up to 6 to 8 mph, and power through thick grass, dirt, and gravel without breaking a sweat.
- Best 24V Ride-On Truck Guide: “Ready to level up? Check out our guide to the Best 24V Ride-On Trucks for Older Kids (That Won’t Get Stuck in the Grass) to find the perfect heavy-duty upgrade.”
Frequently Asked Questions
(Pro-Tip: Use the FAQ Block in your Rank Math plugin to format these questions. This allows Google to read the schema and potentially display these exact Q&As right on the search results page!)
Why do the lights and radio work, but the ride-on car won’t drive? The lights, radio, and dashboard sounds require very little electrical voltage to operate. However, the rear motors require a massive surge of amperage to physically push the car forward. If your battery is failing, it will have enough surface charge to power the radio, but it will fail entirely (causing the control board to click) the moment you press the gas pedal.
Can I put a 24V battery in a 12V ride-on car to make it faster? No. You should never drop a 24V battery into a standard 12V ride-on car without a proper conversion kit. Doing so will instantly send too much power to the 12V control board and motors, which will fry the electronics, melt the gears, and potentially cause an electrical fire.
How long does a 12V ride-on car battery last before it needs replacing? With proper maintenance and regular charging, a standard SLA (Sealed Lead Acid) 12V toy battery will generally last between 1 to 3 years. If the car has been left sitting in a hot garage or a freezing shed all winter without being charged, the battery will likely die within a single season.